System Setup
3-8
Part 1604857-04
E 2014 Nordson Corporation
Feed Hopper and Wall/Rail Mount System Setup
This procedure applies to mobile systems, and wall or rail mount systems
supplied with powder from a feed hopper.
1. Unclamp the hopper lid and take out the vent hose and hose clamps.
Re-clamp the lid.
2. Unpack the pump, powder hose, air tubing, clamps, and Velcro straps
shipped with the system.
3. See Figure 3-4. Plug the following into the controller:
S 8-mm blue atomizing air tubing (4)
S 8-mm black flow-rate air tubing (6)
S 6-mm blue fluidizing air tubing (9)
4. See Figure 3-9. Route the atomizing air (4) and flow-rate tubing (6)
through the grommet (12) on the front panel of the cart tower.
5. Route the fluidizing air (9) tubing through the tower and out the bottom
front.
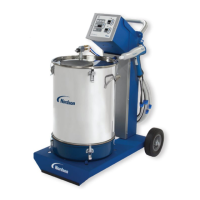
6. Mobile systems: Install the hopper on the cart platform, in between the
retainer tabs.
7. Install the pump (7) into the pump mount (5) with a slight twisting
motion. Connect the fluidizing and atomizing air tubing to the pump as
shown.
NOTE: Rail mount systems are shipped with a pump adapter kit and a
coupling for use with pickup tubes designed for other pumps. Refer to the
installation instructions on page 3-10.
8. Connect the 10-mm x 6-mm reducer (11) to the 10-mm elbow fitting on
the hopper fluidizing pan. Connect the fluidizing air tubing (9) to the
reducer.
9. Connect the ring-tong terminal on the green/yellow ground wire (10) to
the ground stud on the side of the fluidizing pan, then plug the ground
wire into the grounding socket on the cart base.
10. Install a hose clamp (8) over the end of the vent hose (1) and connect
the hose to the vent stack on the lid. Tighten the clamp to secure the
hose.
11. Connect the powder hose (2) to the pump and secure it with a hose
clamp (3).
NOTE: The pump is equipped with quick-connect couplings that allow you
to quickly disconnect the air tubing when cleaning or repairing the pump.
Pull back on the knurled coupling rings to uncouple them.

 Loading...


