43856301TH Rev.3
53 /
Oki Data CONFIDENTIAL
3. Set up
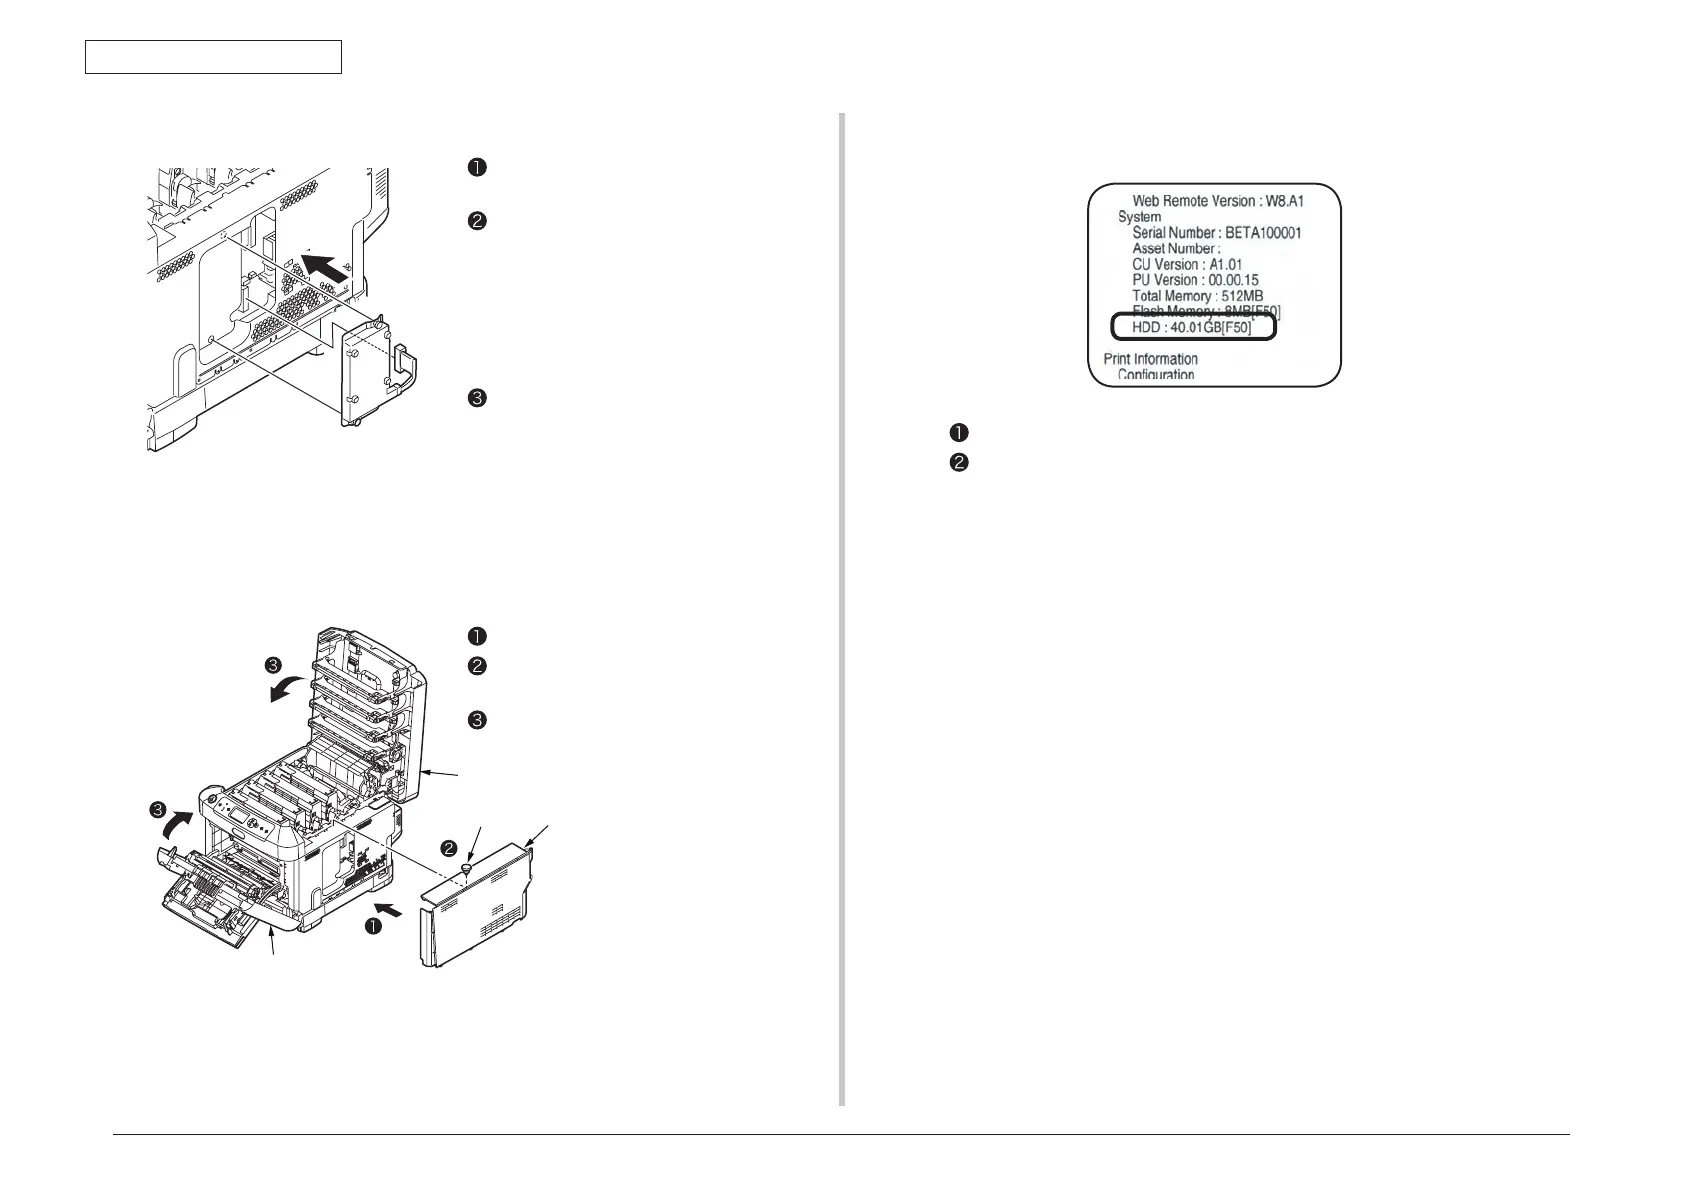
Insert the tab of the built-in hard disk
into the slot on the printer.
Fix the disk with screws (2 places).
(4)-4. Install the built-in hard disk.
Push the connector into the slot until a
slight click is heard.
(4)-6. Connect the power cord and printer cable to the printer, and turn the
power on.
Screw
Top cover
Front cover
Side cover
Install the side cover.
Fix the side cover with the screw.
(one place)
Close the top cover and front cover.
(4)-5. Install the side cover.
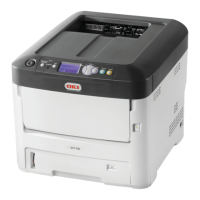
Print the setting content with following the procedure in chapter 3.6.
Confirm the built-in hard disk capacity displayed in [HDD].
Memo The
capacity of built-in hard disk might be different from the example of
the above figure.
Note! Please
reinstall the built-in hard disk when the capacity of HDD is not
displayed.
Note! Read
the manual of the hard disk when you install the built-in hard disk
for IC card authentication.
Note! Read the man
ual of the kit when you install data protection kit-A1.
And, the printer driver setup for recognizing the built-in hard disk is required.
If the printer driver is not set up, please set up the printer driver completely referring to
the user's manual (Setup) firstly, and then finish the following setting procedure.
(4)-7. Print the setting content and confirm if the built-in hard disk is installed
properly.