Page: 81
Service Guide ML520/521
Chapter 3 Maintenance & Disassembly
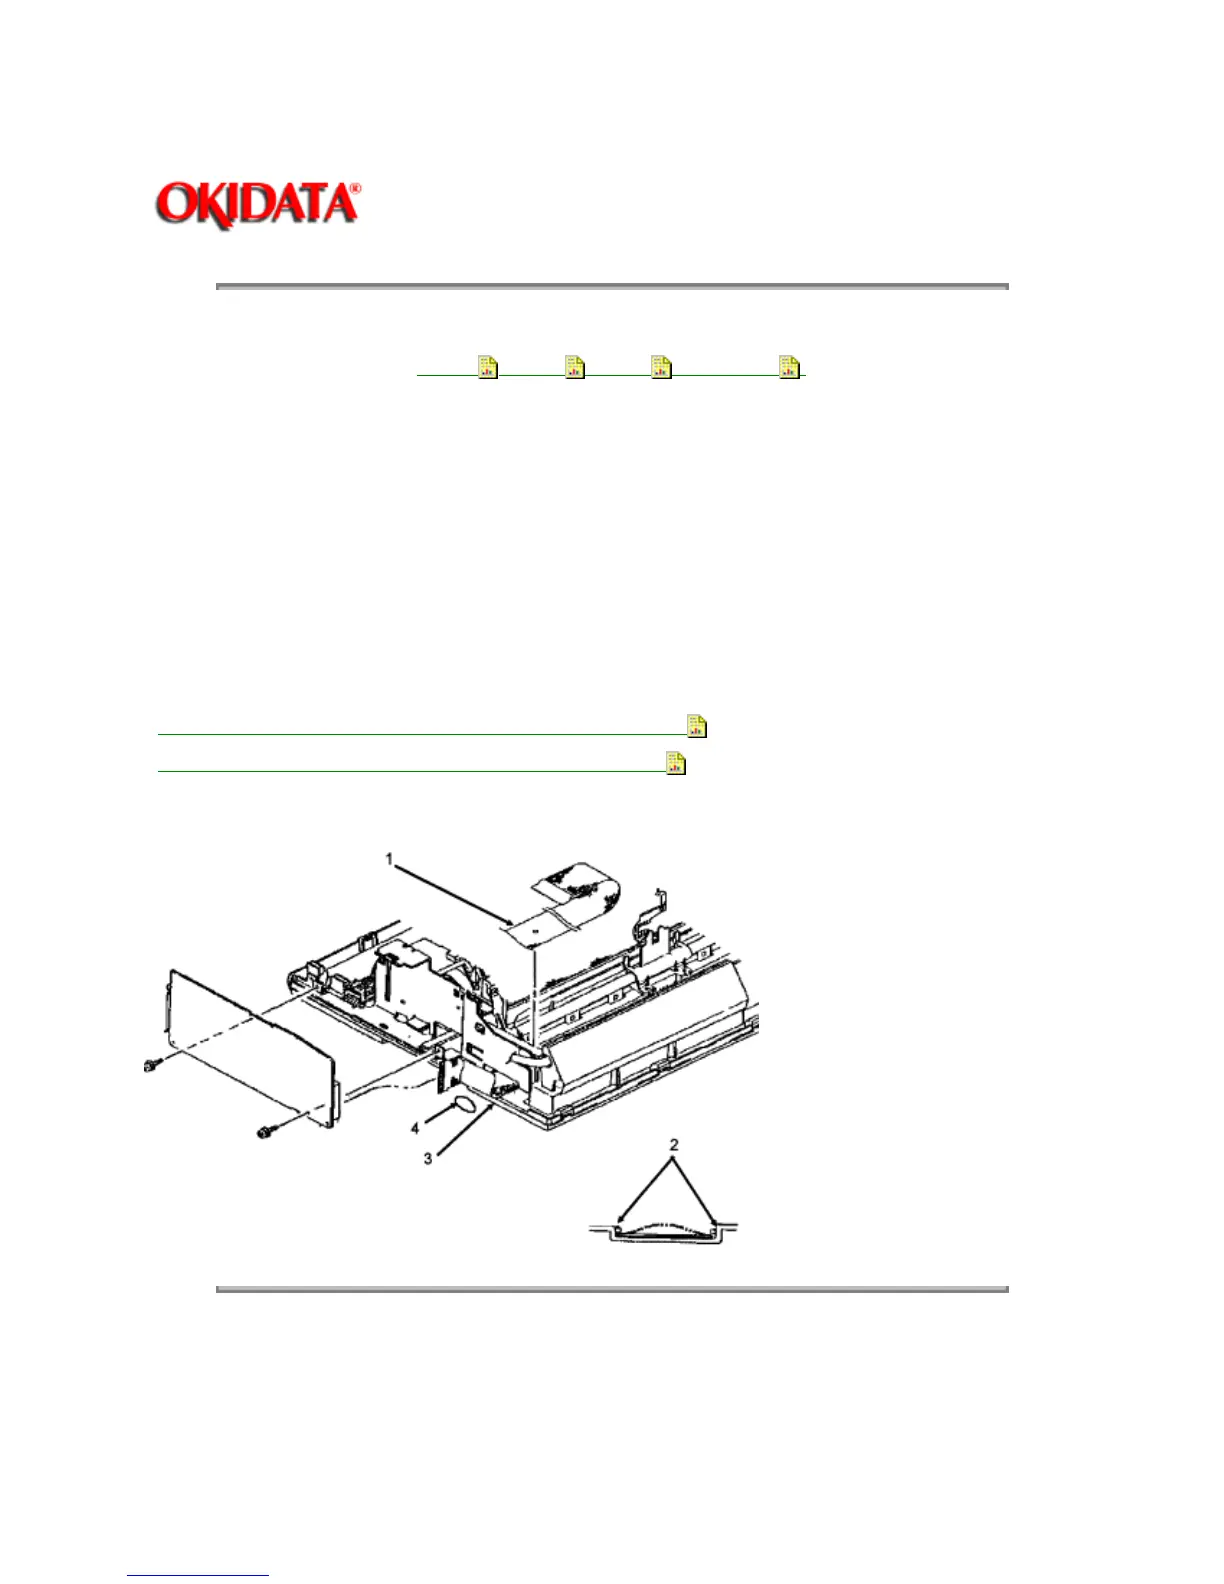
3.2.12 Carriage Cable
1. Perform these procedures:
3.2.01
, 3.2.06 , 3.2.07 , and 3.2.11 .
2. Slightly bow the carriage cable (1) to release it from the claws (2) and the projection on the main
frame (3).
3. Remove the carriage cable guide (4).
4. Remove the carriage cable.
NOTE:
Installation
The contacts on the cable face up when the cable is positioned on the main frame.
The cable end with the 45° angled contacts connects to the gear case assembly.
Do NOT sharply bend the carriage cable. You will slightly bow the cable to position it under the claws
and over the projection.
P/N 56627301 Cable: Carriage (Narrow) RSPL 520 B.2.07
P/N 56627302 Cable: Carriage (Wide) RSPL 521 B.2.07
Copyright 1997, Okidata, Division of OKI America, Inc. All rights reserved. See the OKIDATA Business
Partner Exchange (BPX) for any updates to this material. (http://bpx.okidata.com)