Installation
|
Installing Optional Devices
20
COM and SATA sub-board
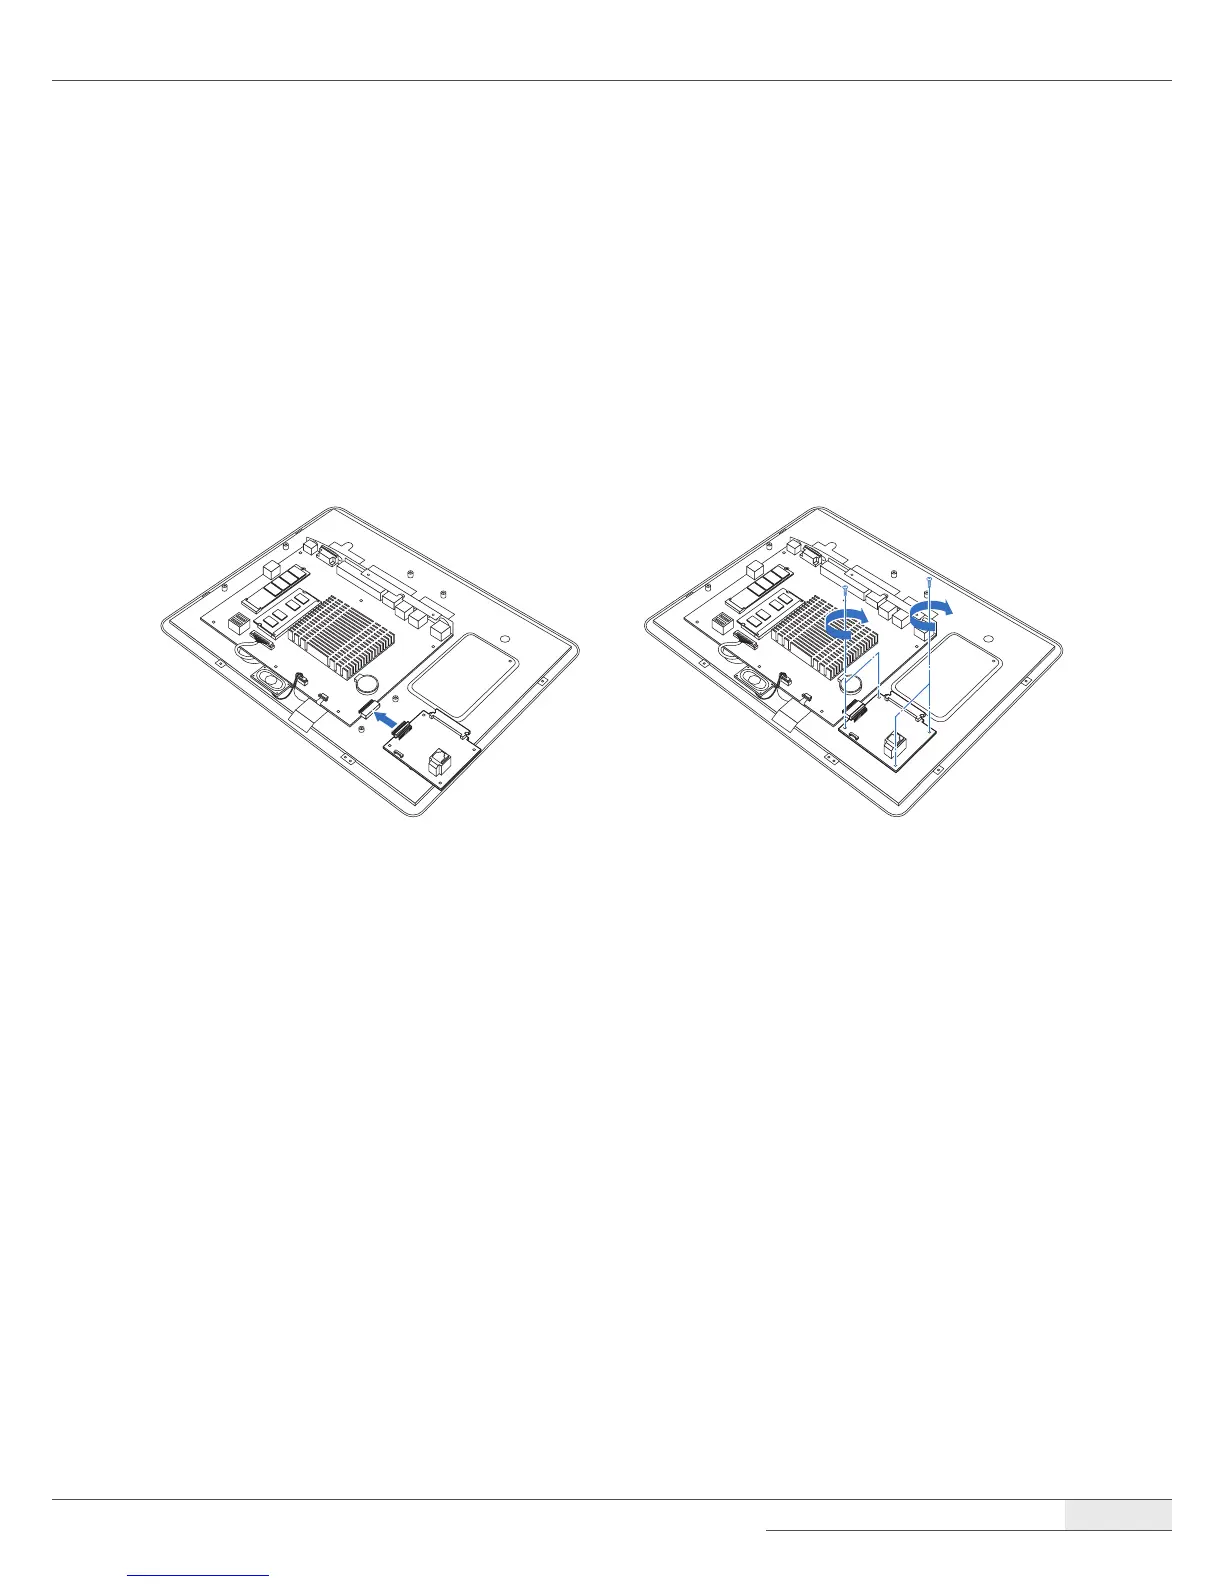
Installing the COM and SATA sub-board
To install the COM and SATA sub-board, follow these steps:
1.
Remove the system cover by following the instructions in “➊ Removing the cover“ on page 22.
2.
Connect the COM and SATA sub-board to the COM and SATA header on the main board, and
tighten the two screws.
3.
Replace the system cover by following the instructions for removal in reverse order.
Removing the COM and SATA sub-board
You can remove the COM and SATA sub-board by following the steps in the installation procedure in
reverse order.
 Loading...