12
NOTES:
1. The climatic curve can be applied to both the delivery temperature (water adjustment) and the am-
bient air (only if the specific air probe supplied has been installed); you are advised, however, to use
the check on the delivery temperature.
2. The climatic curves can only be applied to heating and cooling, not to domestic hot water produc-
tion.
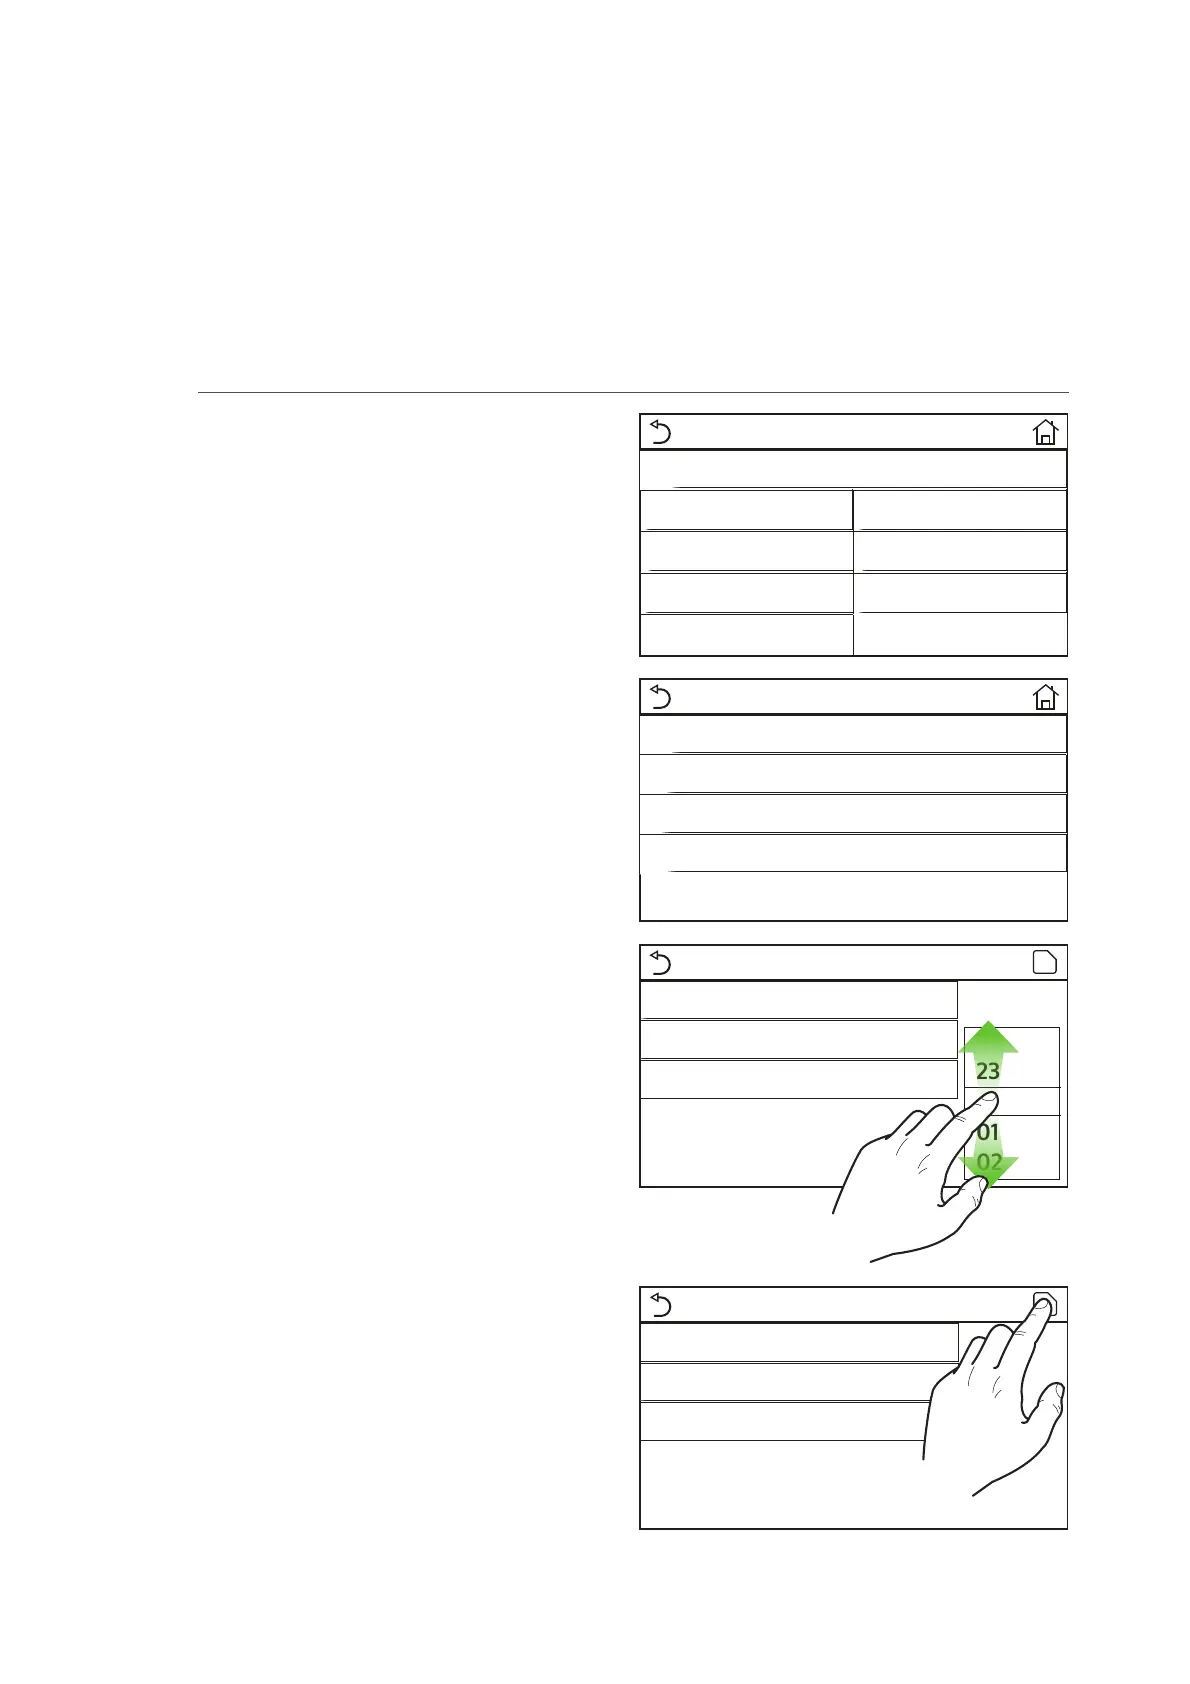
Weather depend (1/3)
atr : Off
Upper AT Heat: 25°C
Lower AT Heat: -20°C
Upper WT Heat: 55°C
Lower WT Heat: 40°C
3 4
1
2
4.7. Setting the automatic setting compensation on the basis of external air (Weather depend)
After accessing the “Weather depend” function, you
can set all the parameters related to offsetting work
set-points in accordance with variations in outside air
temperature. The following keys are used to navigate
this menu:
T (
1
) Move back to the previous page
T (
2
) Move on to the next page
T (
3
) Go back to the higher level menu
T (
4
) Go back to the main page (Home)
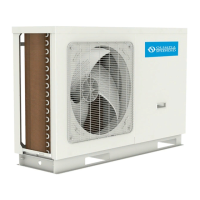
To activate this function, click on the “Weather de-
pend“ label (the first item on the first page of the func-
tion). Select “On” and then confirm with “OK”.
Subsequently, the values for the various parameters
that make up climatic curves will be set; these param-
eters represent the curves that the system will use to
change the set automatically on the delivery temper-
ature or the ambient air temperature (if an air-based
control has been set, using the specific accessory air
probe) to both hot and cold:
Weather depend
On
Off
OK Cancel
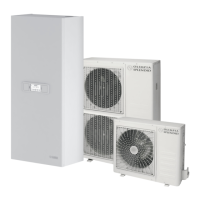
Upper AT Heat
Range: 10~37°C Default: 25°C
+
-
25°C
OK Cancel
To set values for each parameter to create the climatic
curves, click on the label of the parameter in question
and set the desired value using the "+" or "-" keys to
enter a value within the permitted range. After setting
the value, press “OK” to confirm and return to the high-
er level.
Lower AT Upper AT
Upper WT
Upper RT
Lower WT
Lower RT
13
3. The function remains active even when the unit has been switched off. To deactivate it, set “Weather
depend: Off manually.”;
4. In the “View” menu, you can see the target value of the climatic curve.
5. The function can still be set if the unit is OFF, but it will only be implemented if the unit is activated.
6. If the relative function is activated (paragraph 8.3), the value of this parameter will be stored in the
memory and automatically reset after any possible voltage failure.
7. The default value for this function is “Off”.
After accessing the “Weekly timer” function, you can
set up to three time bands for each single day of the
week; during these time bands, the unit will work with
the current mode and set-point. Alternatively, you
can assign the “Holiday” value to one day or more; if
the specific “Holiday program“ function is enabled, an
operating set-point of 30°C will be automatically set
if you use the check on the delivery water, or 10°C if
you use the ambient air check (installing the specific
air probe accessory).
Clicking on the label for one of the days of the week
allows access to the page for that day, where you can
assign a value to the day, including:
T “With” = if the Weekly Timer is active, the system
will perform the programmed access as speci-
fied in the data for periods 1, 2 and 3
T “Without” = the Weekly Timer is also active, this
day will not be considered
T “Holiday“ = if the “Holiday release” is active, dur-
ing this day the set will be kept at 30°C (for water
control) or 10°C (for air control)
T
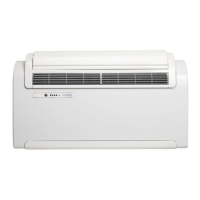
By clicking on the label for one of the periods during
the selected day, you can access the period settings
page. The possible period settings are:
T “With” = the period describes a time band when
the unit is to be used;; in this case, the labels re-
lating to the start and end times for the period
will also be displayed (which will be set first by
clicking on the time label to be set and then
sliding your fingertip over the time values until
you select the ones required; lastly, press the top
right button to save the data entered)
T “Without” = the period will not be used
4.8. Setting a timer for programmed switch-on and/or switch-o (Weekly timer )
Weekly timer
Weekly timer: On
Mon: Valid Tue: Invalid
Wed: Invalid Thur: Invalid
Fri: Invalid Sat: Holiday
Sun: Holiday
Mon
Mon: Valid
Period 1: Invalid
Period 2: Invalid
Period 3: Invalid
00 00
01 01
02 02
23 59
22 58
Period 1
Period 1: Valid
Start Timer: 00:00
End Timer: 00:00
00 00
01 01
02 02
23 59
22 58
Period 1
Period 1: Valid
Start Timer: 00:00
End Timer: 00:00