18
6. The setting is only valid if the unit is “On”.
7. Depending on the operating mode dened (heating or cooling), the relative set-points will be used.
8. If the start time of “Period 2” is the same as that of “Period 1”, the rst will be implemented.
9. The time bands are based on the timer inside the unit.
10. During hot water production mode, this function is not available.
11. If the relative function is activated (paragraph 8.3), the value of this parameter will be stored in the
memory and automatically reset after any possible voltage failure.
12. The default value for this function is “O”.
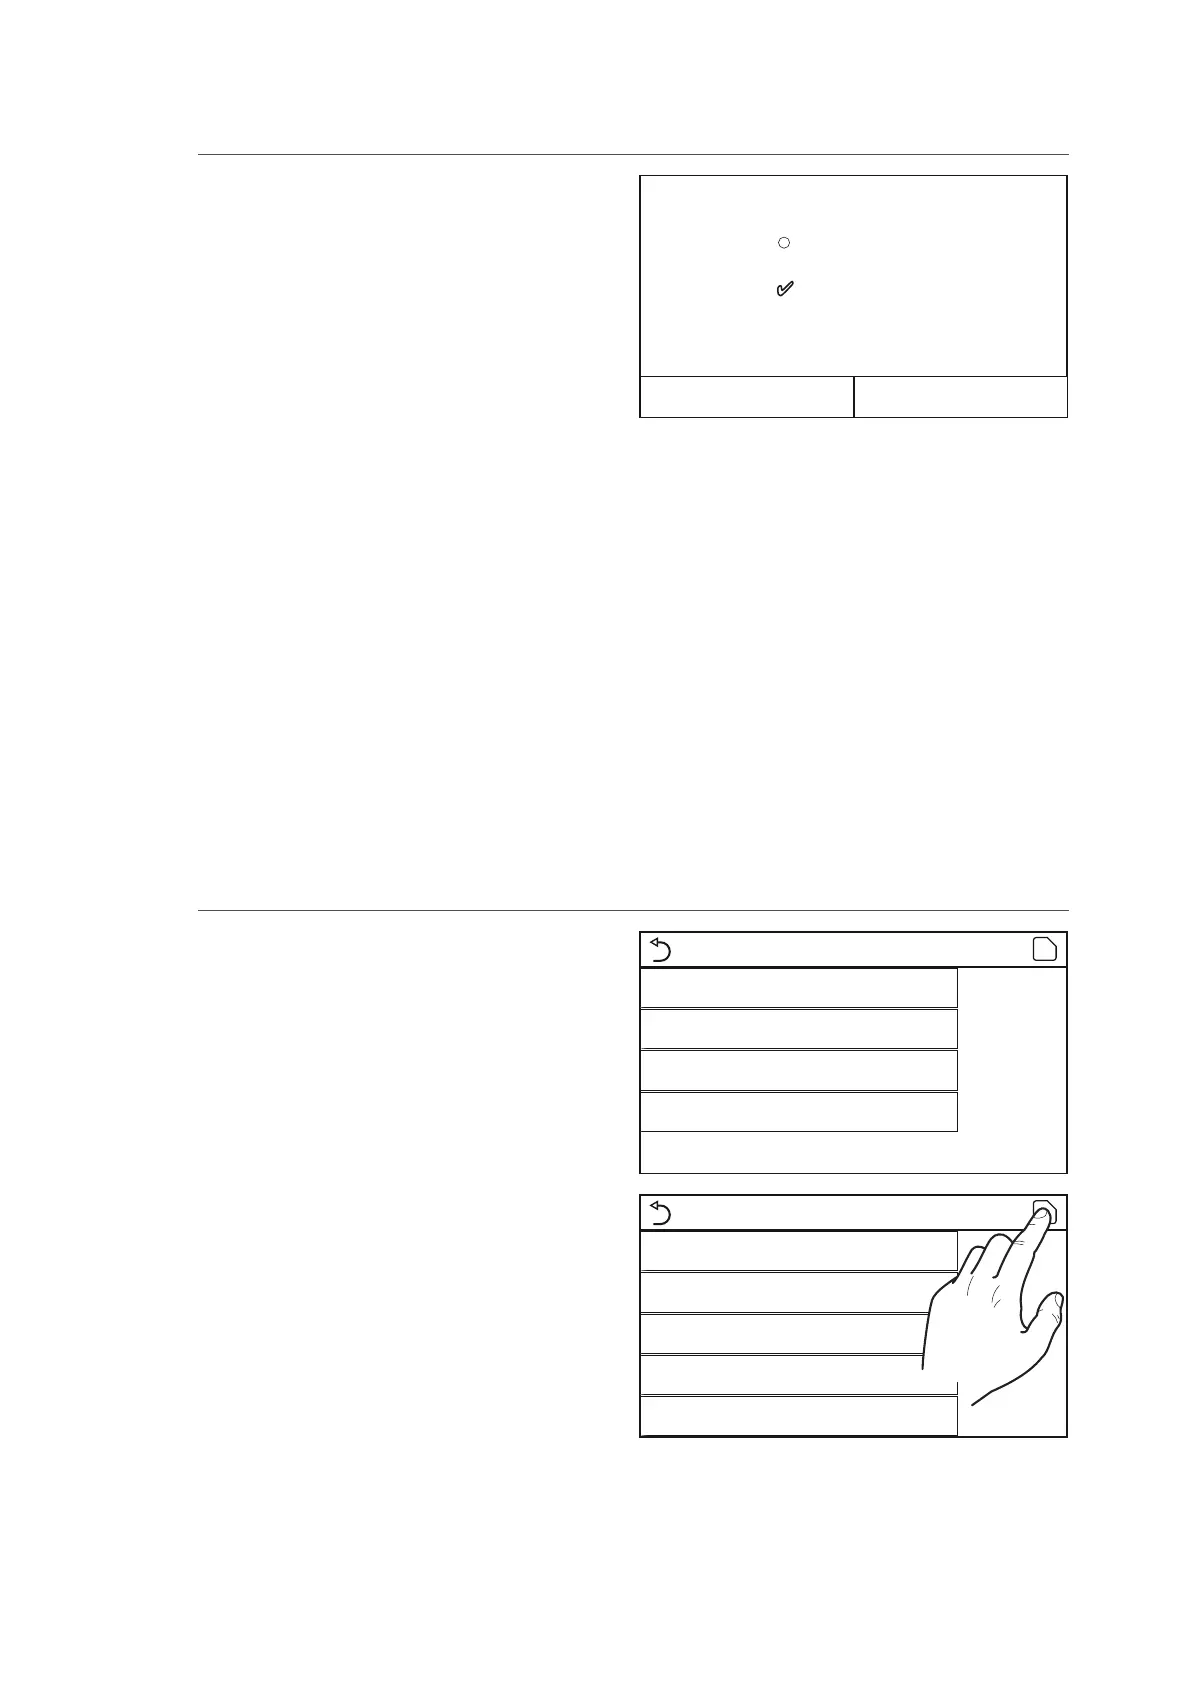
Emergen. mode
On
O
OK Cancel
NOTES:
1. Emergency mode can only be activated when the unit is OFF, or if the compressor displays an error
and, despite a reset, the error resumes and persists for at least 3 minutes.
2. Emergency mode can only be activated in heating (DHW or Heating, but not simultaneously).
3. Emergency mode cannot be activated without the installation (and activation) of the electric heater
on the storage tank and/or the additional heat source or electric heater.
4. The use of Emergency mode (in Heating) will be blocked if the “HP-Water Switch“, “Auxi. heater 1”,
“Auxi. heater 2“, “Temp AHLW“ errors appear.
5. The use of Emergency mode (in DHW) will be blocked if the “Auxi. WTH“ error appears.
6. None of the functions linked to the timers will be available during Emergency mode.
7. The thermostat cannot be used in Emergency mode.
8. After a voltage failure, Emergency mode returns to the OFF status.
9. Certain functions are not available in Emergency mode so, if you attempt to activate them, the sys-
tem will tell you to disable Emergency mode rst.
10. The default value for this function is “O”.
4.13. Enabling emergency operation for heating or DHW (Emergen. mode)
If the water tank for this model - and/or an additional
heat source (paragraph 7.7) or electric heater
(paragraph 7.8) - is installed (and correctly set) (refer
to the installation manual for more information), you
can enable “Emergen. mode” which, once activated,
excludes the heat pump and produces hot water
(domestic or system) using only the electric heater of
the storage tank and/or the additional heat source (or
electric heater) to meet the requests. After accessing
the “Emergen. mode” function, you can enable or disa-
ble this program; press "OK" to conrm.
19
You can use the weekly timer to assign the “Holiday”
program to at least one day of the week. On those
days, the unit will work in heating mode, maintaining
a 30°C set-point on delivery water (or 10°C if the check
is based on the ambient air). To enable the implemen-
tation of the Holiday Program (if set on the weekly
timer), you must activate this function.
After accessing the “Holiday mode” function, you can
choose one of the modes available by clicking directly
on the text that identies it and then conrming with
the ”OK” key.
Holiday mode
On
O
OK Cancel
NOTES:
1. Before changing the operating mode, the unit must be OFF, otherwise a message will warn you to
turn the unit o before changing the mode.
2. During the use of Holiday mode (as set in the weekly timer), the operating mode will be automatical-
ly set on “Heating” and the On/O command from the panel cannot be used.
3. None of the functions linked to the timers will be available during Holiday mode.
4. Certain functions are not available in Emergency mode so, if you attempt to activate them, the sys-
tem will tell you to disable Emergency mode rst.
5. If the relative function is activated (paragraph 8.3), the value of this parameter will be stored in the
memory and automatically reset after any possible voltage failure.
6. The default value for this function is “O”.
4.14. Setting the winter period absence function (Holiday mode)
This function is used to set one to four daily periods,
whose commands will then be executed every day.
After accessing the “Preset mode” function, you can
press the key for each period to activate or deactivate
an individual period, choose the operating mode to
be used, the temperature set-point for processed wa-
ter, and the start and end times of the period itself.
Clicking on the "Period" label will open the page with
the labels relating to period activation, the mode to
be used during the period, the water delivery tem-
perature and the start and end times. Click on each of
these to set the appropriate value (each data item may
draw up additional windows for selecting or entering
the required values). Lastly, press the top right button
to save the data entered.
4.15. Setting the daily timer programming (Preset mode)
Preset mode
Period 1: Valid
Period 2: Invalid
Period 3: Invalid
Period 4: Invalid
Preset mode
Period 1: Valid
Mode: Heat
WOT Heat: 45°C
Start timer: 00:00
End timer: 00:00
NOTES:
1.
If the water tank for this model is not installed (and correctly set),
Hot water mode will not be
available.
2. If timer programming with the Weekly timer and other settings with Preset mode have been entered