XYAA6338 Service Manual 4-1
4. SETUP AND ADJUSTMENTS
Proceed as follows to setup and/or adjust the printer:
a. Open the printer's front cover.
b. Press keys 1 and 2 simultaneously until an acoustic
signal is sounded.
c. Press keys 1 and 2 simultaneously again, until
another acoustic signal is sounded.
d. Close the printer's top cover.
An acoustic signal sounds and the three LEDs located on
the lower part of the control console light to indicate
when the printer switches to the initial status menu.
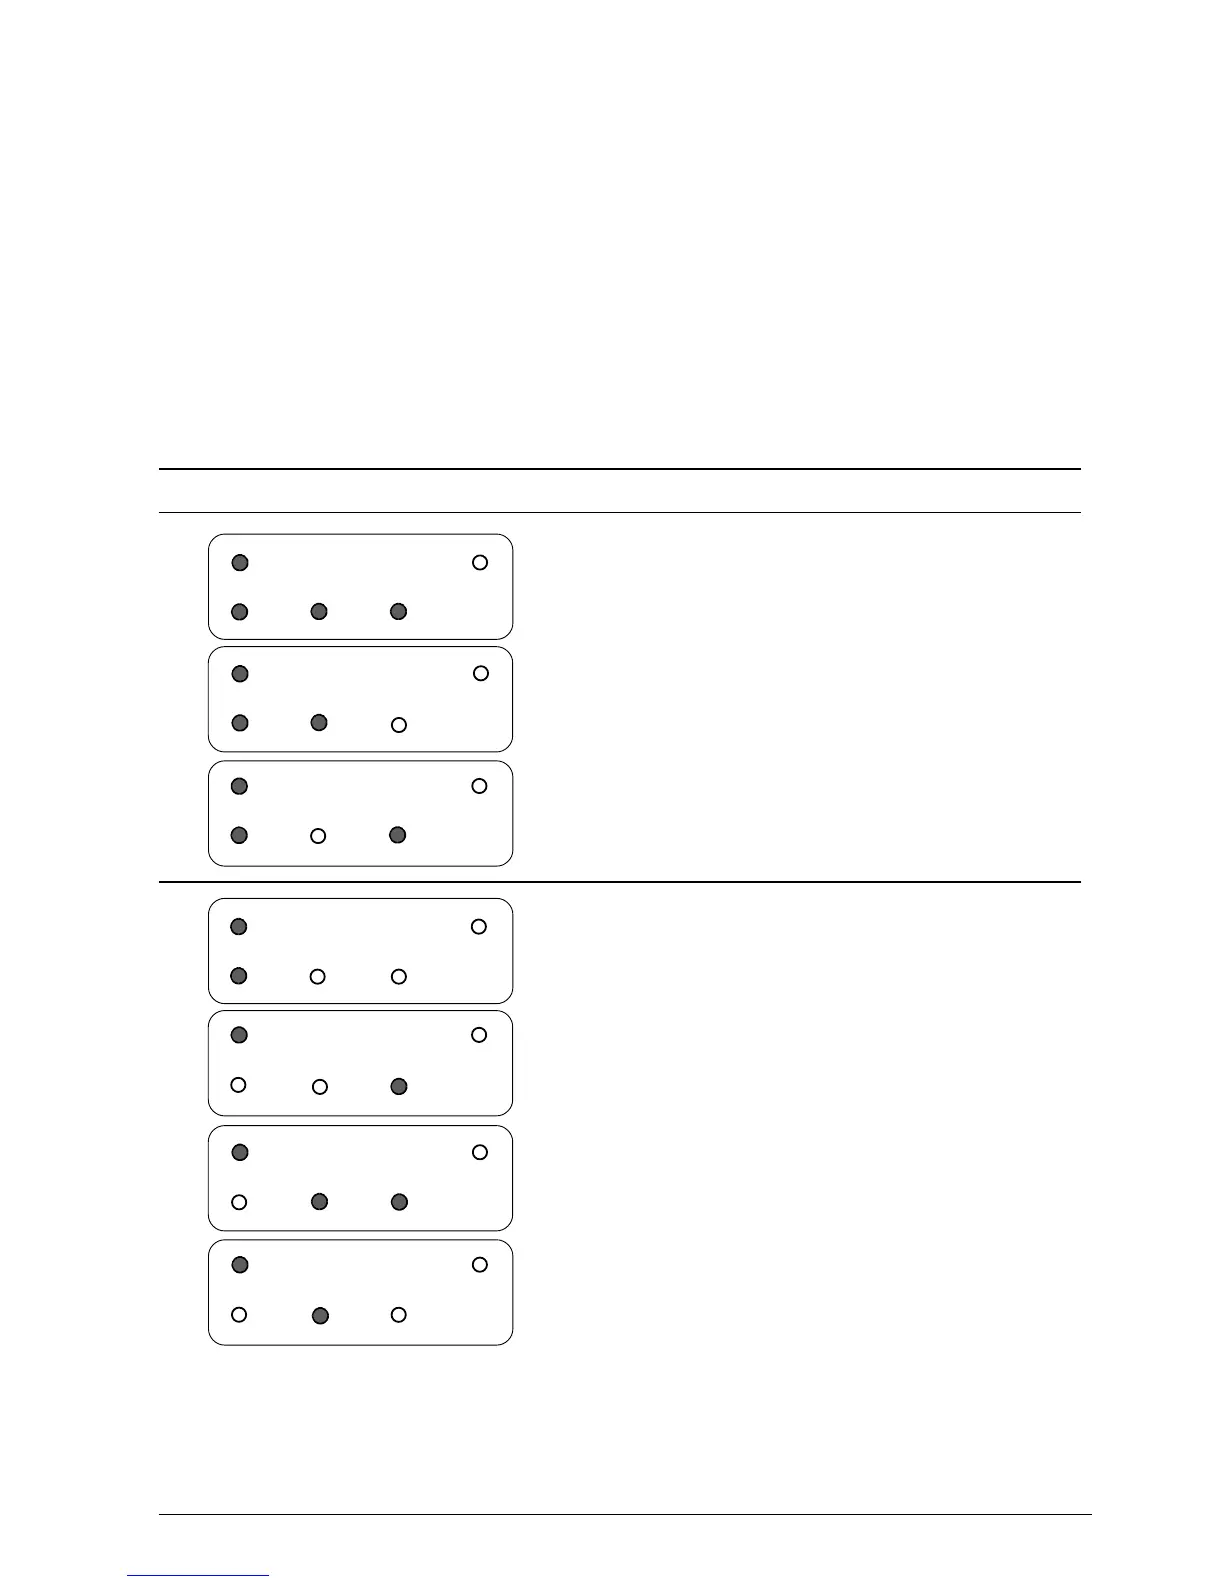
Pressing key 1 one or more times provides you with a
light indication corresponding to the operation to be
performed (refer to the table below that provides the
correspondence between the light indications and the
operations to be performed). Pressing key 2 grants
access to the menu indicated by the LED combinations.
Ref.Ref.
Ref.Ref.
Ref.
LED Indications on the Console LED Indications on the Console
LED Indications on the Console LED Indications on the Console
LED Indications on the Console
Setup/Adjustment Operation SetSetup/Adjustment Operation Set
Setup/Adjustment Operation SetSetup/Adjustment Operation Set
Setup/Adjustment Operation Set
22
22
2 Operator test
11
11
1 Initial state (Setup/adjustment mode)
33
33
3 Printer setup
44
44
4 Entrance into the Adjustment Menu
66
66
6 Auto read Micr
77
77
7 Slip test
55
55
5 Hexdump