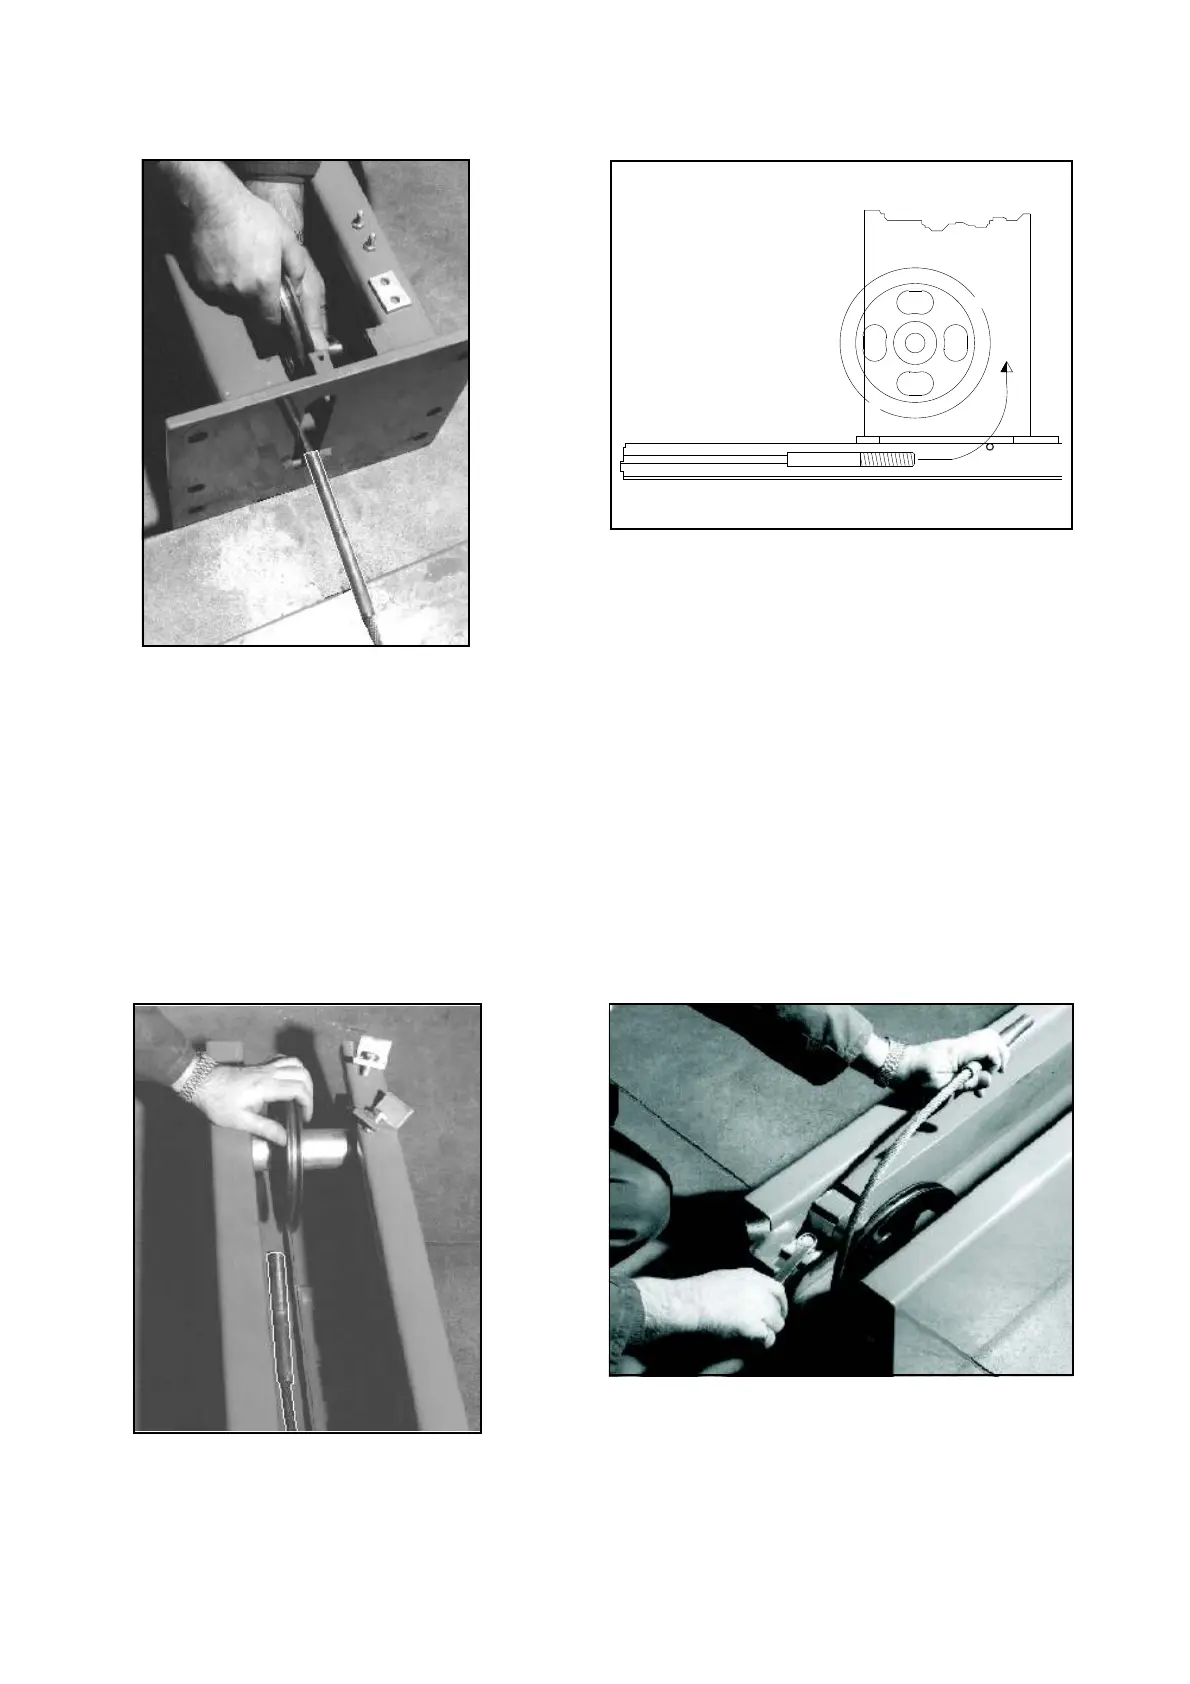
4-Stenderelafunediacciaiocheescedallacolonnacomando
pertuttalalunghezzadelbasamentoedinserirneilcodulofilettato
nell’asoladellacolonnalibera,facendolopassaresopraalperno
antiscarrucolamento(fig.40).
Fig.39
5-Rimontarelapuleggianellasuasede,tenendolafunediac
-
ciaionellagoladellapuleggia.Inserireilpernoelalamafermaper
-
notoltainprecedenzaefissarlaconlerelativeviti.
6-Togliereilcarterintestaallacolonnalibera;rimuoverelelame
fermapernopuleggiaaformadi“L”quindifarpassareilcodulodel-
lafunediacciaiofralapuleggiaelaschienadellacolonna,tenen-
dolafunenellagoladellapuleggia(fig.41).
7-Tenereintensionelafunediacciaiodentroallagoladellapu-
leggiaquindirimontarelelamefermapernoa“L”serrandoleconi
relativibulloni(fig.42).
8-Rimontareilcarterintestaallacolonnalibera.
Fig.41
4-Extendthesteelcablethatcomesoutofthecommandpost
alongtheentirelengthofthebaseandinsertthethreadedendinto
theslotofthefreepost,passingitabovetheno-slippin(fig.40).
Fig.40 Inserimentodelcodulofilettato
Fig.40 Insertingthethreadedend
5-Replacethepulley,keepingthesteelcableinthepulleyrace.
Insertthepinandthepinstoppingplatethatwaspreviouslyremo
-
vedandconnectitwiththerelativescrews.
6-Removethecasingatthetopofthefreepost;removethe
“L”-shapedpulleypinstoppingplateandpasstheendofthesteel
cablebetweenthepulleyandthebackofthepost,keepingthe
cableinthepulleyrace(fig.41).
7-Keepthesteelcableundertensioninsidethepulleyraceand
thenreplacethe“L”-shapedpinstoppingplatestighteningthem
withtherelativebolts(fig.42).
8-Replacethecasingatthetopofthefreepost.
Fig.42
22