15
Getting Started
2 Getting Started
Caution: Before installing the Bode 100 , check the environmental and
power requirements (see 12 "Technical Data" on page 135).
2.1 Installing the Bode Analyzer Suite
Caution: Install the Bode Analyzer Suite from the delivered CD-ROM
before connecting the Bode 100 to the USB connector of your computer.
The Bode Analyzer Suite on the delivered CD-ROM controls the operation of the
Bode 100. Install the Bode Analyzer Suite first, before you connect the
Bode 100 to the computer. Put the Bode 100 CD-ROM in the CD-ROM drive and
follow the instructions on the screen. Select the 32-bit or 64-bit installation
according to your computer’s hardware. For installation support, visit the
OMICRON Lab Web site www.omicron-lab.com
or contact your nearest support
center (see "Contact Information / Technical Support" on page 139).
2.2 Powering the Bode 100
Caution: Before powering the Bode 100 using a DC power supply different
from the one delivered with the Bode 100, check the polarity of its output
voltage (see 12.2 "Power Requirements" on page 136).
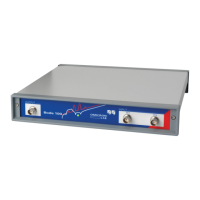
The Bode 100 is powered with an external wide-range AC power adapter.
Before powering the Bode 100, select the adapter’s mains input plug fitting your
power outlet. Plug the adapter’s DC output connector into the Bode 100 DC
power input on the rear panel and the mains input plug into the power outlet.
Alternatively, you can power the Bode 100 with any DC power supply meeting
the power requirements specified on page 136.
2.3 Connecting the Bode 100 to the Computer
The Bode 100 communicates with the computer through USB interface (see
12.4 "Computer Requirements" on page 137). Connect the Bode 100 USB
connector on the rear panel to the USB connector of your computer using the
USB cable delivered with your Bode 100.