Chapter 3 - Getting to know the device
l
Patient arm support and table wings (if supplied) – Devices used to capture optomap® fa images
may be fitted with a patient arm support and table wings. They are used to support the patient when
the injection is administered. The patient arm support can be removed for cleaning.
Viewing PCs
Viewing PCs run the Review application. The Review application lets you analyze patient images. You can
review images in a variety of ways. You can add annotations to highlight areas of interest, add diagnostic
codes, add notes, and email images to third parties.
Image Server
The Image Server PC runs the management applications:
l
The Admin application lets you configure the network and data management environment. You can
define security levels, create and modify users, and set a variety of system configuration options.
l
The Storage application lets you archive and protect database and patient image files. It is essential
to archive regularly. For further information refer to the Storage application help file.
Depending on your network configuration you may also run the Review application and Scheduler application
from the Image Server PC. When the Review application has been installed on an Image Server PC, the
Image Server PC may be used as an additional Viewing PC.
The Scheduler application lets you schedule patient appointments and manage patient details. The Scheduler
application may be installed on any PC on the same network as the device.
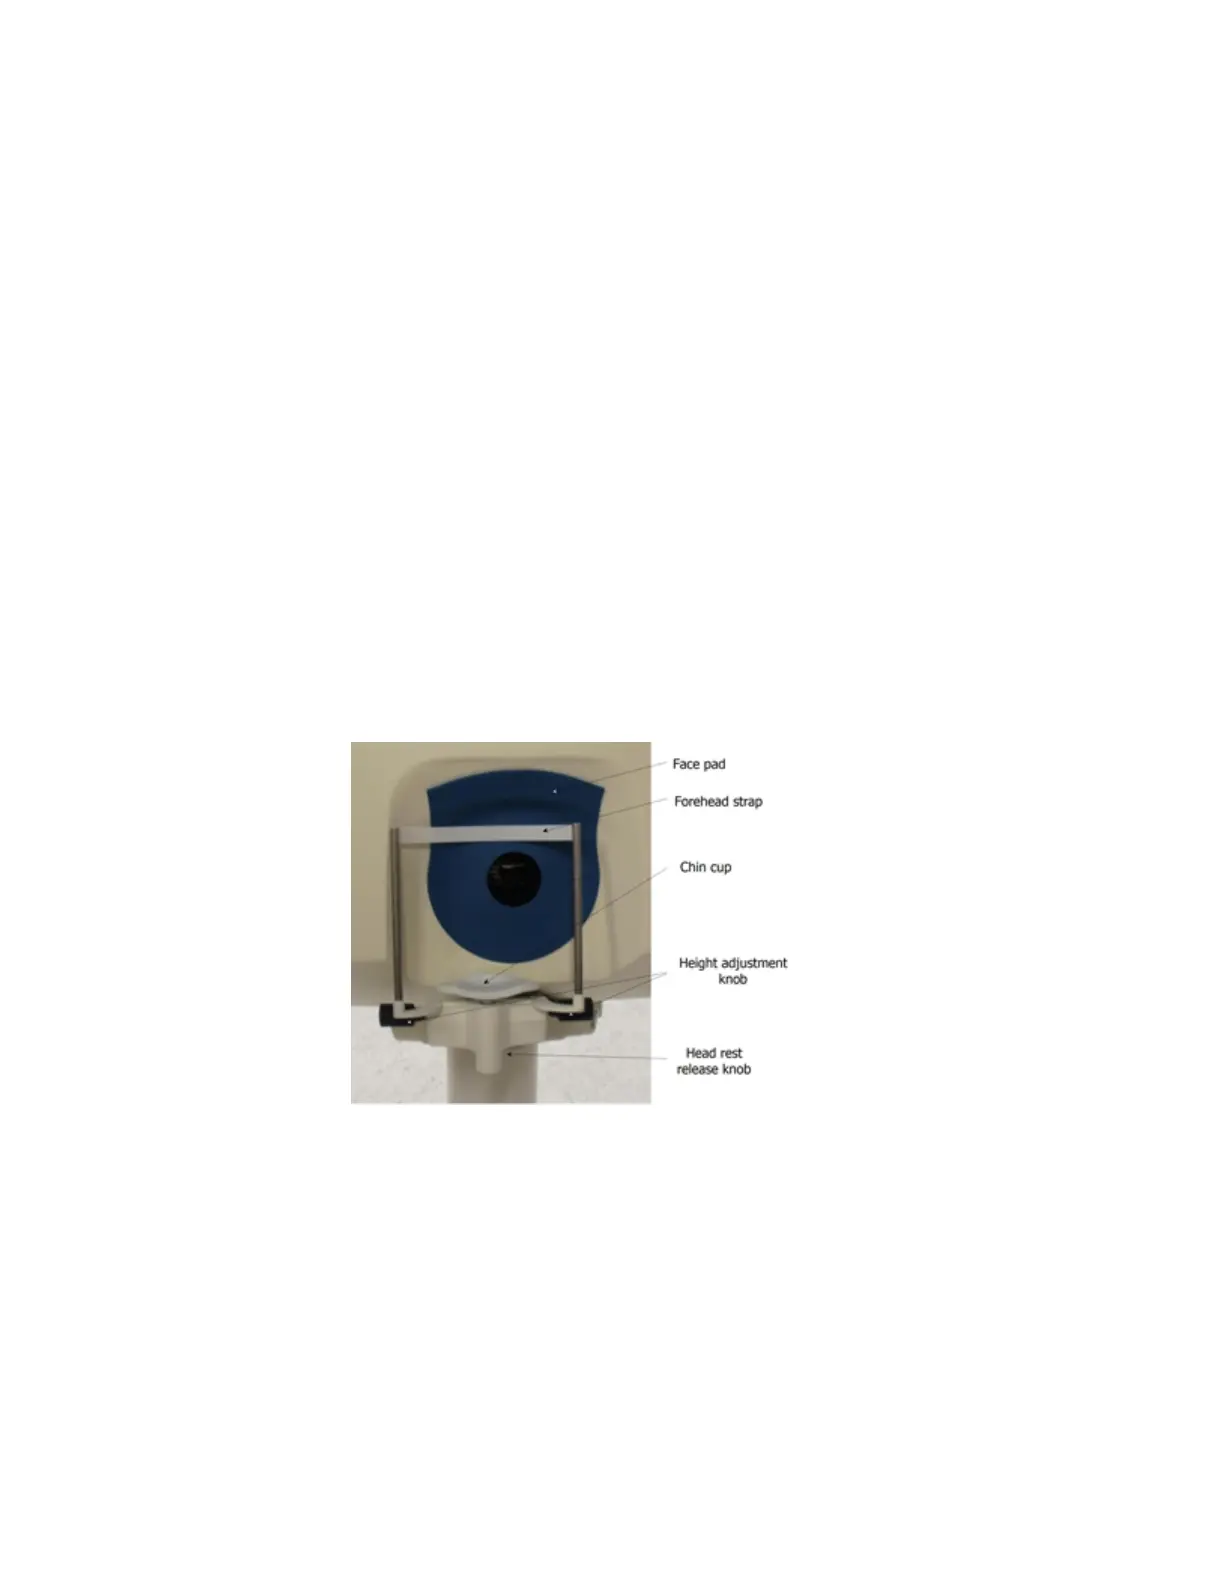
About the head rest
The head rest supports the patient's head while images are being captured. It is made up of a forehead
strap and a chin cup.
The head rest can be removed for cleaning and should be cleaned between patients.The full instructions
can be found in the Introductory Handbook.
Moving the chin cup
l
The chin cup height can be altered by turning the knobs on the side of the head rest.
l
The chin cup should be slid into position for the eye being imaged. When imaging the left eye slide
the chin cup to the first position on the right. When imaging the right eye slide the chin cup to the
first position on the left. There is an additional position on each side if the patient's features require
the chin cup to move further.
l
Release the chin cup by pulling the lever and slide the chin cup into position.
l
The chin cup should be turned to ±15°.
8 of 100