Chapter 3 - Getting to know the device
How to use the hand control
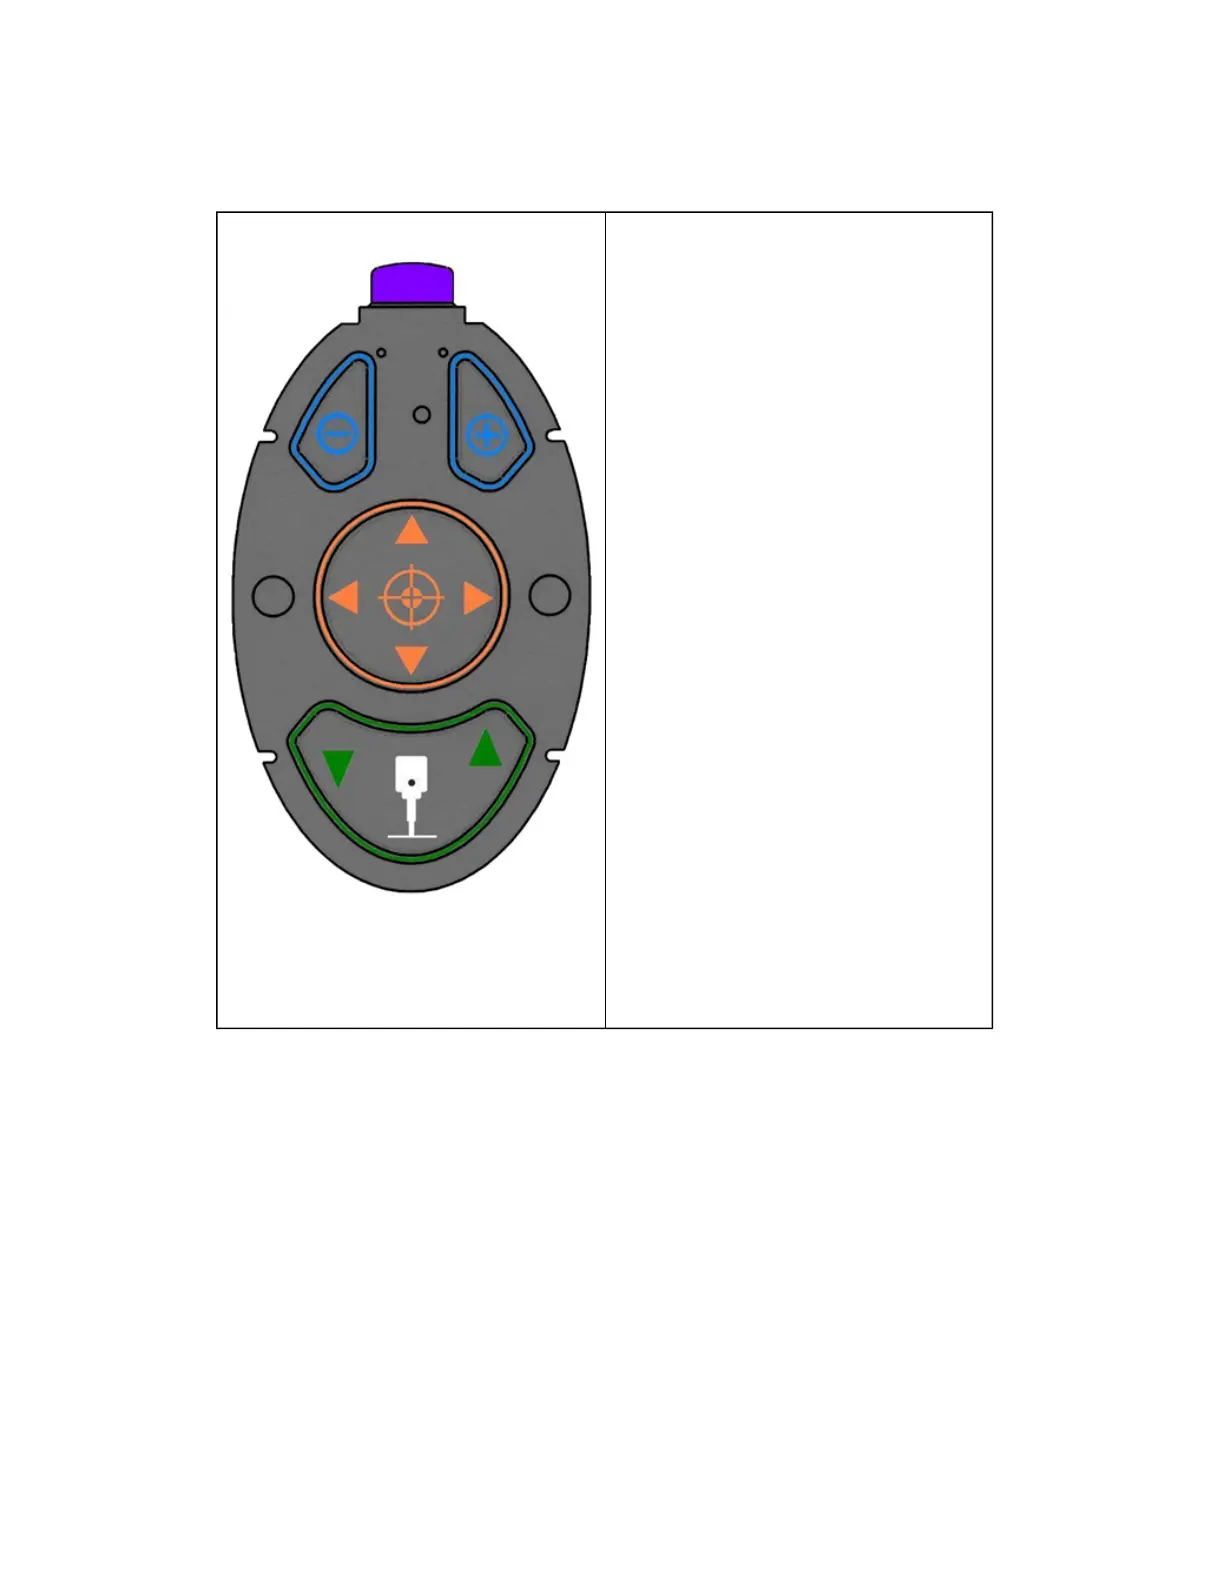
200Tx Hand Control Hand Control table height buttons
Use these buttons to adjust the table height.
Hand Control eye position buttons
Use these buttons to move the pupil circle to
the center of the patient's eye.
The patient's eye should be displayed inside
the target shown on the External Eye
Camera view. Use the up, down, left and right
buttons on the hand control to align the pupil
circle within the patient's pupil. When the eye
is close to the correct position the system will
indicate which fine alignment button needs to
be pressed to set the distance.
Hint: You can select the eye to be captured
using the Hand Control. Press the left button
to select Right Eye (OD) and the right button
to select Left Eye (OS). Once the eye has
been selected this button reverts back to the
alignment functionality.
Hand Control in and out fine alignment
buttons
Fine adjustment feedback (either - or +) will
be shown on the External Eye Camera view.
These fine adjustment symbols correspond to
the in and out buttons on the hand control.
Press the button indicated to align the limbus
circle on the patient's limbus. When the
patient is close enough the symbol will
change to a filled in circle. The rings change
color, from red to green, when the patient is
correctly aligned.
Hand Control Capture button
Once the patient's eye has been correctly
aligned press the capture button to capture
the image.
11 of 100