Chapter 5 - About capturing an image
2. Position the chair
l
Explain to the patient what is about to happen, see Patient instructions on page 21.
l
Ask the patient to sit in the chair.
l
Move the chair forwards until the patient's face is approximately 15 cm (6 inches) from the
front of the scan head.
3. Position the scan head table height
l
Adjust the scan head table height so that the tip of the patient's nose is aligned with the
center of the limbus ring shown on the External Eye Camera view, How to use the hand control
on page 11.
4. Position the Patient
l
Ask the patient to look at the green ball.
l
Ask the patient to keep their teeth together.
l
Ask the patient to place their chin fully in the chin cup with their nose outside the hole in the
face pad.
l
Position the patient against the forehead strap. The patient should be leaning towards the
scan head.
l
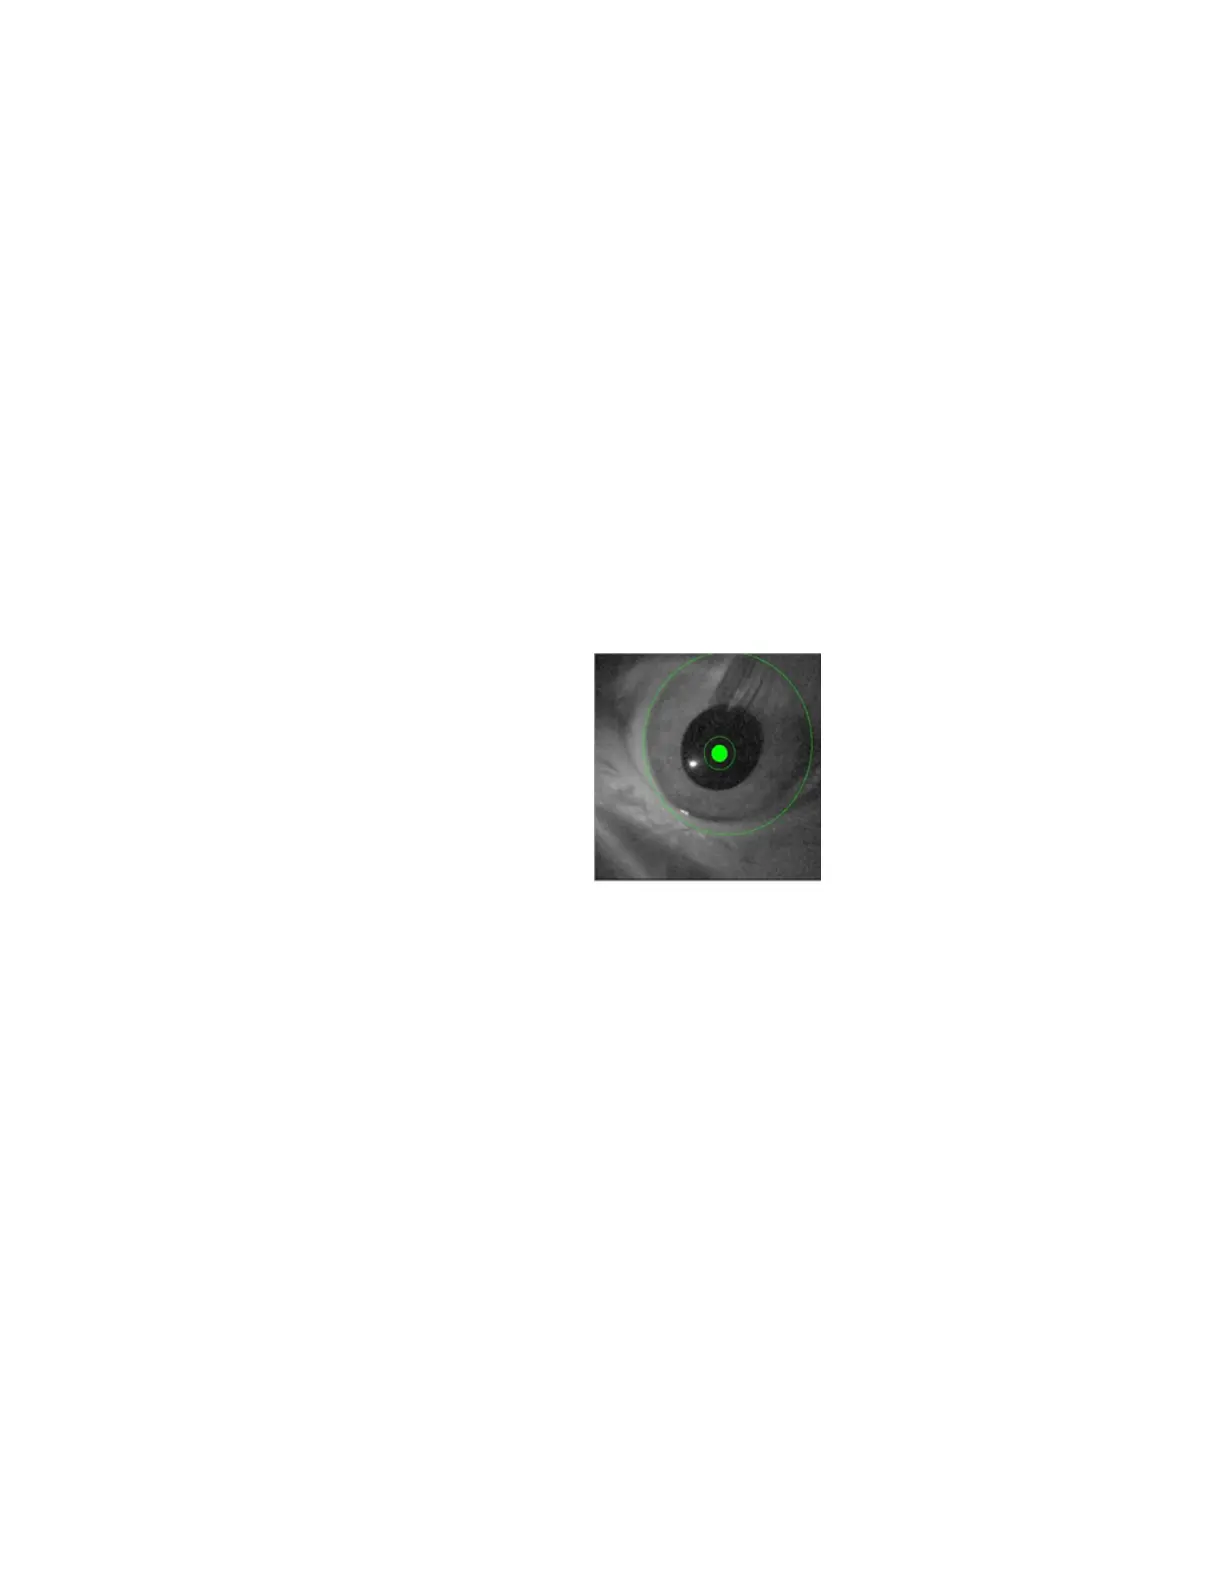
Use the External Eye Camera view as a guide, adjust the chin cup height to align the pupil with
the center ring.
5. Position the Patient's Eye
How to position the patient manually
l
Align the patient's eye so that the center ring is in the center of the pupil and that the 3 and 9
o'clock sides of the limbus ring cover the patient's limbus.
l
Move the patient closer to the device when a (+) is displayed in the center ring, and further
from the device when a (-) is displayed. Use the buttons on the hand control to align the
patient's eye with the rings.
l
The system is aligned with the patient's eye when the rings change color from red to green
and the center ring is filled.
l
Ask the patient to open both eyes as wide as they can.
l
Check the pupil and limbus positioning.
l
Capture the image by pressing the capture button on the hand switch. Alternatively, you can
capture the image by pressing [F8] on the keyboard.
How the patient uses the self alignment option (not applicable when eye steering or capturing stereo
images)
l
Ask the patient to keep looking at the green ball.
l
As the patient moves in, two red lights will be displayed when the patient is at the correct
distance. One red light will appear above and the other below the green ball.
6. Select the optomap® af if you are capturing an optomap® af image.
7. If you are capturing Stereo Images you will need to capture Stereo 1 and Stereo 2 images of the same eye.
You should always capture a Normal image first and then:
l
Select the Stereo 1 option. Align the patient as for a normal image, then when the rings
change color to green, move the patient slightly to the side indicated by the arrows
displayed on the External Eye Camera view. The center circle should remain inside the patient's
pupil.
l
Select the Stereo 2 option. Align the patient as for a normal image, then when the rings
change color to green, move the patient slightly to the side indicated by the arrows
25 of 100