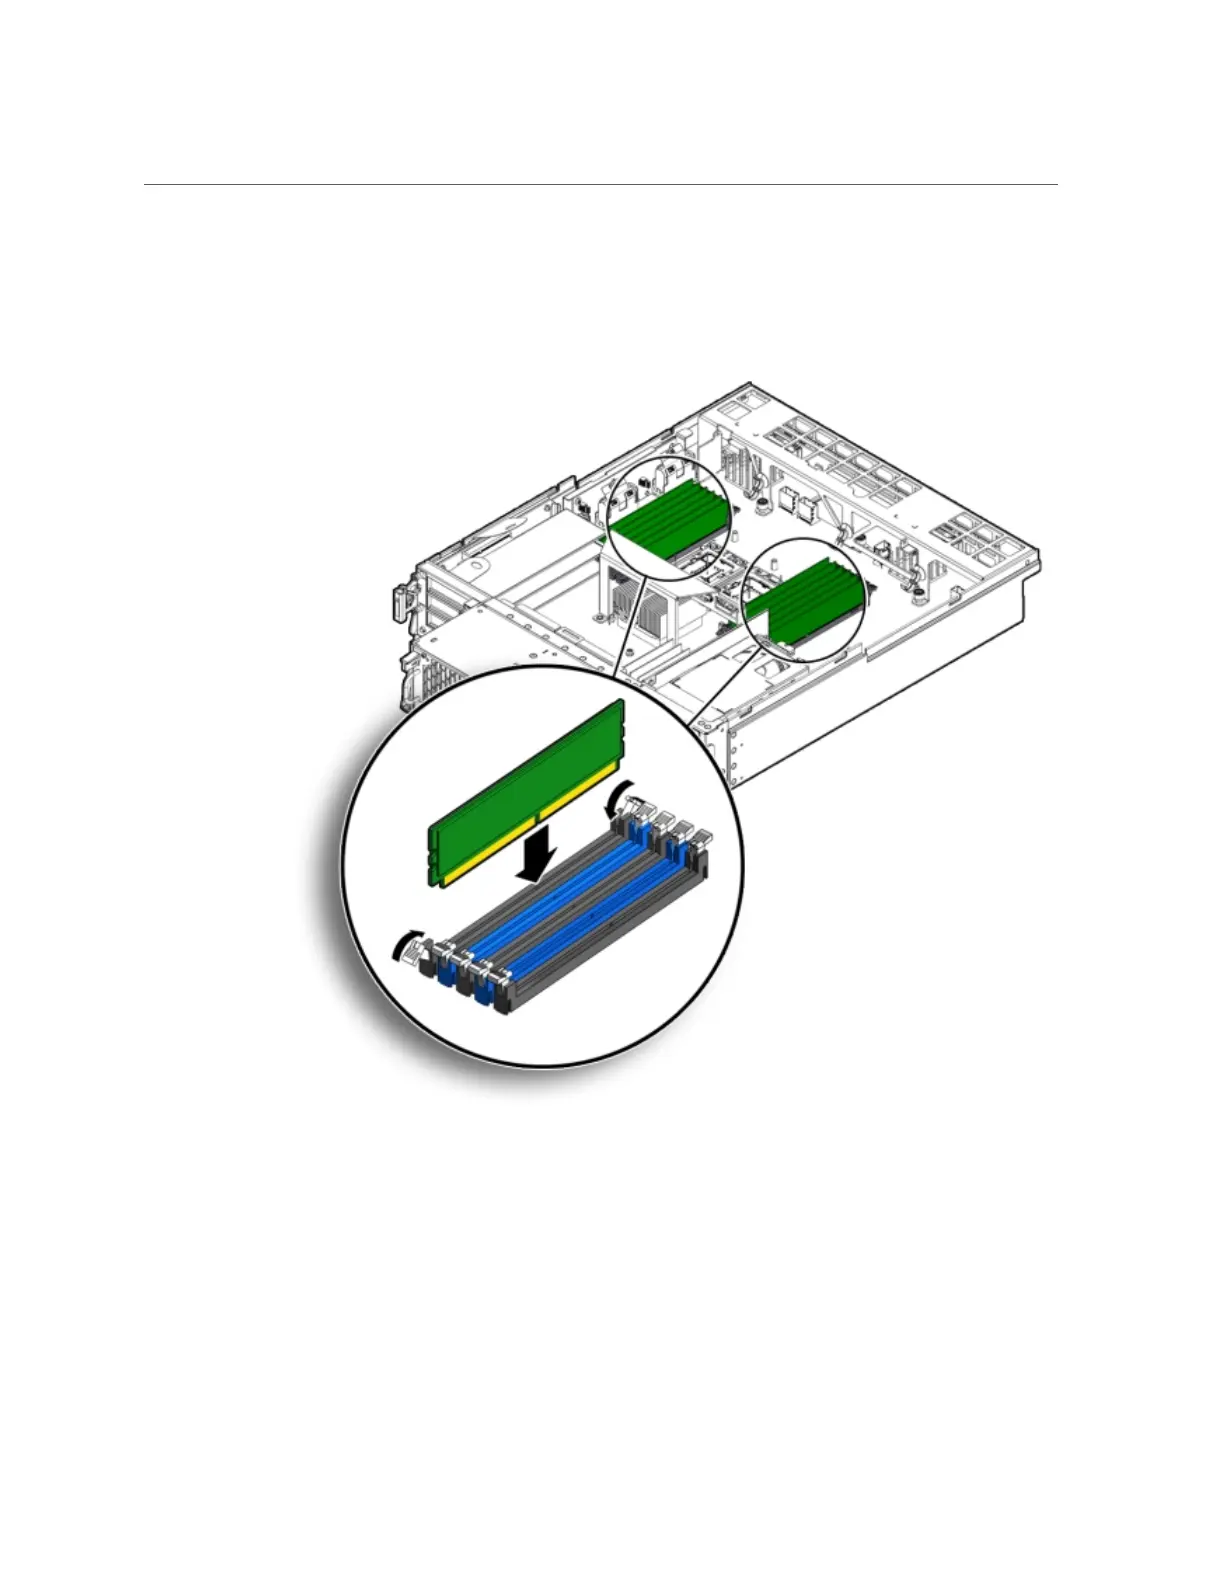
EasyManuals Logo

Oracle Database Appliance X6-2-HA User Manual

Oracle Database Appliance X6-2-HA
254 pages
To Next Page IconTo Next Page
To Previous Page IconTo Previous Page
Page #141 background imageLoading...
Page #141 background image
Install DIMMs
AppendixA • Servicing the Oracle Database Appliance Version 1 141
Align the notch in the DIMM with the key in the connector. The notch ensures that the DIMM
is oriented correctly.
5.
Push the DIMM into the connector until the ejector tabs lock the DIMM in place.
If the DIMM does not easily seat into the connector, verify that the notch in the DIMM is
aligned with the key in the connector as shown above. If the notch is not aligned, damage to the
DIMM might occur.
6.
Repeat Step 3 through Step 5 until all replacement DIMMs are installed.
7.
Return the server node to operation.

Table of Contents

Other manuals for Oracle Database Appliance X6-2-HA

Questions and Answers:

Question and Answer IconNeed help?

Do you have a question about the Oracle Database Appliance X6-2-HA and is the answer not in the manual?

Oracle Database Appliance X6-2-HA Specifications

General IconGeneral
BrandOracle
ModelDatabase Appliance X6-2-HA
CategoryStorage
LanguageEnglish

Related product manuals