Install Processor (CPU)
AppendixA • Servicing the Oracle Database Appliance Version 1 167
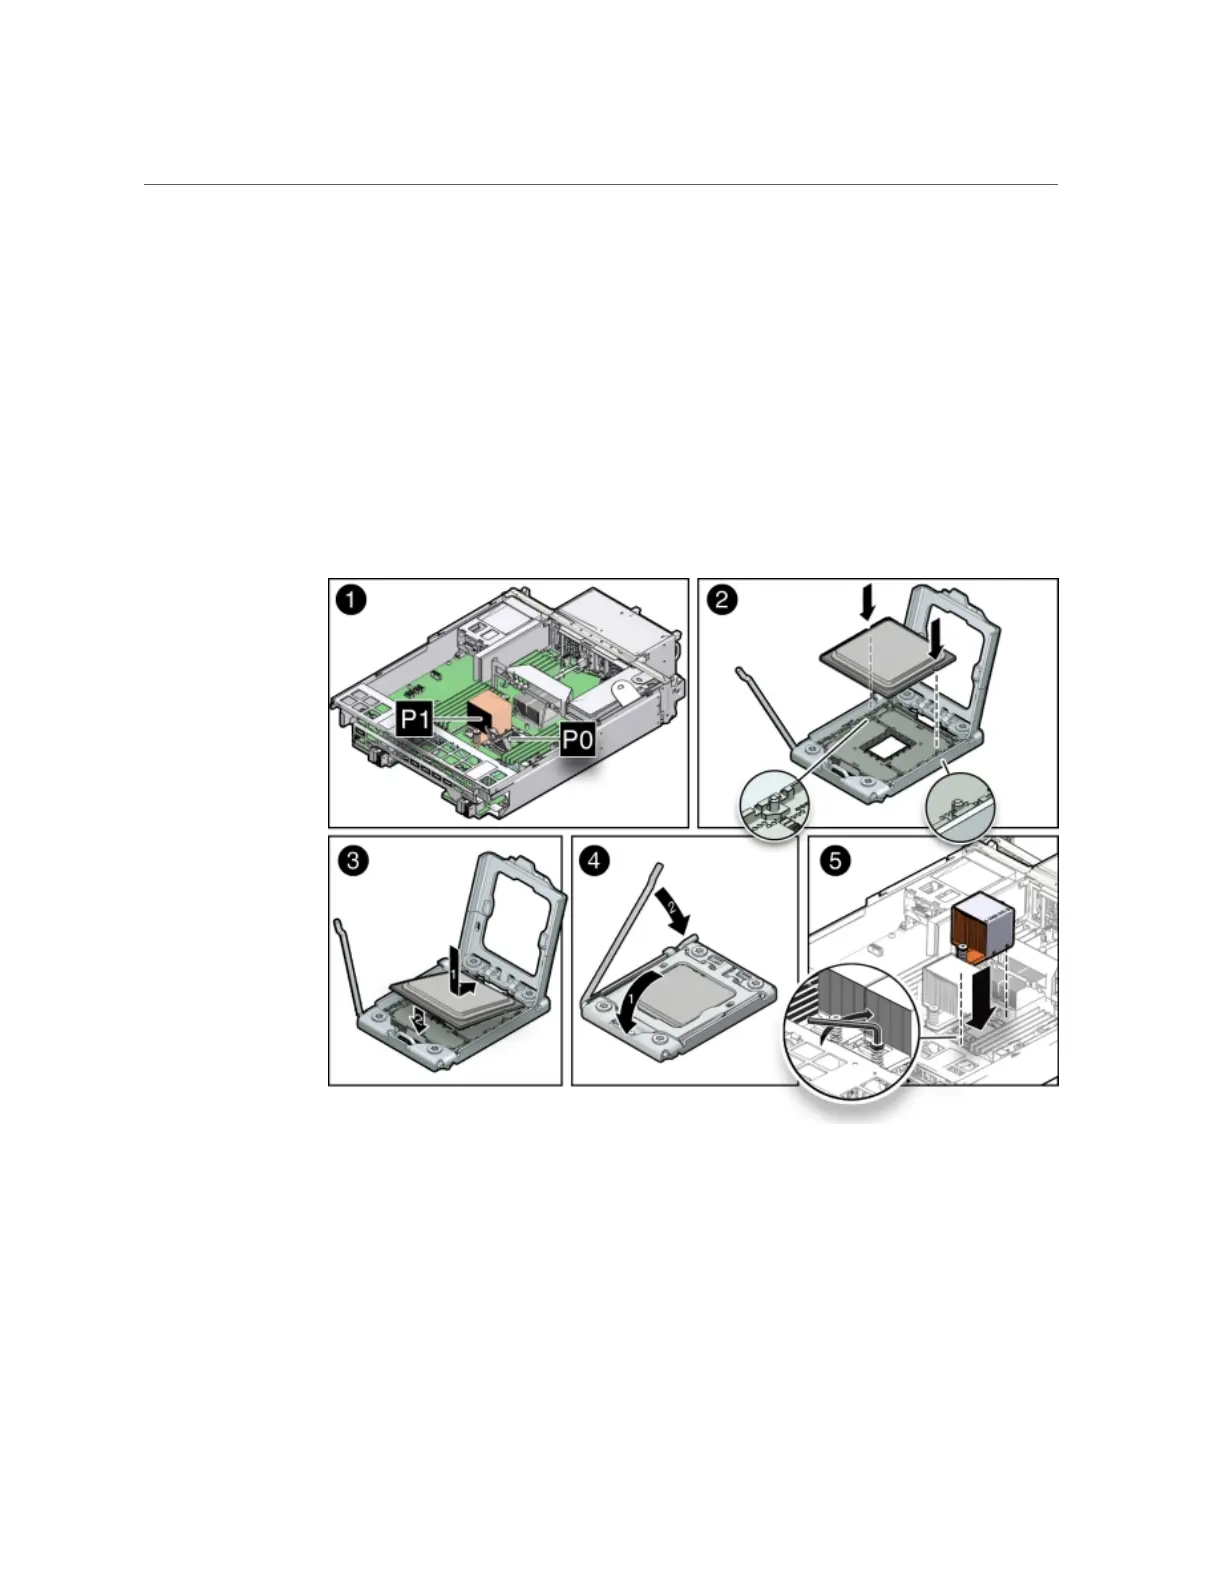
2.
Unpack the replacement CPU.
The CPU replacement kit includes a new CPU, wipes, and a tube of thermal grease.
3.
Install the CPU.
a.
Grasp the sides of the CPU firmly with your thumb and index finger, tilt it at
a 45 degree angle, orient it with the socket alignment tabs [2], carefully lower
the end of the CPU with the alignment tabs into the socket [3], support the
raised end of the CPU with the index finger on your other hand, and lower
the CPU into the socket [3].
b.
Lower the pressure frame to the closed position [4].
Ensure that the pressure frame sits flat around the periphery of the CPU.
c.
Engage the release lever by rotating it downward and slipping it under the
catch [4].
d.
Ensure that there is no debris on the top of the CPU die.

 Loading...


