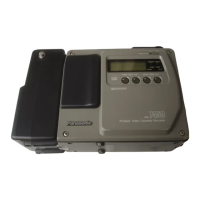
1-15.Controller {Optic n)
• Remote
Controller
AG-A600
Connection
Remote Controller AG-A600
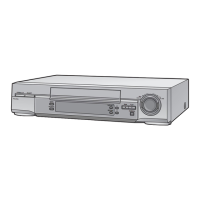
1-16. Rack Mount Adaptor {Option)
The Rack Mount Adaptor AG-M730-E
is
used
to
mount the unit
on
the IEC standard rack.
Installation of the AG-M730-E
1.
Remove the 4 screws
from the side cabinet of the unit.
2. Use the 4 screws supplied
with the AG-M730-E
to
install
it
to the unit.
I
Install It
with
the
notch
down
The optional Remote Controller AG-A600 allows RECORD: PLAYBACK, FAST FORWARD, REWIND, PAUSE/STILL, Mounting on the IEC standard rack
VARIABLE SPEED PLAYBACK
(0-9
t1mes
normal tape speed)
1n
forward or reverse direction and STOP operations. Operation
is
possible with the unit's operation buttons even when the AG-A600
is
connected to the unit.
Connection with the REMOTE Connector
&fi\mark~
.;:;::..
.::::::::
Press
Align the "
.A.
" marks and connect
it
to the REMOTE Connector
while keeping the cable connector button pressed.
1.
2.
Remove the 4 rubber legs
from the bottom of the unit.
Mount the unit on the rack.
•
Be
sure
to
install a ventilation fan (air volume of about 3.3 m
2/sec.)
on
the top of the rack.
Installation of slide rails
• Use a complete slide rail and bracket unit for 18" length (part
No.
CC3004-99-0017) or 24" length (part No. CC3004-99-0018)
of Chassis Track. (The complete slide rail and bracket unit
is
not available from Panasonic.)
• When using the slide rail, remove the setscrews. The setscrews
can
be
removed
by
pulling
in
the direction of the arrow. Keep
the removed setscrews, washers and spacers
in
a proper
place.
•
For
the details, contact your authorized service personnel.
IEC standard rack
Fasten
it
to the
rack
with
.._~::
Setscrew
Washer Spacer
OPERATING
INSTRUCTIONS-
Slide rail
 Loading...