62
VQT2J52
Changing the unit’s settings
You can change the unit’s settings using Setup menu.
≥The settings remain intact even if you switch the unit to standby.
1 While stopped
Press [FUNCTION MENU].
2 Press [3, 4] to select “Others” and
press [OK].
3 Press [3, 4] to select “Setup” and
press [OK].
4 Press [3, 4] to select the tab and
press [1].
5 Press [3, 4] to select the menu and
press [OK].
6 Press [3, 4] to select the option and
press [OK].
To return to the previous screen
Press [RETURN ].
To exit the screen
Press [EXIT].
(All factory default settings are indicated with underlined text.)
∫ Favourites Edit
You can create four Favourites of channels for making viewing and
recording easier. Editing these Favourites does not affect the
channel setting itself.
≥Timer recording may not work correctly if you edit the Favourite
during timer recording standby.
To add channels to a Favourite
1 Press [3, 4] to select the channel in the “All Channels” column
and press the “Yellow” button.
≥Repeat this step to add other channels.
≥Press the “Blue” button to add all the available channels to the
Favourite. (This function is available only when no channels
have been added to the Favourite.)
2 Press [OK] to save the Favourite.
To change the order of channels of a Favourite
1 Press [1]
§
.
2 Press [3, 4] to select the channel in the “Favourite” column to
move and press the “Green” button.
3 Press [3, 4] to select the new position of the channel and press
the “Green” button.
≥Repeat the steps 2 – 3 to move other channels.
4 Press [OK] to save the Favourite.
To delete channels on a Favourite
1 Press [1]
§
.
2 Press [3, 4] to select the channel in the “Favourite” column and
press the “Yellow” button.
≥Repeat this step to delete other channels.
≥Press the “Blue” button to delete all the channels from the
Favourite.
3 Press [OK] to save the Favourite.
Deleting a channel from a Favourite does not affect the channel
itself. You can still select the channel from the “All Channels”
category.
To change the name of a Favourite in the “Favourite”
column
1 Press [1]
§
.
2 Press the “Red” button.
(> 45, Entering text)
§
When the station name of the “All Channels” column is highlighted
∫ Auto Setup Restart
Download from TV
You can restart auto channel setting if set up (> 10) fails for some
reason.
Select “Download from TV” when you connect the unit to a Q Link
compatible TV with a fully wired 21-pin Scart cable or a VIERA Link
(HDAVI Control 3 or later) compatible TV with an HDMI cable.
When the confirmation screen appears
Press [2, 1] to select “Yes” and press [OK].
You can also use the following method to restart Auto Setup.
When the unit is on and stopped
Press and hold [X CH] and [CH W] on the main unit until the
Active Antenna setting menu ([For]Germany[and]Austria[) or
Country setting screen ([For]Italy[and[Spain]) appears.
All the settings except for the ratings level, ratings PIN, clock settings
and remote control code, etc. return to the factory preset. The timer
recording programmes are also cancelled.
∫ DVB Manual Tuning
You can set channels manually that the DVB Auto Setup could not
complete successfully.
1 Press [3, 4] to select the channel you want to set.
2 Press [2, 1] to adjust the frequency.
≥The frequency rises and falls in steps of 0.5 MHz.
≥Adjust the frequency by checking the signal strength and signal
quality displays.
[Refer to “Signal Condition” (> 63) for signal quality and signal
strength.]
3 Press [OK] to start scan.
The set channel is displayed in the table.
4 Press [EXIT] and press [WXCH] to check that applicable
channels have been selected.
∫ Add New DVB Channels
You can search for newly added terrestrial digital channels to receive.
The unit starts searching for
newly available terrestrial digital
channels. This takes about
5 minutes.
A message is displayed when
the search is finished.
“No new DVB channels found.”
is displayed when no new channels can be found.
Press [OK] to save the newly found channels.
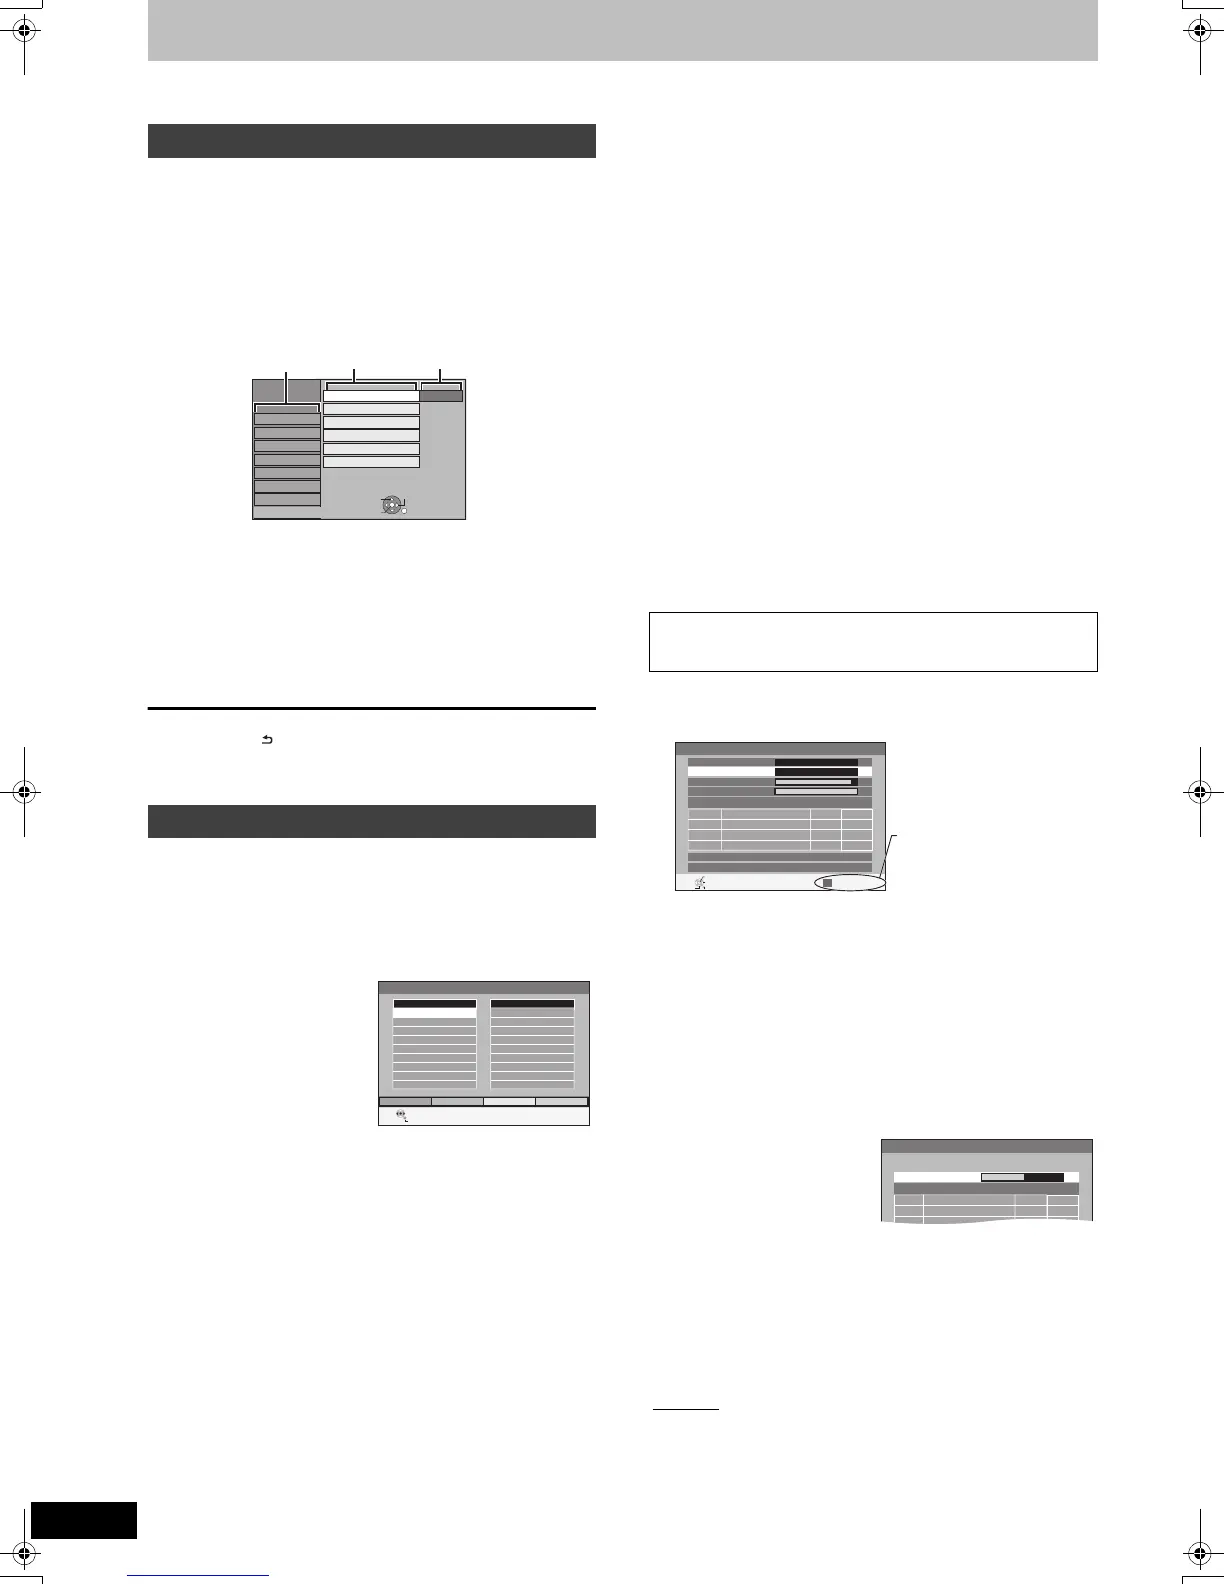
Common procedures
Tuning
Press the “Green” button to
select the Favourite.
Setup
Remote Control
Clock
DivX Registration
System Update
DVD 1
Standby Settings
Disc
Picture
Sound
Display
Tuning
Connection
VHS
Others
OK
RETURN
TAB
SELECT
Initialize
Favourites Editor
RETURN
SELECT
Favourite Select
Add All Add
All Channels
2 ABC
20 ABC HDTV
Favourite 1
[For]Germany[and]Austria[
∫ Settings for Digital Channels
Press [OK] to show the following settings.
∫ New Channel Message (> 17)
When a new DVB channel is added this unit will be informed
automatically. Then the confirmation message appears. If you
select “Yes” on the display, Auto-Setup starts (all channel settings
are deleted. The timer recording programmes are also cancelled.).
[Automatic
]
[Off] The Channel Messages are not shown.
DVB Manual Tuning
Frequency
MHz
NewChannel Name Type
RETURN
0 10
0 10
[CH24]
498,0
Signal Quality
Signal Strength
Channel System
Western Europe (CCIR)
Change Channel System
OFFSET
START SCAN
CH
TV : 0 Radio : 0 Data : 0
No.
If there is no signal quality
and/or signal strength, press
the “Red” button and select
the correct channel system.
Add New DVB Channels
Scan CH 5 69
CH QualityChannel Name Type
DMR-EZ49VEGEC-VQT2J52_eng.book 62 ページ 2010年1月7日 木曜日 午後4時0分
 Loading...