6. Stabiliser, Zoom and Flash
156
3
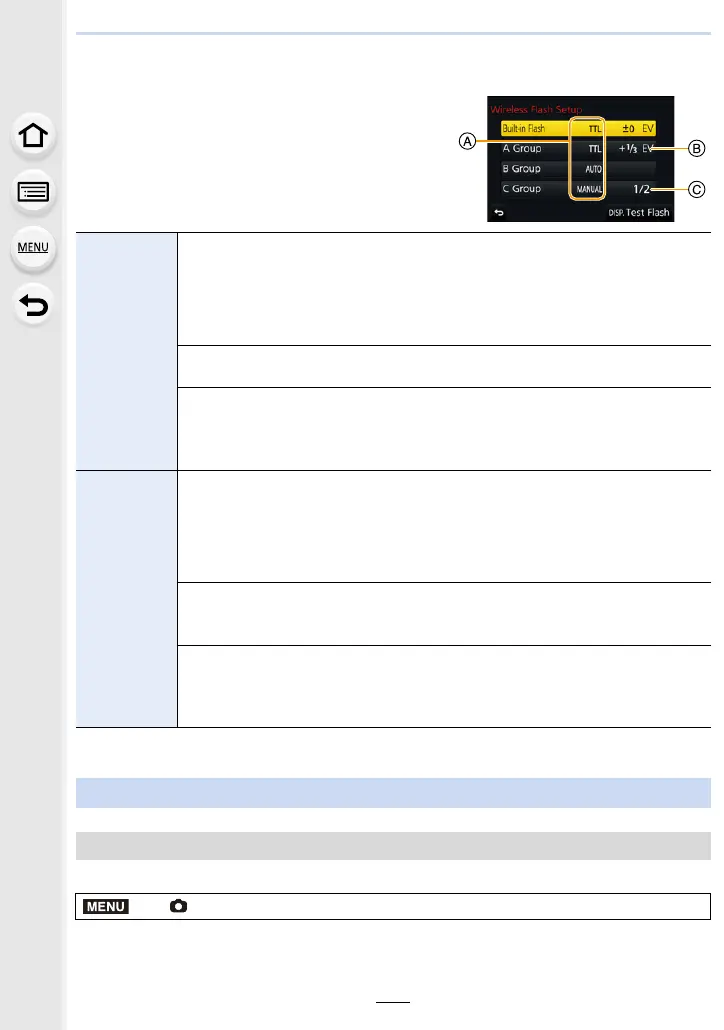
Press 3/4 to select an item and then press [MENU/SET].
• Press [DISP.] to fire a test-flash.
A Firing Mode
B Flash output
C Luminosity ratio
¢This option is not displayed when the flash (DMW-FL200L: optional) is attached to the camera.
Select the menu. (P51)
Settings: [HIGH]/[STANDARD]/[LOW]
[Built-in
Flash]/
[External
Flash]
[Firing Mode]
[TTL]: The camera automatically sets the output.
[AUTO]
¢
: Flash output is set by the external flash.
[MANUAL]: Set the luminosity ratio of the external flash manually.
[OFF]: The flash on the camera side emits only communication light.
[Flash Adjust.]
Set the flash output of the camera manually when [Firing Mode] is set to [TTL].
[Manual Flash Adjust.]
Set the luminosity ratio of the external flash when [Firing Mode] is set to
[MANUAL].
• You can set from [1/1] (full brightness) to [1/128] in steps of 1/3.
[A Group]/
[B Group]/
[C Group]
[Firing Mode]
[TTL]: The camera automatically sets the output.
[AUTO]: The wireless flashes automatically set the output.
[MANUAL]: Set the luminosity ratio of the wireless flashes manually.
[OFF]: The wireless flashes of the specified group will not fire.
[Flash Adjust.]
Adjust the output of the wireless flashes manually when [Firing Mode] is set to
[TTL].
[Manual Flash Adjust.]
Set the luminosity ratio of the wireless flashes when [Firing Mode] is set to
[MANUAL].
• You can set from [1/1] (full brightness) to [1/128] in steps of 1/3.
Using other settings for wireless flash recording
Setting the output of communication light
> [Rec] > [Flash] > [Communication Light]
 Loading...