VQT2S30
80
Advanced (Recording pictures)
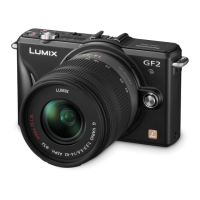
AF area can be moved when [š] is selected. The size of AF area can also be changed.
1 Touch the subject.
•
AF area setting screen is displayed.
• Press and hold the [Q.MENU] button until the AF area
setting screen is displayed. AF area can then also be
moved by pressing the cursor button toward 3/4/2/
1.
• The AF area can be set freely at a position on the
screen. (It cannot be set to edge of the screen)
• The AF area returns to the center when [‚] is pressed.
• When the [FOCUS AREA SET] is set to [Fn BUTTON SET] (P136), AF area setting
screen can also be displayed by pressing 4.
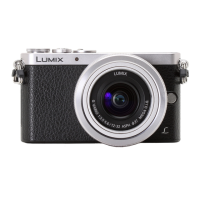
2 Touch the slide bar to change the size of the AF
area frame.
•
It can be changed to 4 different sizes of “spot” A,
“normal” B, “large” C, and “extra large” D.
• It is also possible to rotate the rear dial to the right to
make it larger. Rotate it to the left to make it smaller.
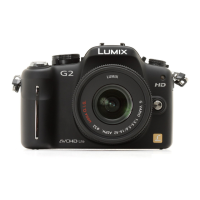
3 Touch [SET].
•
AF area with same function as [Ø] is displayed in the
touched position, with the Face Recognition frame still
displayed.
• AF area will turn yellow, and Face Recognition frame
will turn white.
• Setting of the AF area frame is canceled when
[CANCEL] is touched.
DMC-G2KPP-VQT2S30_eng.book 80 ページ 2010年4月13日 火曜日 午後9時20分
 Loading...