Chapter 2 Getting Started — Removing/attaching the projection lens
44 - ENGLISH
Removing/attaching the projection lens
Removing and attaching methods of the projection lens are same for both standard zoom lenses and optional lenses.
Move the projection lens to the home position before replacing or removing the projection lens. (x page 61)
Attention
f Replace the projection lens after turning off the projector.
f Do not touch the electric contacts of the projection lens. Dust or dirt may cause poor contact.
f Do not touch the surface of the projection lens with your bare hands.
f Before attaching the projection lens, remove the lens cover attached to the projection lens.
Note
f In case of the ultra short focus zoom lens (Model No.: ET-DLE085), attachment/removal procedures of the lens mount cover are different.
Refer to the user manual supplied with ET-DLE085 for details.
f For attachment/removal procedures of the xed-focus lens (Model No.: ET-DLE030), refer to the user manual supplied with ET-DLE030.
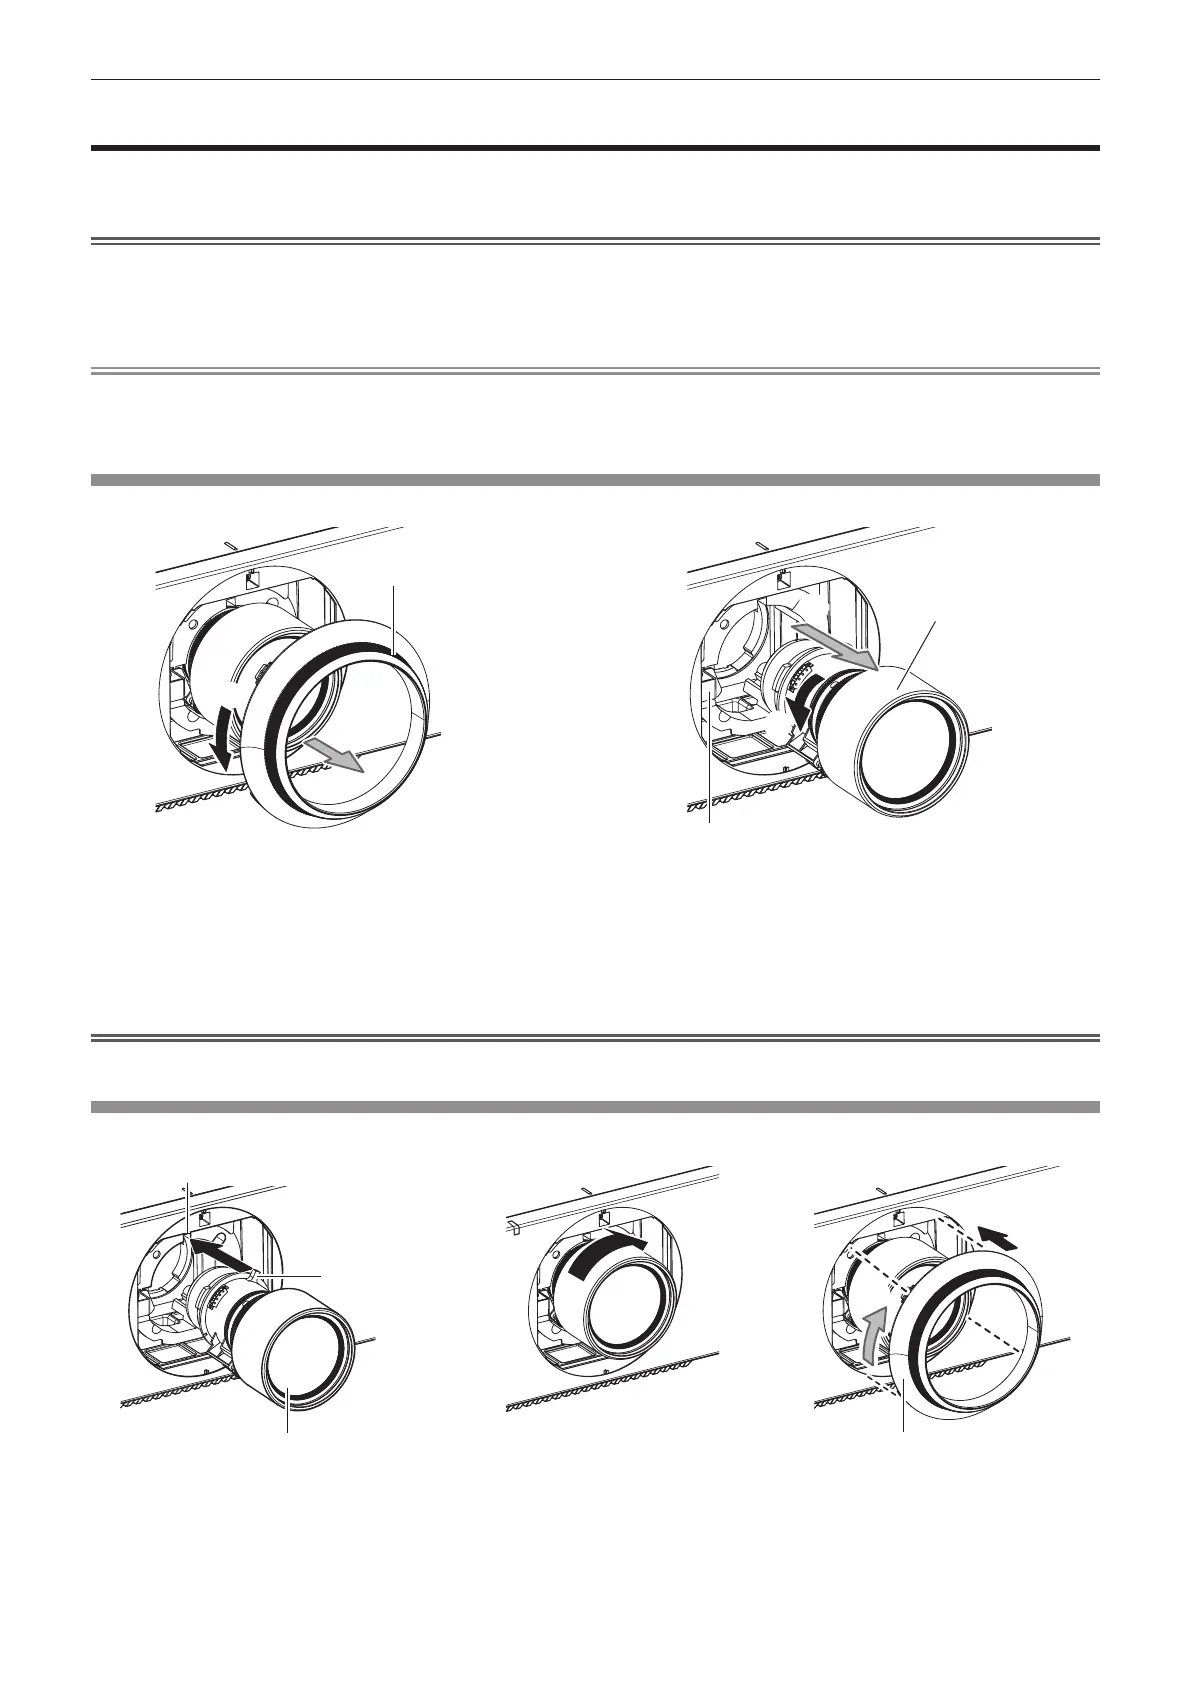
Removing the projection lens
Remove the projection lens using the following procedure.
(ii)
(i)
(i)
(ii)
(iii)
Fig. 1
Lens mount cover
Projection lens
Lens release button
Fig. 2
1) Turn the lens mount cover counterclockwise and remove. (Fig. 1)
2) While keep pressing the lens release button, turn the projection lens counterclockwise to the end and
remove. (Fig. 2)
Attention
f Store the removed projection lens where it will be free from vibration and impact.
Attaching the projection lens
Attach the projection lens using the following procedure.
(ii)
(i)
Guide groove
Guide
Projection lens
Fig. 1
Fig. 2 Fig. 3
Lens mount cover
1) Remove the lens mount cover, and align the projection lens guide to the guide groove of the projector
and insert to the end. (Fig. 1)

 Loading...


