Note: Refer to the diagrams of D-Amp P.C.B. (Item 20.4.) for
location of the part.
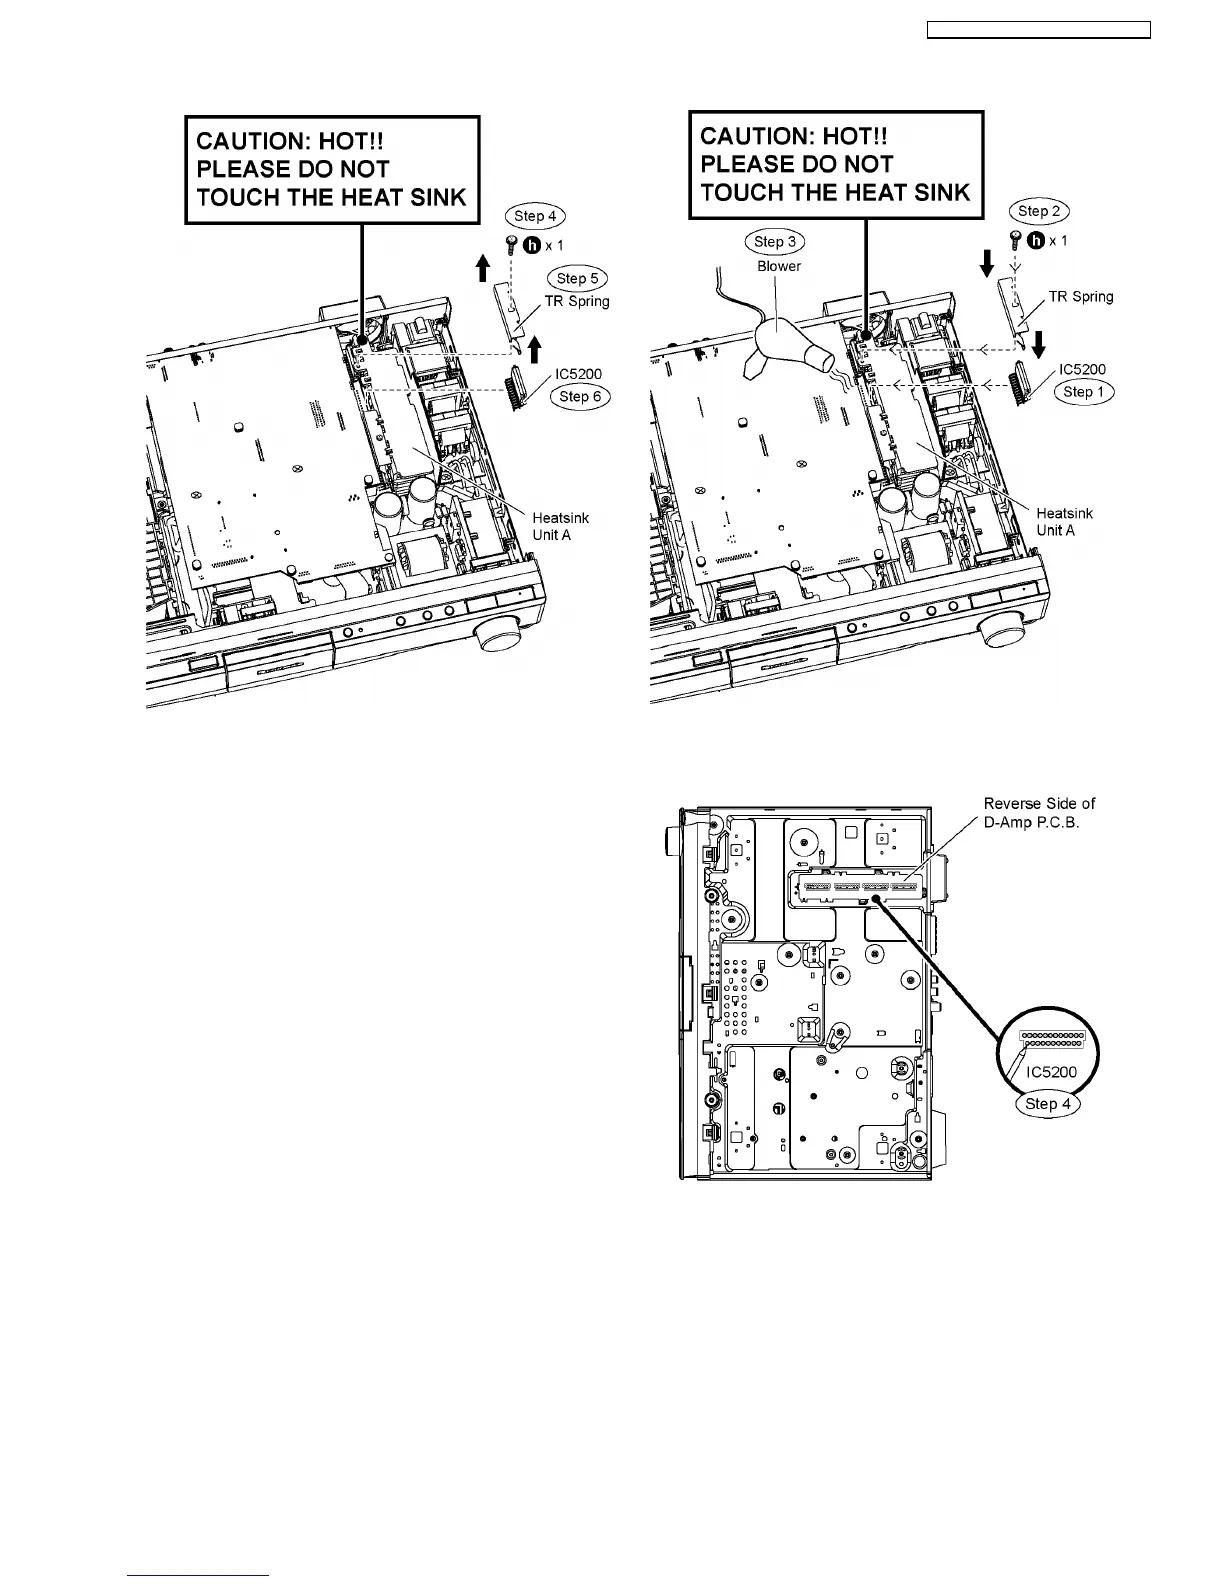
9.17.1. Assembly of the Digital Amp IC
(IC5200)
Step 1 Fix the digital amp IC (IC5200) to the heatsink unit A.
Step 2 Screw the TR spring to the heatsink unit A.
Step 3 Use a blower to remove the minute particles that might
be caused after the process of the screwing TR spring to the
heatsink unit A.
Step 4 Solder pins of the digital amp IC (IC5200) on the
reverse side of D-Amp P.C.B.
Special Note: Ensure pins of the digital amp IC (IC5200) are
properly seated and soldered on D-Amp P.C.B.
Step 5 Follow (Step 5) to (Step 6) of Item 9.17.1
9.18. Replacement of Digital Amp IC
(IC5300)
•
• •
• Follow (Step 1) to (Step 3) of Item 9.3.
•
• •
• Follow (Step 1) to (Step 2) of Item 9.16.
Step 1 Desolder pins of the digital amp IC (IC5300) on the
reverse side of D-Amp P.C.B.
53
SA-PT560E / SA-PT560EB / SA-PT560EG