CONNECTION OF OPTIONAL UNITS
I-26
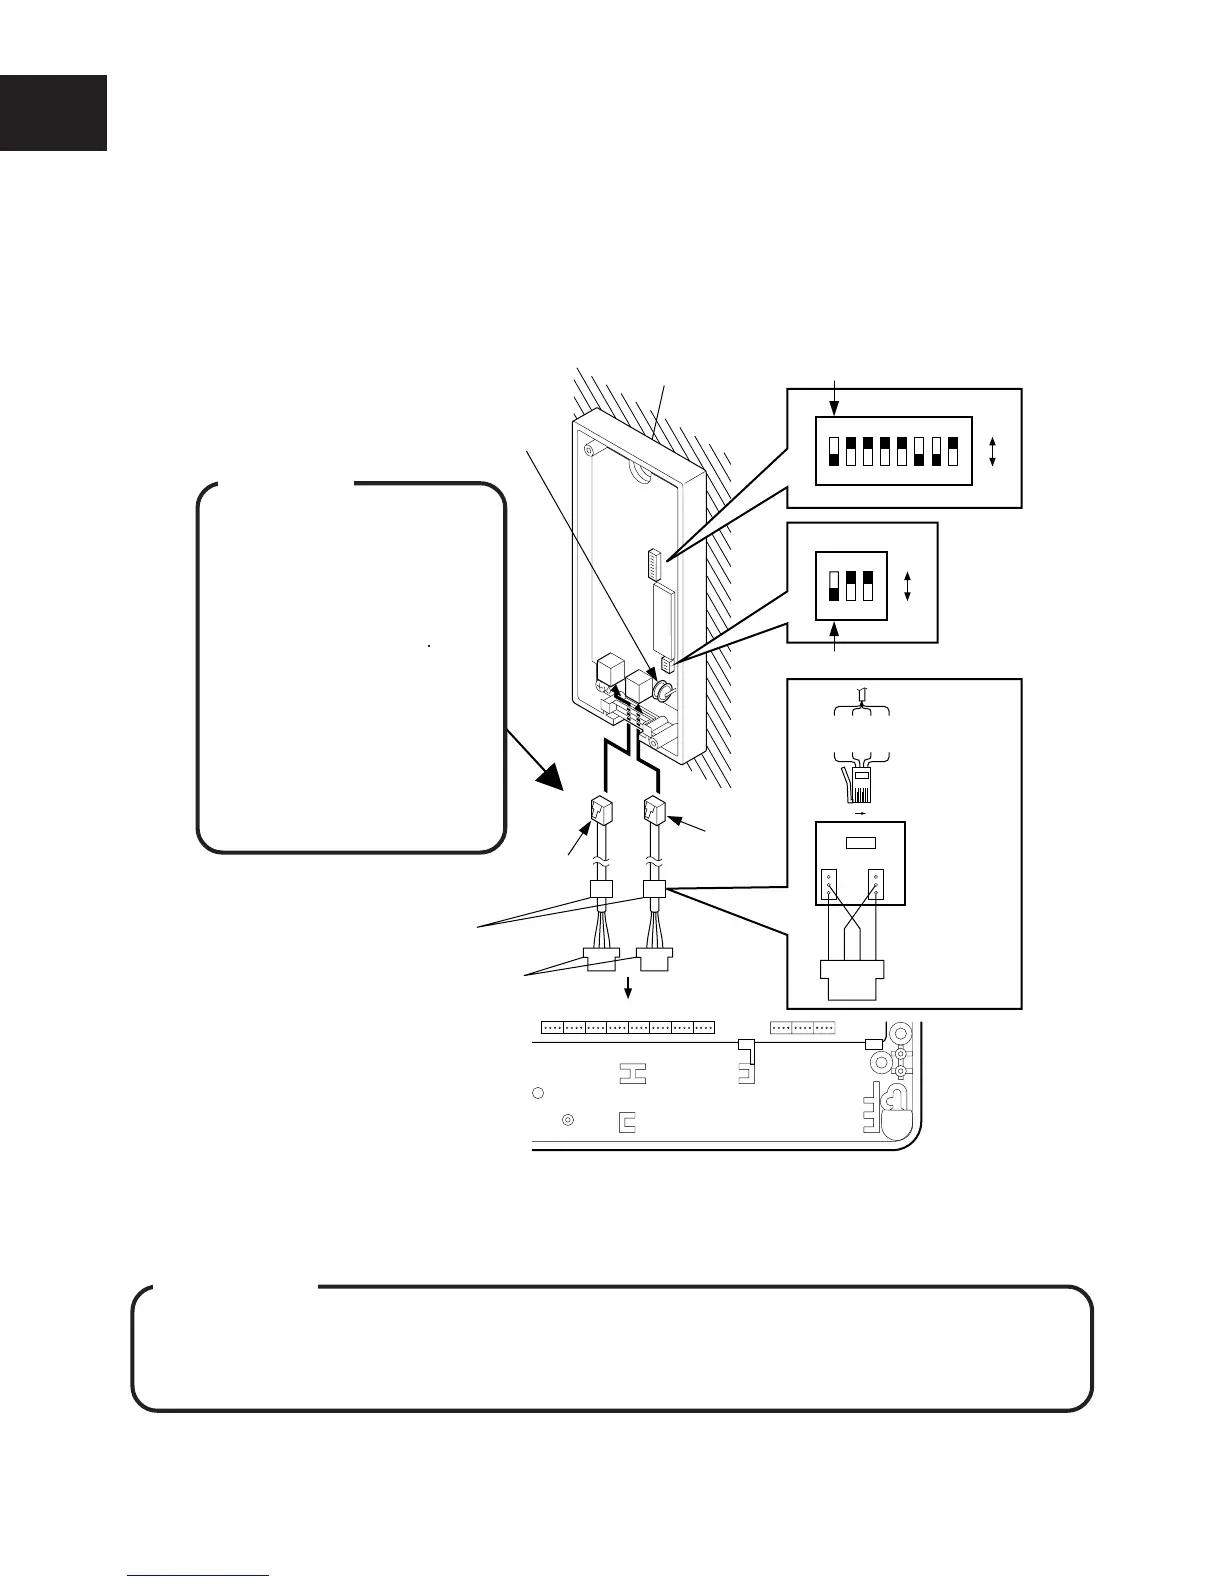
● Connecting the DISA OGM Unit
When you use a DISA OGM Unit, programming must be performed (See Telephone Type Setting
(10-25) 01# of MODE 4).
q Connect the internal line to the main unit using a DDK connector cable and secondary socket
(LJU).
w Connect the modular plug to the DISA OGM Unit and replace the DISA OGM Unit’s top cover.
NOTE : When using only 1 line, connect the cable to Line 1.
● DIP Switch Settings
IMPORTANT
To register the contents of the Dip switches either:
qq
qq
q
Turn off the main switch and turn it on again.
ww
ww
w
Disconnect the main power on the line 1 side and connect it again.
CCU
DDK connector
DISA OGM Unit
Lithium Battery
123
ON
OFF
SW 1
12345678
ON
OFF
SW 2
SW 2-1
SW 1-1
Line 1
Line 2
Extension connector
w
q
Secondary
Socket (LJU)
Secondary
Socket (LJU)
1
2
3
6
5
4
2(B)
4(L)
3(H)
5(A)
6 1
1234
LABH
DDK connector
WARNING
• Use a plier for tighten-
ing wires to DDK con-
nectors to prevent from
loose wiring.
• Do not bundle internal
lines and AC power
line or exchange lines
together outside the
CCU. Distance of 50cm
is required between
them to assure proper
functioning.