Chapter 3 Installing Drivers for 6000 Boards
33
3.2.4. Configure Touchscreen In Windows Vista / 7
With PenMount Windows Universal V2.2.0.283 and later versions, since the
touchscreen is automatically installed as a digitizer device in Windows Vista/7,
the functions which are built within Windows Vista / 7 such as rotation,
multi-monitors, flicks, and context menu function (which launches a context
menu by user’s long-pressing on touchscreen rather than clicking the
right-mouse button or pressing the application key on the keyboard) will be
supported.
To configure touchscreen in Windows Vista / 7:
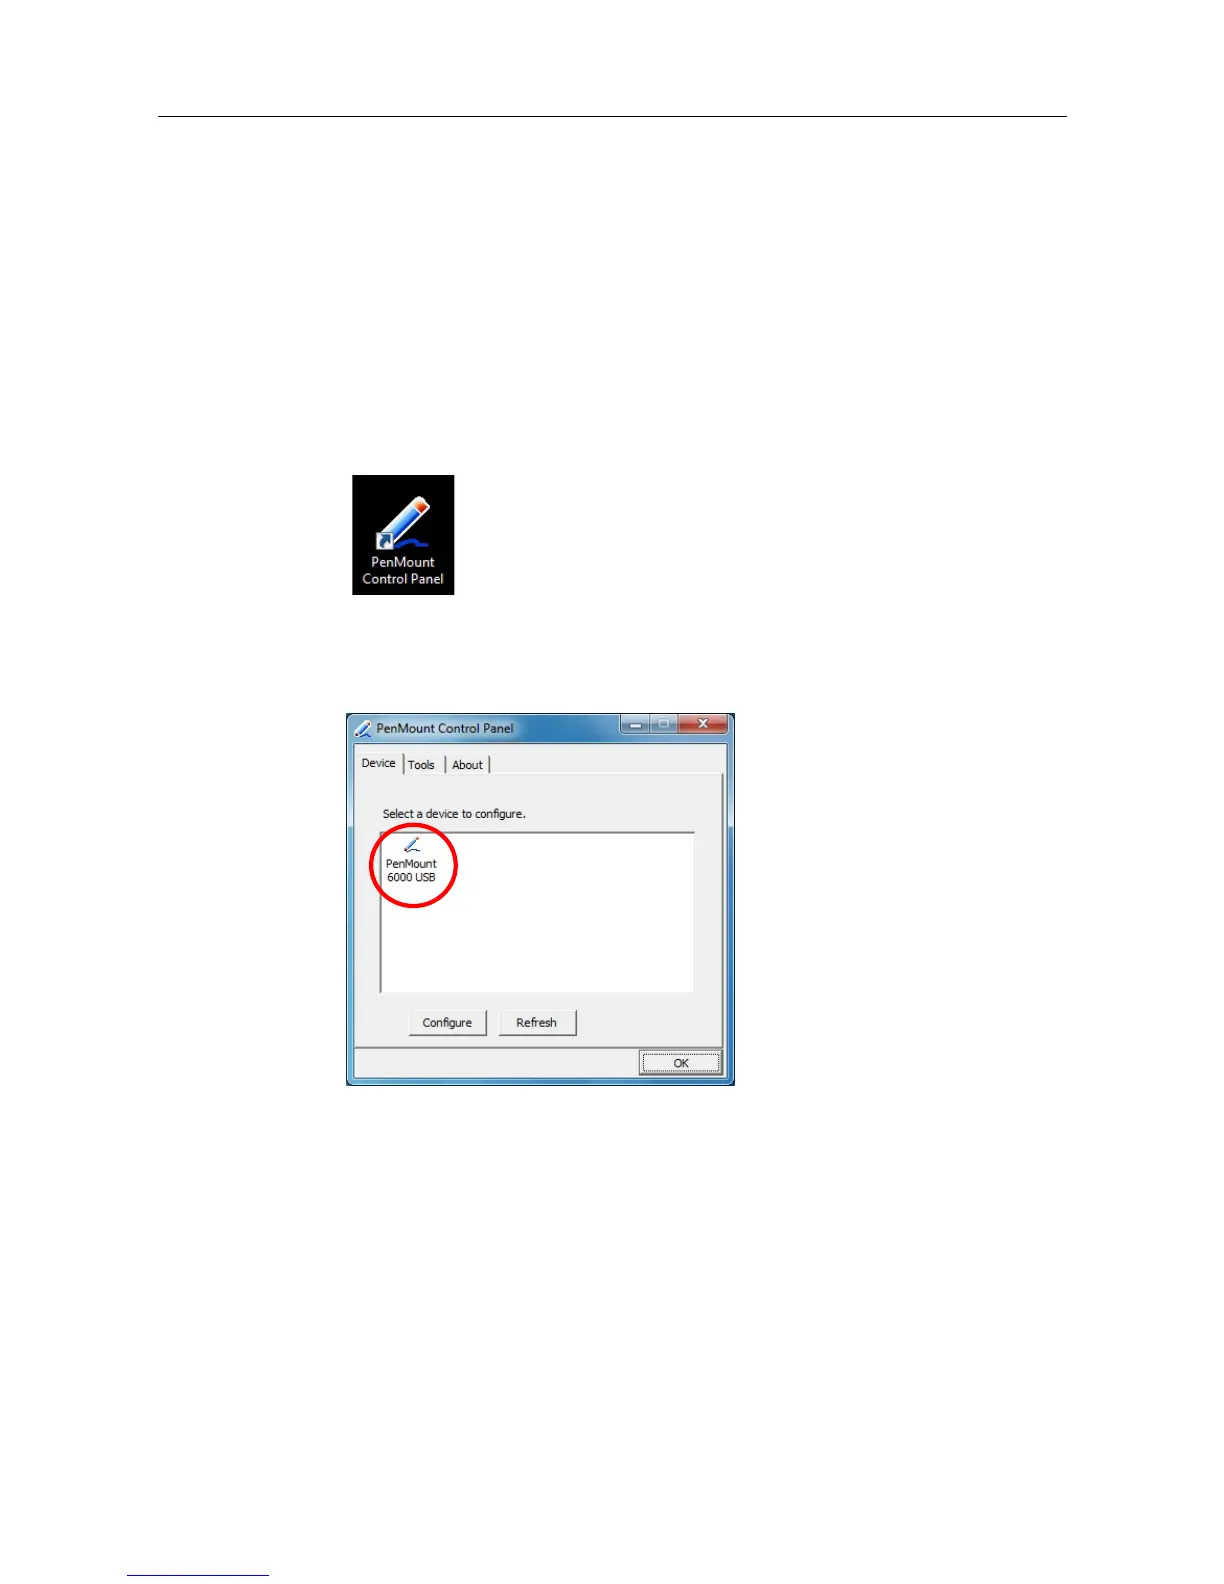
Double-click on the
PenMount Control Panel
icon on the Desktop.
PenMount Control Panel opens. You will be able to see the icon of
PenMount 6000 USB under Device tab. In Device tab, you can see the
devices detected on your system. Select a device and press the Configure
button to configure it.
3.2.4.1. PenMount Control Panel
The functions under PenMount Control Panel are:
Device
In this tab, you can find out how many devices are detected on your system.
Select any device by clicking on its icon.
Calibrate
This function offers two ways to calibrate your touchscreen. ‘Standard
Calibration’ adjusts most touchscreens while ‘Advanced Calibration’ adjusts
aging touchscreens.
Standard Calibration
Click this button and arrows appear pointing to red