Using your Instrument . 35
3. Select the Number Format (the type of decimal separator) using the left and right arrows.
The options are “,” or “.”.
4. Press OK
to store the settings and return to the Utilities folder.
Printer
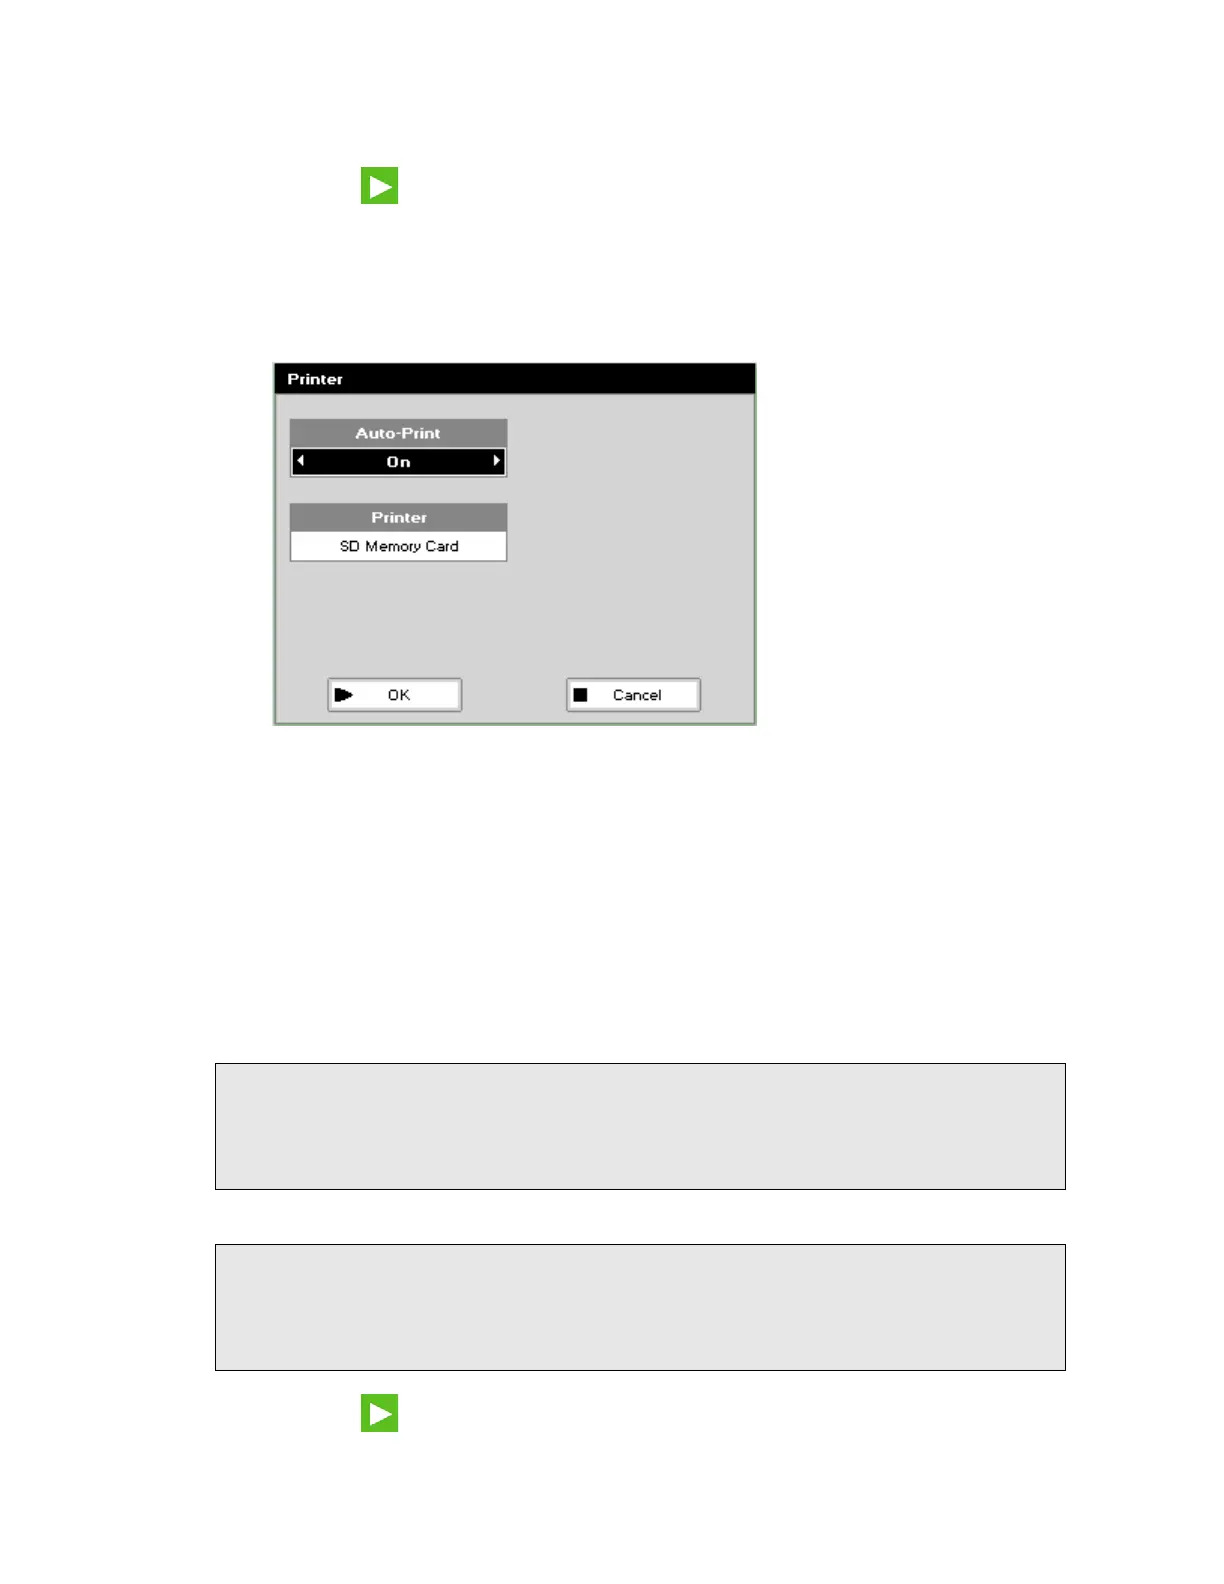
1. Press 3 to select Printer.
The Printer screen is displayed.
2. Select whether Auto-Print is On or Off using the left and right arrows, and then press
the down arrow.
When Auto-Print is On, the results are automatically printed after a measurement is taken
or when you exit the application, depending on the method. The appropriate icon for your
Printer option will be displayed in the top right corner of the method results screen.
When Auto-Print is Off, printing has to be initiated manually.
3. Select how the data are sent.
The options are Built-in (the internal printer), Computer (USB) (to a computer via USB
port), SD Memory Card or Computer (Bluetooth) (to a computer via Bluetooth).
The options available depend on what is installed in your instrument.
NOTE: If SD Memory Card is selected, data is saved as .pvc files in a folder that depends
upon the instrument serial number: \<Serial number>\PVC. The method type is
saved in the file name. For information on viewing your results and saving your data
into other formats, see “Lambda Bio XLS Report Utility Viewer” in the
Lambda Bio/XLS Print Utility User’s Guide
(L6050015).
NOTE: If an SD Memory Card is installed in your instrument, the LED next to the card will be
lit while data is being printed to the card. The card should not be removed from the
instrument while the LED is lit as this could corrupt your data. For some methods you
have to exit the method to end printing. See the “Receiving Print Data” in the
Lambda Bio/XLS Print Utility User’s Guide
(L6050015) for more information.
4. Press OK to store the settings and return to the Utilities folder.