NOTICE
Keep all parts clean from contaminants.
Contaminants may cause rapid wear and shortened
component life.
Do not drain the engine lubricating oil when the
engine is cold. As the engine lubricating oil cools,
suspended waste particles settle on the bottom of the
oil pan. The waste particles are not removed with
draining cold oil. Drain the oil pan with the engine
stopped. Drain the oil pan with the oil warm. This
draining method allows the waste particles that are
suspended in the oil to be drained properly.
Failure to follow this recommended procedure will
cause the waste particles to be recirculated through
the engine lubrication system with the new oil.
Oil and Filter Change Intervals
There are several other factors that can alter the
engine oil and filter change interval.
• If the engine is using engine oil analysis to
determine oil and filter change period.
• The engine is working in a severe service
environment/Load Factor
• Infrequent operation of the engine
Refer to this Operation and Maintenance Manual,
“Severe Service Application” for more information on
reducing the engine oil and filter change period.
If the engine is operated in severe service conditions,
Perkins recommends the use of engine oil sampling.
Refer to this Operation and Maintenance Manual,
Engine Oil sample - Obtain for more information.
Drain the Engine Lubricating Oil
Operate the engine so that the lubricating oil is warm,
then stop the engine. Isolate the electrical power to
the starter.
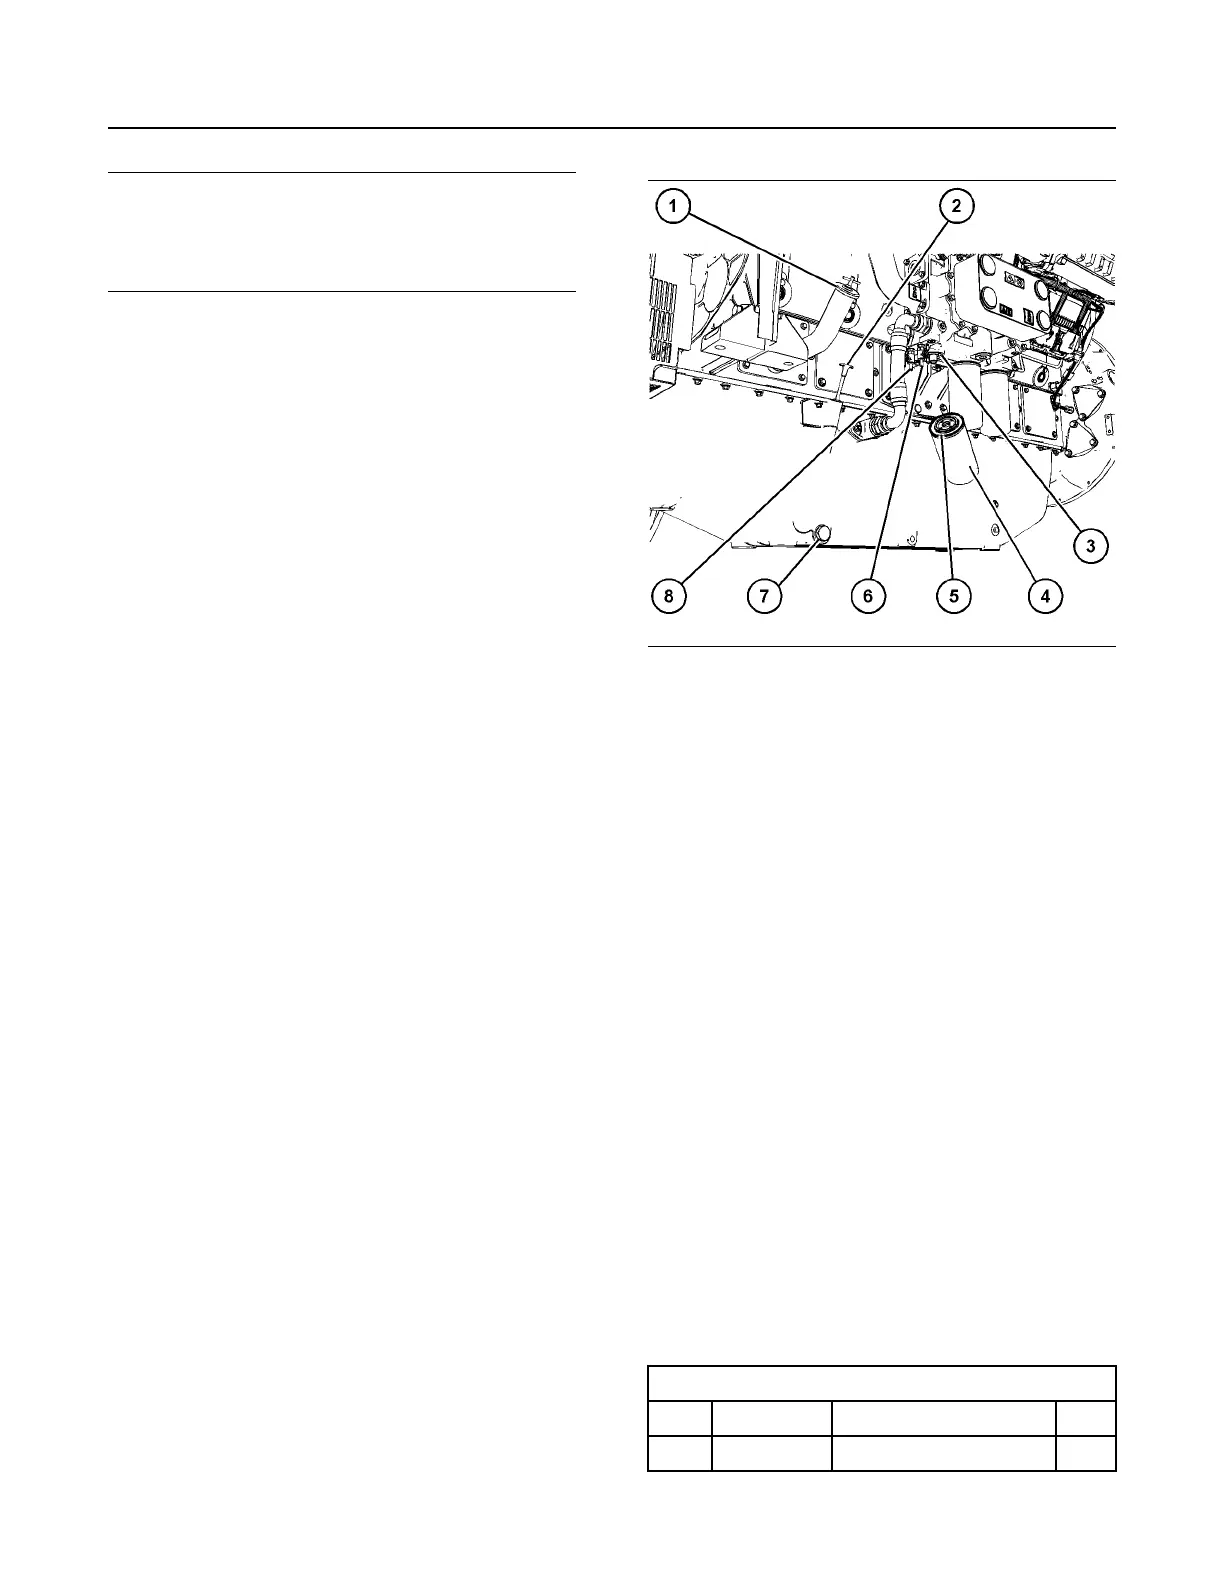
Illustration 91 g07694547
Typical example of a later engine
1. Place a suitable container below the engine oil
pan. Remove the drain plug (7). Allow the engine
oil to drain.
Note: Ensure that the vessel that will be used is large
enough to collect the waste oil.
2. Remove the sealing washer from the drain plug
(7). Discard the sealing washer.
3. Install one end of suitable tubing to the drain valve
(8) on the engine oil cooler. Place the other end of
the tubing in the drain container below the engine
oil pan and open the drain valve.
4. Install one end of suitable tubing to the drain valve
(6) on the engine oil cooler. Place the other end of
the tubing in the drain container below the engine
oil pan and open the drain valve.
5. Close the drain valve (8) and drain valve (6).
Remove the drain tubing from both valves.
6. Install a new sealing washer to the drain plug (7).
Install the drain plug to the engine oil pan. Tighten
the plug to a torque of 68 N·m (50 lb ft).
Replace the Oil Filter
Table 8
Required Tools
Tool Part Number Part Name
Qty
A
-
Strap Wrench
1
M0163009 83
Maintenance Section
Engine Oil and Filter - Change