VEHICLE RECOVERY AND SPRING BRAKES
If your vehicle is not equipped with
the proper recovery hitch assembly,
contact an authorized dealer to obtain
the proper equipment.
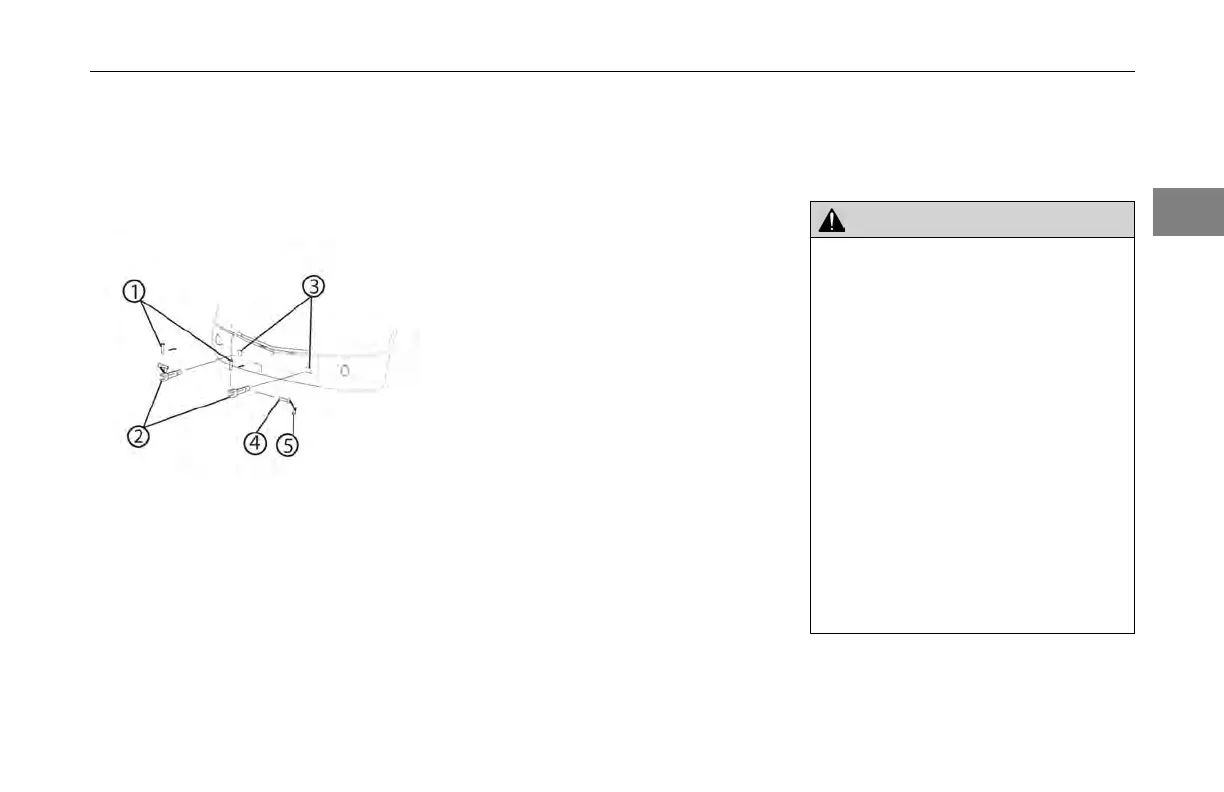
Recovery Hitch Assembly
1 Tow Pin
2 Tow Hitch
3 Square Hitch Socket
4 Lock Pin
5 Lock Tab
Recovery Hitch Installation
Use the
following procedure to install
the Vehicle Recovery Hitches. See
Recovery Hitch Assembly illustration
for part identication.
1. Check square
sockets behind
lower bumper for obstructions,
clear if necessary.
2. With lock
pins removed, insert
hitches through bumper and into
the square hitch socket.
3. Align the
hole in the tow hitch with
the square hitch socket hole.
4. Insert the
lock pin into the square
hitch socket hole and through
the hole in the tow hitch until the
lock tab is within the square hitch
socket.
5. Rotate the
lock pin 90 degrees to
secure the pin in place.
6. Remove the
hitches and store all
parts after recovering the vehicle.
Driver Controlled
Main Differential
Follow these
steps to lock a
driver-controlled main differential.
WARNING!
An open air line on the recovered ve-
hicle will cause a leak in the air sys-
tem of the recovery vehicle if both ve-
hicles’ brake systems are connected.
This could cause a loss of system air,
which can cause the service brakes
not to function, resulting in the sudden
application of the spring brakes caus
-
ing wheel lock-up, loss of control, or
overtake by following vehicles. You
could be in an accident involving death
or personal injury. Ensure that any
air line that has been removed from a
driver-controlled main differential lock
is rmly capped to prevent loss of air
pressure from the recovery vehicle if it
is supplying air pressure.
2
(04/13) Y53-6047–2C 2-15