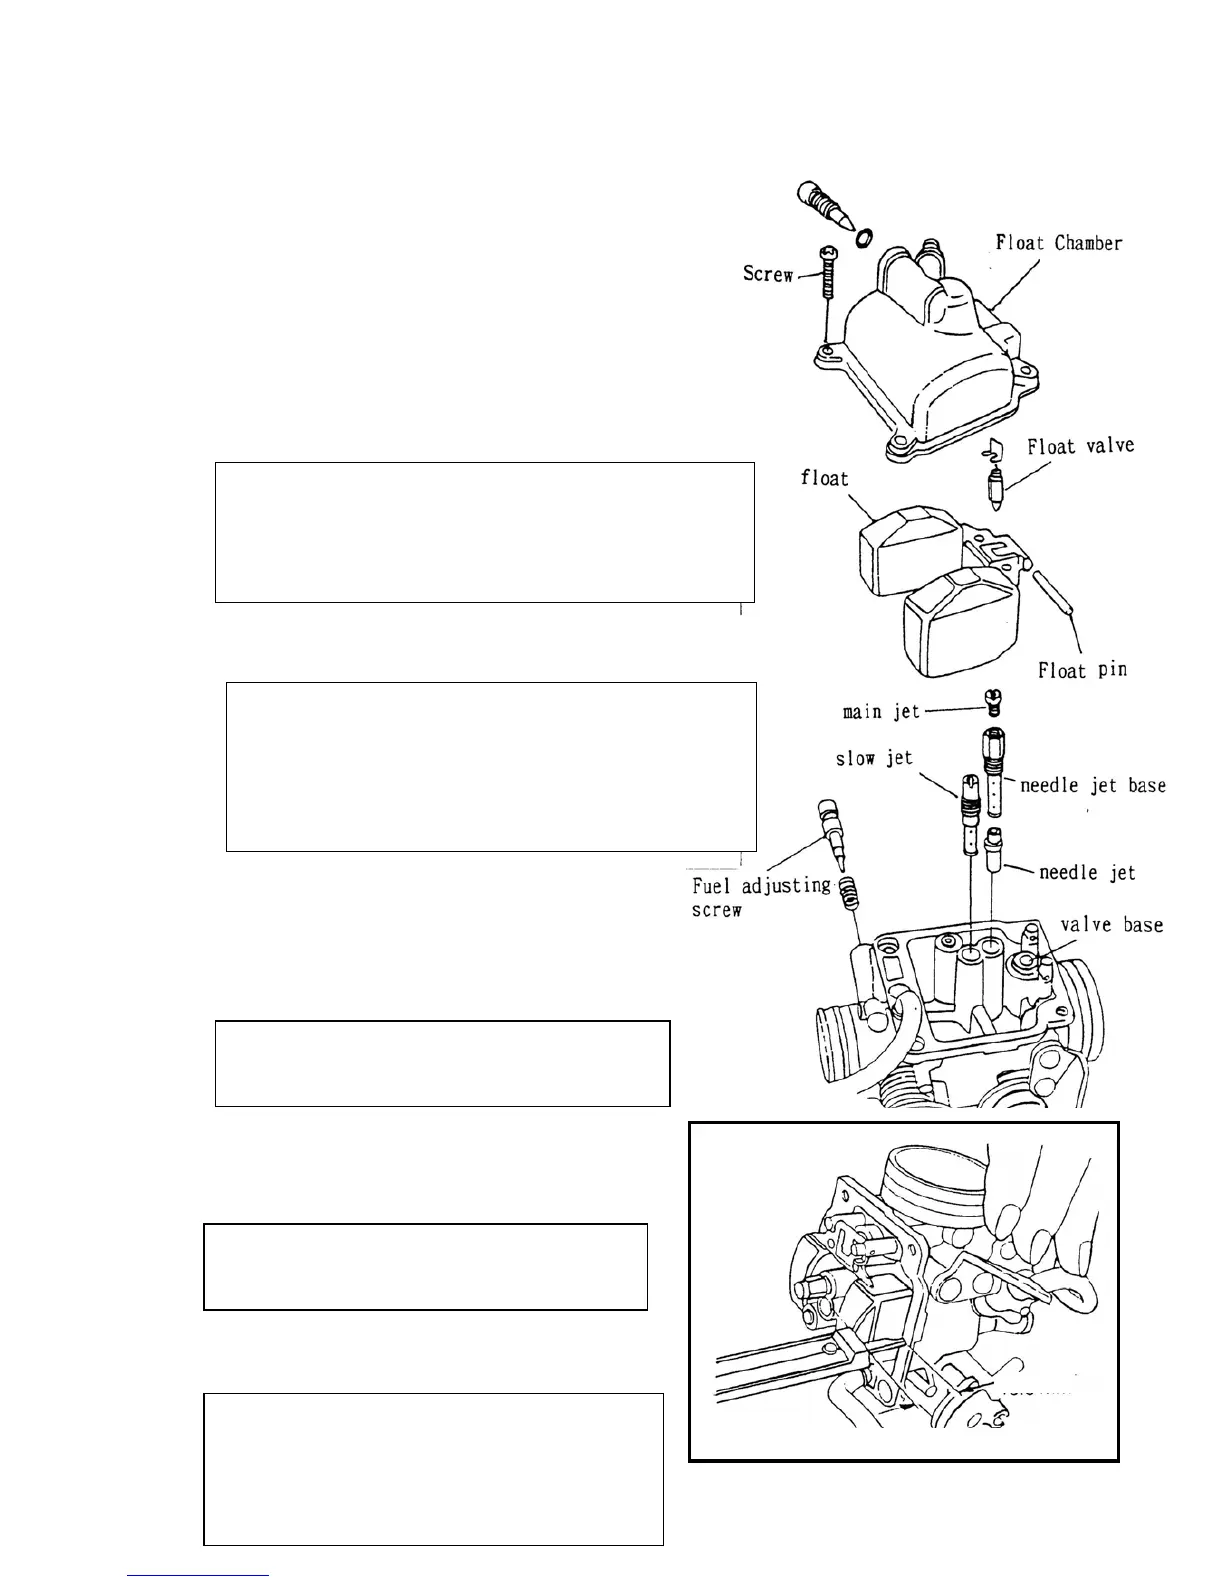
(D)The float nozzle
1.Dismantling
zRemove the screws to take off the float chamber.
zRemove the float, the float pin, and float valve.
2.Checking
zCheck the float valve, valve base to see
whether it is blocked or damaged.
zCheck the float valve, valve base surface
if sectional worn out or dirty.
zRemove the main jet, needle jet base, needle jet,
slow jet and fuel adjusting screws.
zUse the detergent solution to clean the jets. Fuel
adjusting
After cleaning off the blockage and the
dirt, screw
b
low dry by compressed air.
3.Assembling
zAssemble the slow jet, needle jet, main jet and
fuel adjusting screws.
zAssemble the float valve, float and float pin.
4.Checking fuel level
△Note:
When the valve is too dirty or severely worn-not, the
Valve base will not close completely thus will result
In increasing of fuel level and fuel leakage problem.
A new replacement is needed.
Note:
zAvoid any damage on the jets and the fuel adjusting
screws.
zBefore dismantling, record the number of turning
loops.
zNo screwing-in movement by force to avoid any
dama
ce
zCheck after the checking on the float valve
and the float is done.
zPut the float gauge on the float chamber
perpendicularly to the main jet for
measurement.



 To Next Page