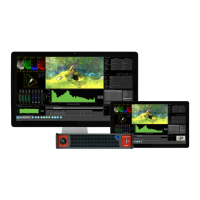
For ease of use and convenience, multiple display layouts can be saved as presets, allowing users to save
bespoke layouts for different operational tasks – accessible from the ‘Preset Bar’ in one click. Once a user
has organized the screen with the instruments they require, a preset can be saved by right-clicking the
‘Instrument Bar’ and selecting ’Save System State As Preset’ from the submenu.
The ‘Preset Bar’ will appear below the ‘Instrument Bar’, with the current screen layout saved as a preset of
default name ‘New Preset’. To rename the preset as desired, right-click the preset button and select
‘Rename Preset’. A prompt window will appear allowing the renaming of the preset by USB keyboard, as
required.
Note: An on-screen keyboard is not provided in this software version.
To save further layout presets, organize the screen as required, and repeat as above.
Selection buttons for all saved presets are available in the ‘Preset Bar’.
To delete a preset, right-click its preset button, and select‘ Delete Preset’. A confirmation dialog box will
appear. To confirm deletion, select ‘Delete’. If you no longer wish to delete the preset, select ‘Cancel’.
To automatically hide the Preset bar from view, right-click the ‘Instrument Bar’ or 'Preset Bar' and check the
‘Auto-hide Presets’ checkbox. To display the ‘Preset Bar’, uncheck the ‘Auto-hide Presets’ checkbox.
Instrument Tabs
This software revision introduces user interface design enhancements. This redesign simplifies and speeds
up the user experience.
As an improvement to the classical Qx instrument user interface, configuration instruments now feature tabs,
providing intuitive grouping and easy access to fundamental settings. Tabs allow for multiple, easy to reach
windows in the same instrument. Submenus are reserved for related auxiliary settings.
As seen in ‘Generator - Configuration’ below, there is now one tab for video generation, and a separate tab
for audio generation.
Tabs are now also employed to provide alternative displays of analysed data, as seen in the Grid View and
List View option in the ‘Analyzer - Ancillary Status’ instrument.
Instrument Navigation
Each instrument also has a submenu. The submenu is activated by right-clicking the mouse in the window,
enabling a drop-down configuration menu. Click and drag on the gray bar at the top of the submenu to move
it. In addition to window-specific commands, the option to ‘Close’ the instrument is provided in its submenu;
as is the option to ‘Dismiss’ the submenu.
Example of drop-down submenu on right mouse click:
Page 10 PHABRIX Qx User Manual
 Loading...