M4735A Service Manual 2-19
Performance Verification Tests
2
To check ECG printing functions:
6. Reconnect the simulator.
Connect the simulator to the M4735A as described in step 1 above.
7. Print a strip.
a. Press Strip to print a strip.
b. Verify that it shows a normal ECG with a clean baseline.
c. Verify that the date, time, and configuration information printed at the
top of the strip is correct.
d. Press Strip again to stop printing.
Shock Advisory Functional Check
This section describes how to check the Shock Advisory function.
1. Set up the simulator.
a. Connect the ECG simulator to the pads cable.
b. Set the simulator for normal sinus rhythm (NSR), 1mV amplitude, at
some nominal rate (e.g., 60 bpm).
2. Set up the M4735A.
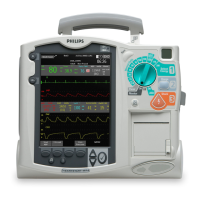
Set the M4735A to AED Mode.
3. Check Shock Advisory with NSR.
a. Press .
b. Verify that the defibrillator responds with No Shock Advised.
4. Check Shock Advisory with Asystole.
a. Set the simulator to Asystole (or turn the simulator off) and press
.
b. Verify that the defibrillator still responds with No Shock Advised.
5. Check Shock Advisory with VF.
a. Set the simulator to VF (Ventricular Fibrillation) and press
.
b. Verify that the defibrillator responds with Shock Advised and charges
up to 150J. If the unit is configured to do so, verify that it automati-
cally prints a strip of the event.
WAR NI NG Do not discharge the stored energy unless you are certain the simulator contains a
50 ohm test load.
c. If the simulator contains a 50 ohm test load, discharge the stored
energy into the test load. If it does not, or you are not sure, wait until
the defibrillator reports Shock cancelled before proceeding.
ANALYZE
ANALYZE
ANALYZE
 Loading...
