Assigning IP addresses and setting up DHCP/TFTP servers
105656_en_05 PHOENIX CONTACT 265
13 Assigning IP addresses and setting up DHCP/TFTP serv-
ers
13.1 Assigning the IP address using IPAssign.exe
Step 1: Downloading and executing the program
• On the Internet, select the link phoenixcontact.net/products.
• Enter the keyword „ipassign“ in the search field.
• Chose the desired or any other product.
The desired program can be found under “Download” and “Software”.
• Double-click on the “IPAssign.exe” file.
• In the window that opens, click on “Run”.
Step 2: “IP Assignment Tool”
The program opens and the start screen of the addressing tool appears.
The program is mainly in English. However, the program buttons change according to the
country-specific settings.
The start screen displays the IP address of the PC. This helps when addressing the mGuard
in the subsequent steps.
• Click on “Next”.
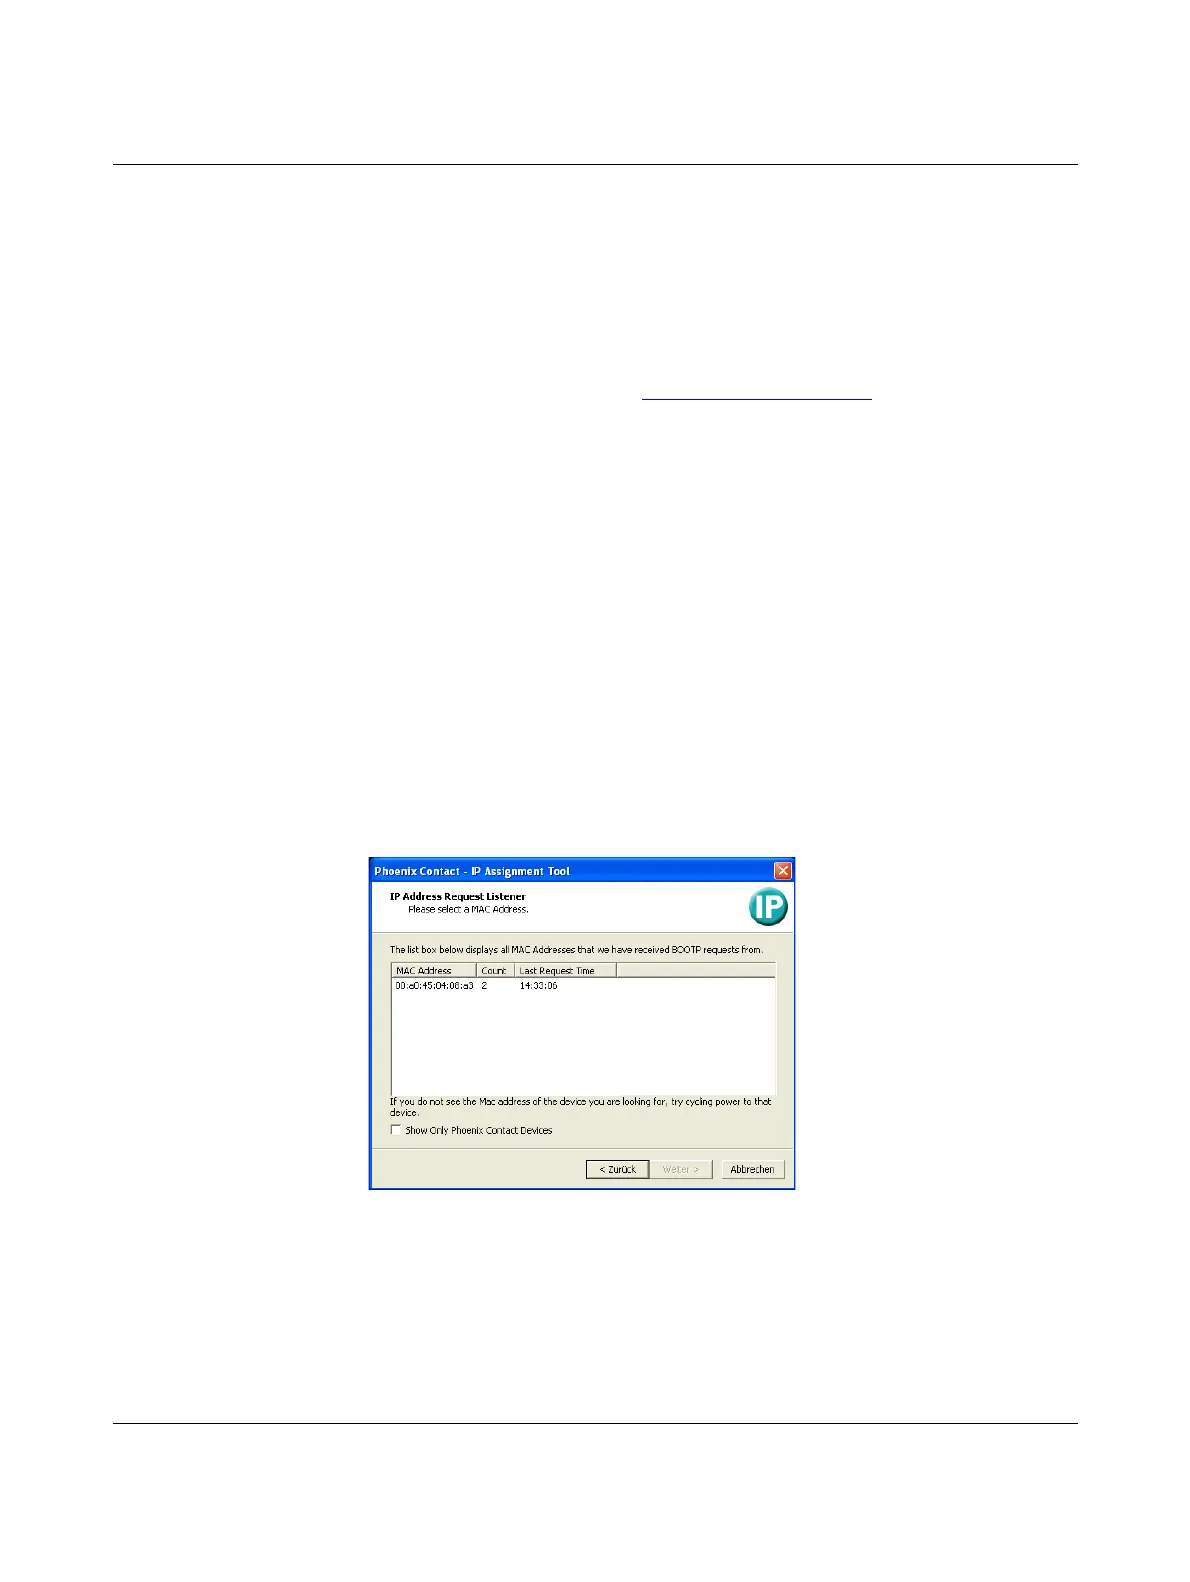
Step 3: “IP Address Request Listener”
All devices sending a BootP request are listed in the window which opens. These devices
are waiting for a new IP address.
Figure 13-1 “IP Address Request Listener” window
In this example, the mGuard has MAC ID 00.A0.45.04.08.A3.
• Select the device to which you would like to assign an IP address.
• Click on “Next”.
 Loading...