29 | User Reference Guide NOCTURN XL Camera
NVT 200-LC-0103
Revision: D
Page 29 of 43
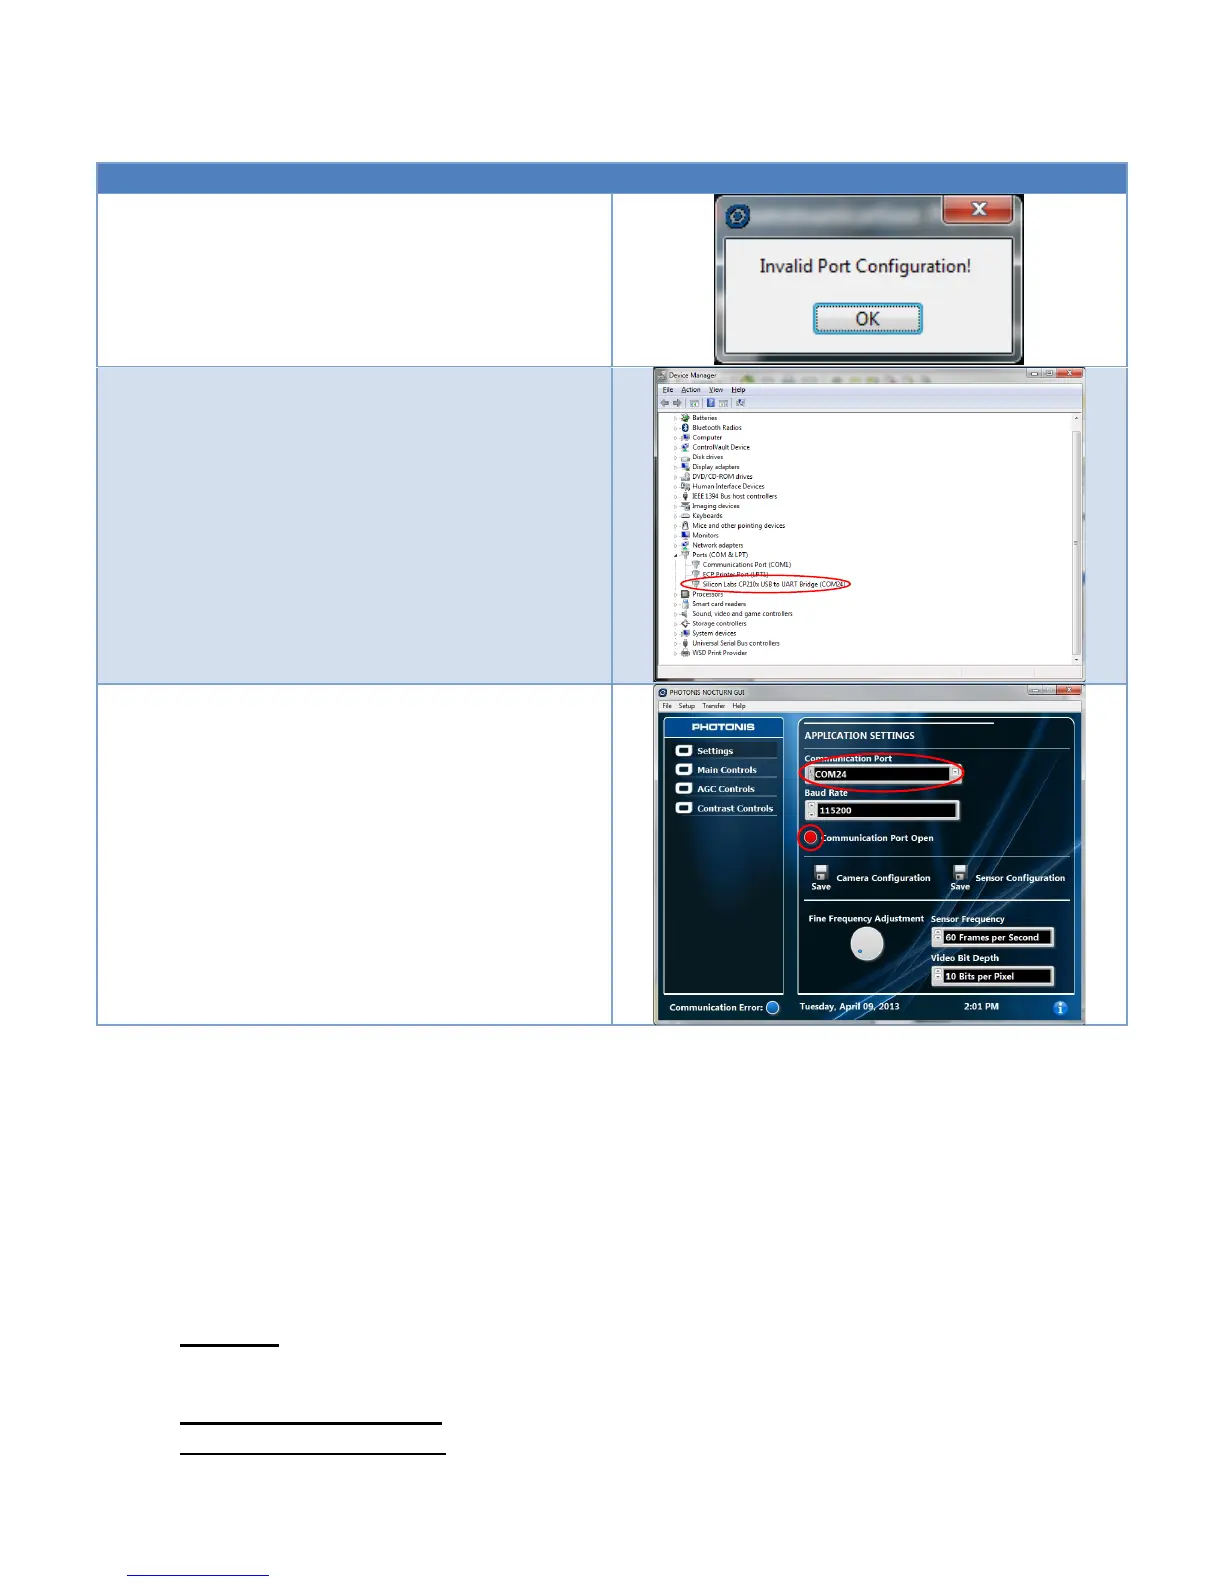
When turning on the Evaluation GUI for the first time,
an error message will be displayed: “Invalid Port
Configuration!” The error is returned because the
camera did not respond to a status request message
on the default communication port. Click the “OK”
button on the message window.
Determine the camera COM port by looking in
Windows device manager. The NOCTURN COM port
number can be seen under the “Ports (COM & LPT)”
and will be labeled “Silicon Labs CP210x USB to UART
Bridge (COM XX)”.
On the “Settings” tab of the GUI enter the “COM XX”
value found in device manager in the “Communication
Port” control. Make sure that the “Baud Rate” control is
set to 115200 and click the red button indicator next to
the “Communication Port Open” control. The red
indicator should turn blue.
At this point, communication with the camera should be
enabled and active. The COM port value will be saved
as the default the next time the GUI is turned on.
GUI ENVIRONMENT
The NOCTURN XL evaluation GUI is meant to provide a simple user interface to control some of the
main features of the NOCTURN XL camera. Functions that are not implemented in the GUI can be
accessed by user using any terminal emulation software. The main GUI screen is divided into four
sections (see Figure 6).
SECTION 1 : MENU BAR
File Menu
File: Exit- Closes the COM port to the camera and exits the GUI
Setup Menu
Setup: Serial Port: Open- Opens the COM port to the camera
Setup: Serial Port: Close- Closes the COM port to the camera
 Loading...
