- Remove the oil pump by undoing the two screws
in the figure.
- Remove the oil pump seal.
N.B.
IT IS ADVISABLE TO MARK THE CHAIN IN ORDER TO EN-
SURE THAT THE INITIAL DIRECTION OF ROTATION IS
MAINTAINED.
Inspection
- Remove the two screws and the oil pump cover.
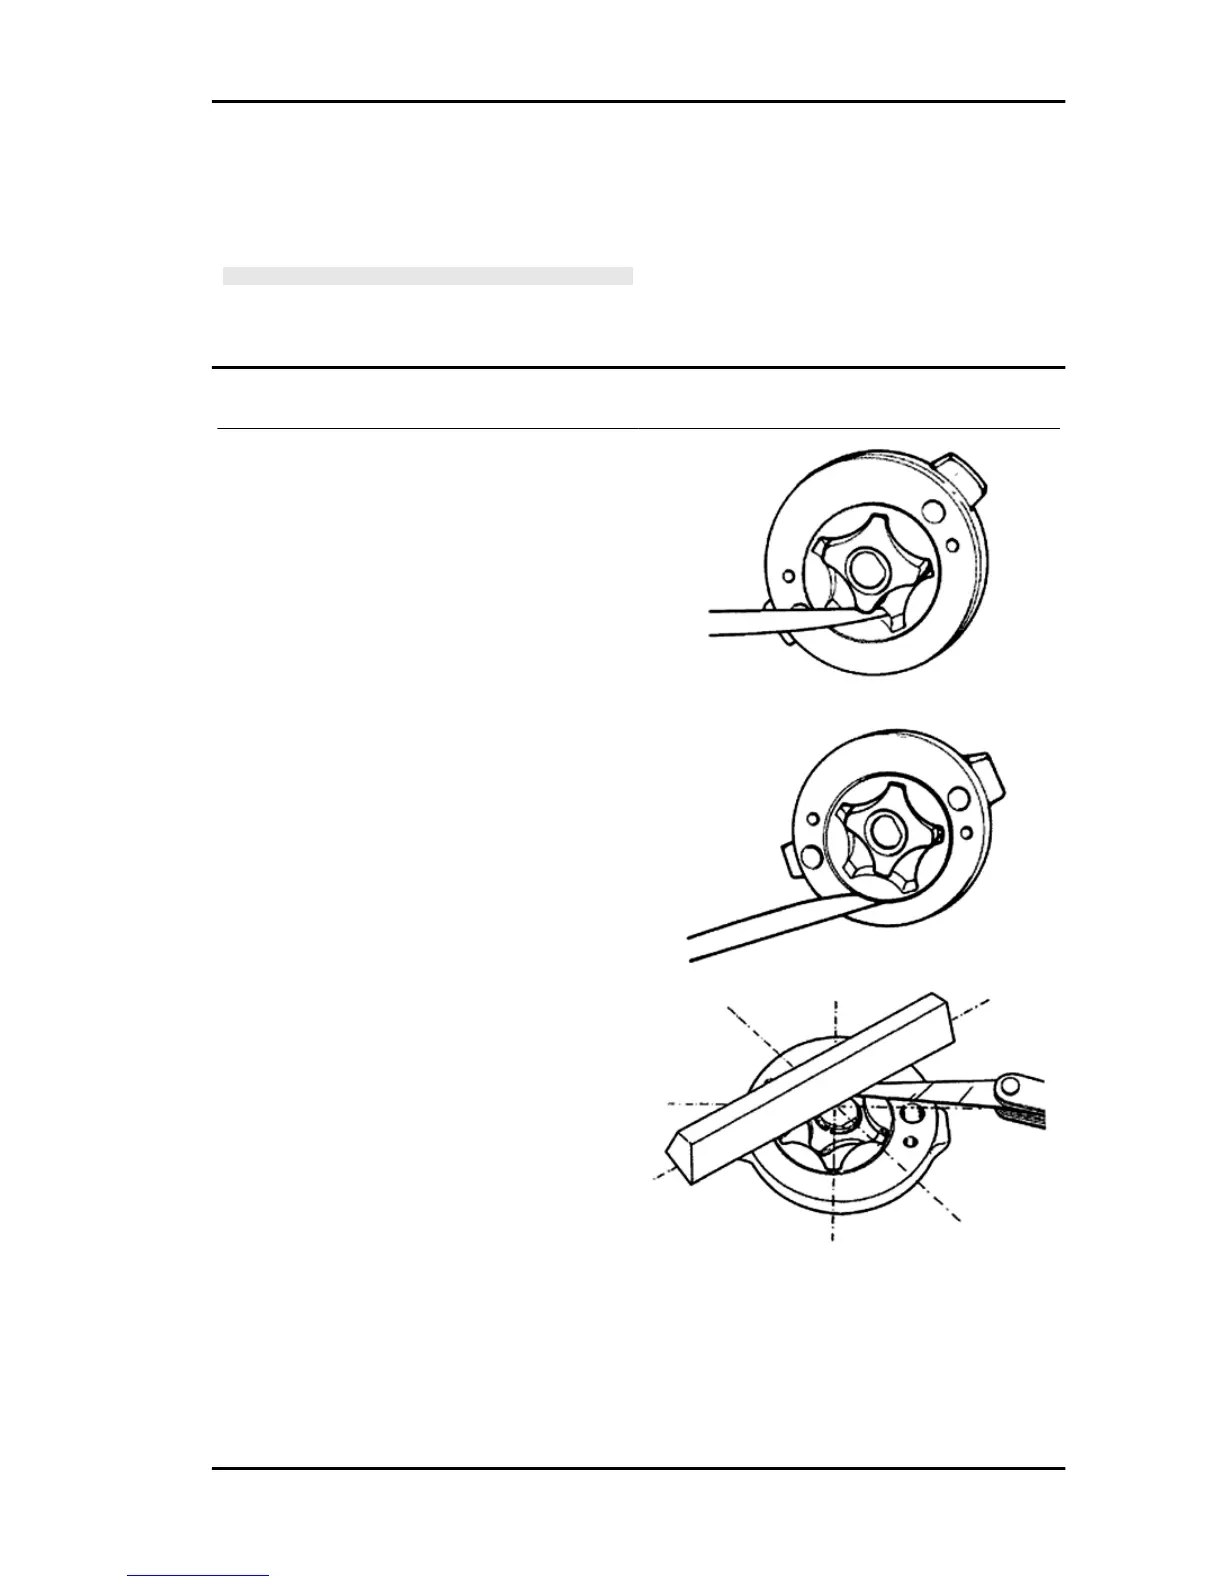
- Remove the clip retaining the innermost rotor.
- Remove and wash the rotors thoroughly with pet-
rol and compressed air.
- Reassemble the rotors in the pump body, keep-
ing the two reference marks visible Replace the
snap ring.
- Check the clearance between the rotors in the
position shown in the diagram using a thickness
gauge.
Measure the distance between the outer rotor and
the pump body (see figure).
- Check the axial clearance of the rotors using a
trued bar as shown in the figure.
Characteristic
Axial rotor clearance
Limit values admitted: 0.09 mm
Distance between the outer rotor and the pump
body
Admissible limit clearance: 0.20 mm
Distance between the rotors
Admissible limit clearance: 0.12 mm
X9 Evolution 125 Engine
ENG - 147