12. Click Download DeviceHub.
a. Once the download is complete, go to your Downloads folder, or your designated page for
downloads, and double-click the DeviceHubXX.XX.X.exe file. This will open the installer.
b. Click Install.
c. Once the installation is complete, click Finish to close the installer.
13. On your computer, check the Systems tray at the bottom of your desktop and find the
DeviceHub icon. Click Yes to confirm that DeviceHub was successfully installed.
14. Click Activate DeviceHub. A new tab will open.
15. Once DeviceHub activation is successful, close the tab.
16. Click Continue PitneyShip Cube Setup.
17. Confirm your location and click Next.
Performing a test print
1. Click Print to perform a test print.
2. Tap No if the test print was unsuccessful. Then, tap Print Again. If the second test print was
unsuccessful, please contact us using the contact options.
3. Tap Yes if your test print was successful.
4. Tap Get Started. PitneyShip will now set up your experience. This could take a few minutes to
complete.
Your PitneyShip Cube setup is now complete.
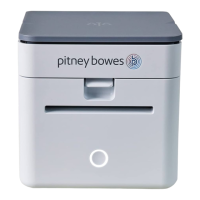
Installing PitneyShip Cube on a Mac using a USB
connection (new user)
These instructions will guide you through a first-time installation of your PitneyShip Cube on a Mac
device as an existing PitneyShip user. These instructions are for users wanting to connect their
PitneyShip Cube using a wired USB cable connection.
1. Opening the box and unpacking
2. Creating your PitneyShip account
3. Connecting your PitneyShip Cube
4. Performing a test print
1 • Installation
Pitney Bowes User Guide June 2023 34