7.2.1.1 General cleanliness and handling
The adapter has to be calibrated in Planmeca PlanMill 50 S milling units
before the first use to ensure an optimal positioning of the DESS system.
Therefore the following aspects must be considered:
• Cleanliness of the blank adapter (milling unit) and of the DESS adapter
• General Cleanliness
• No damages in the bearing surface
• The milling unit and its zero-point must be set correctly
• Always clamp the adapter in the same position
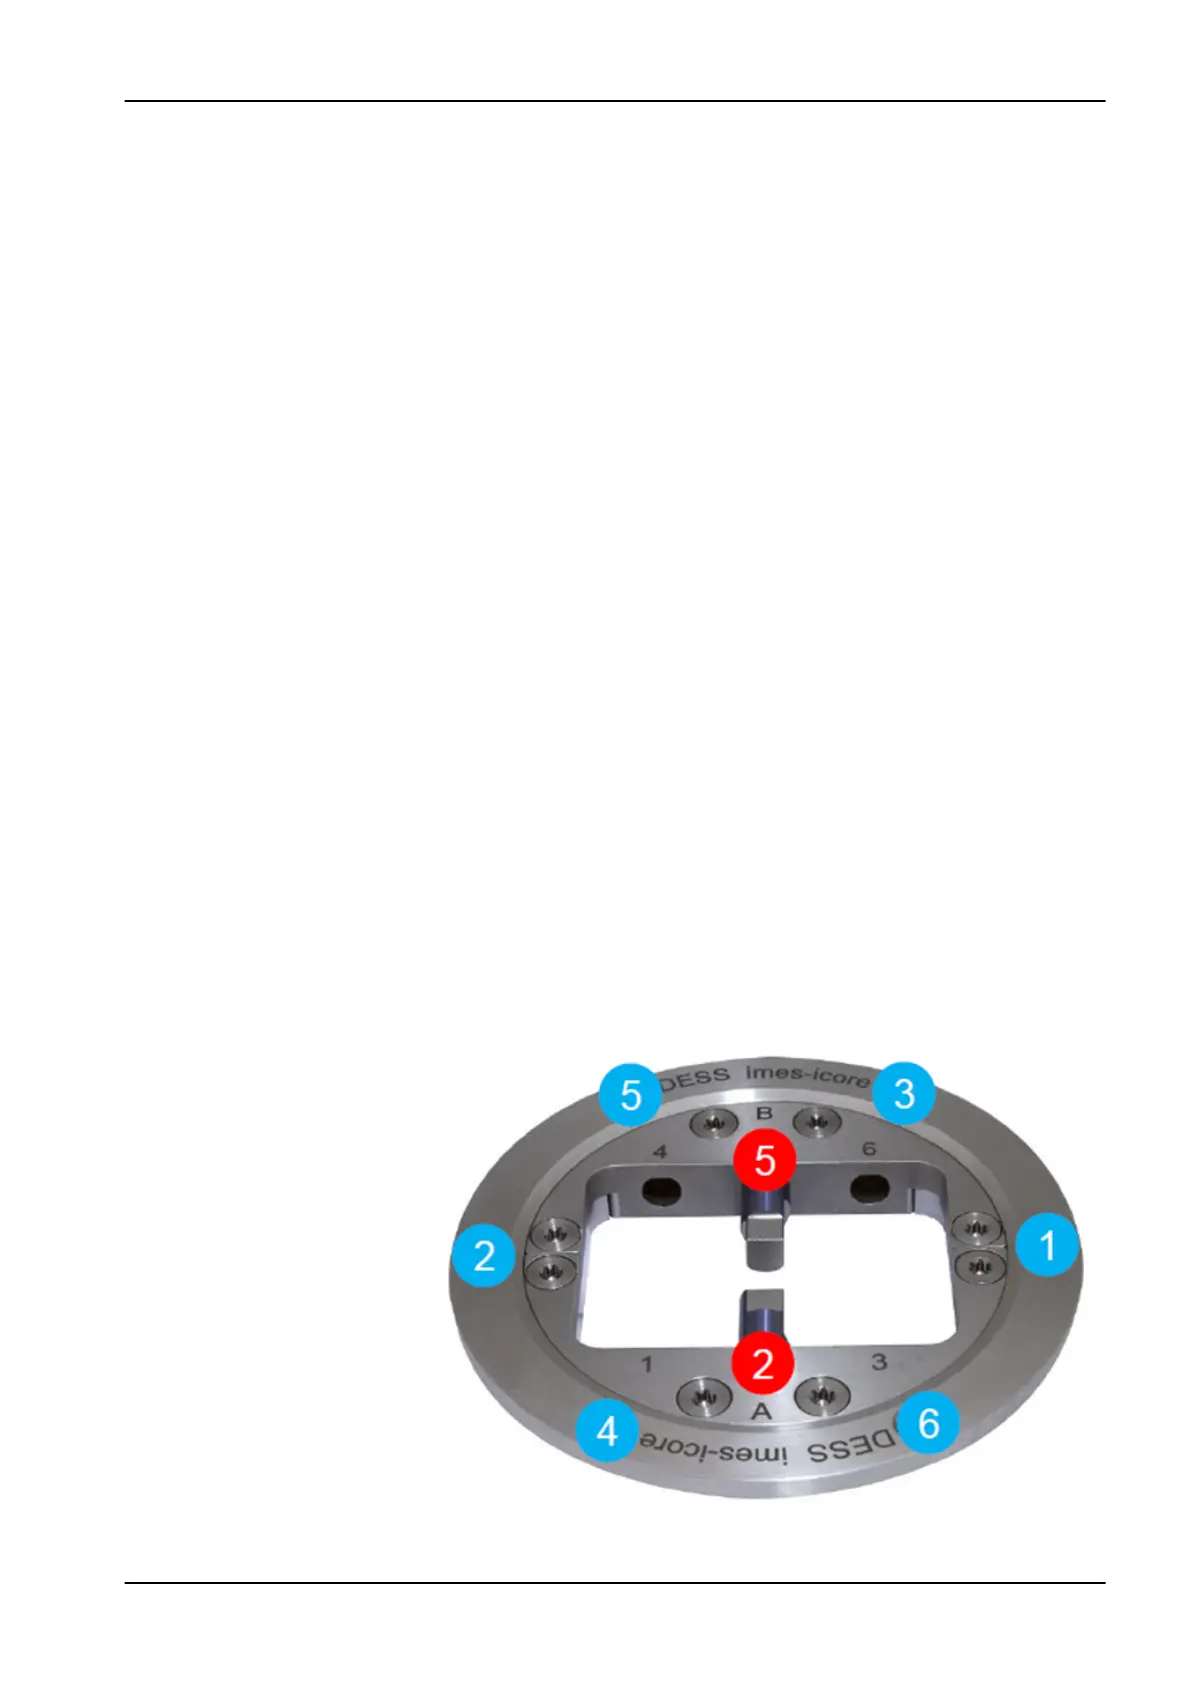
• Screw connections
• The 6 screws should always be tightened in the same order for a
reproducible positioning
• Only screw the 6 countersunk screws loosely at first
• Afterwards tighten the screws crosswise (always in the same
order)
7.2.1.2 Preparing adapter for test milling
NOTE
Please follow directions on general cleanliness and handling.
• The two test pins, available from your local premilled blank supplier, are
thoroughly inserted into the middle positions (2 + 5), pushed in to the
limit, and firmly clamped with the clamping screw by using a torque
wrench.
• The DESS adapter is then fixed into the clean milling unit reception. The
screws should always be screwed in loosely at first and tightened
afterwards in the same order, 1 - 6.
• The test pins are milled directly on the milling unit with the scripted test
program available from your local dealer. A 2mm metal tool (T2) is
required for the milling process.
7 Adapters
User's manual Planmeca PlanMill 50 S 35