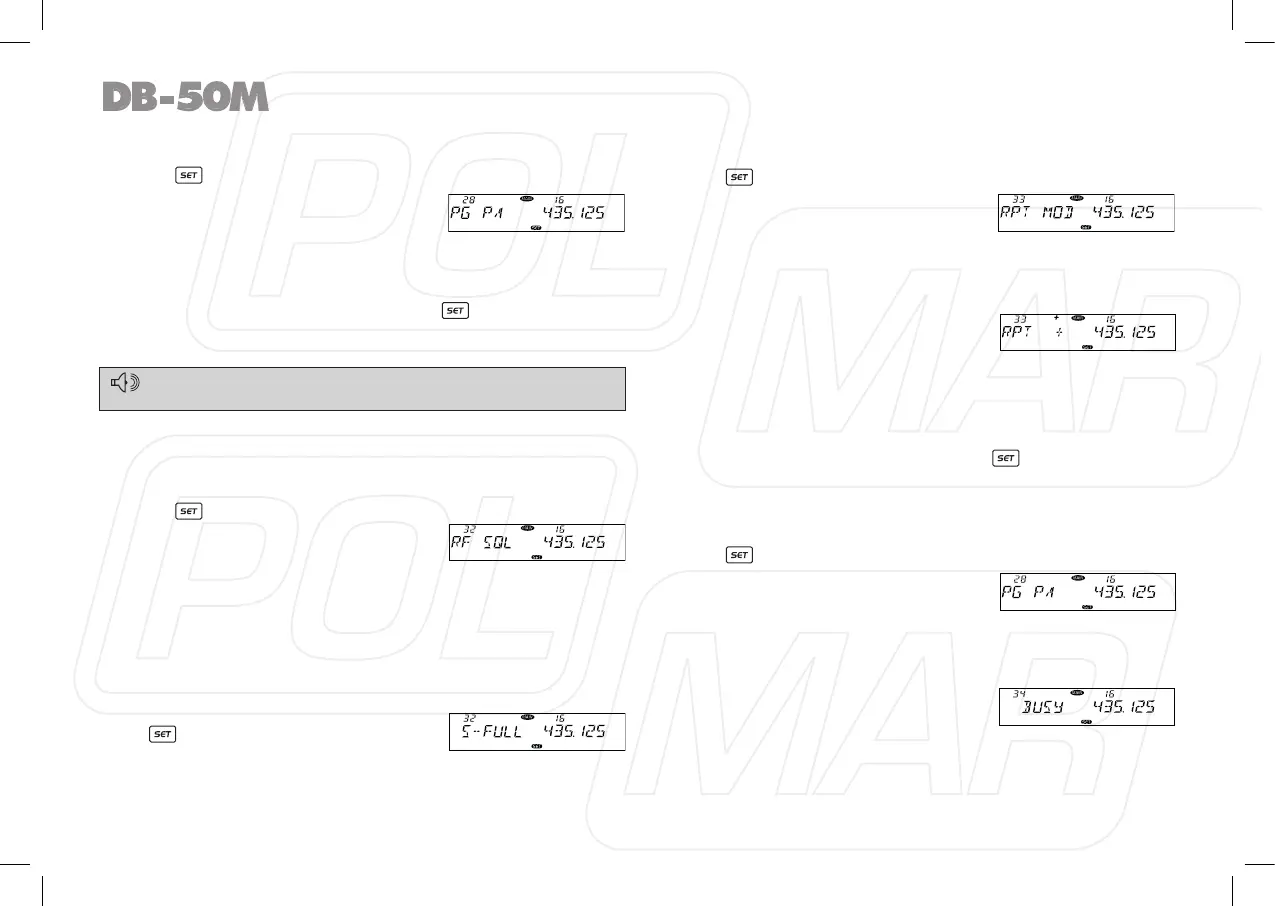
◊ Microphone PA, PB, PC, PD key setup
1. Press key to enter function menu.
2. Turn the Main band selector knob
to choose No 28-31 menu. The LCD
displays “PG PA” PG PB, PG PC, PG
PD.
3. Press the Main band selector knob to enter function setup.
4. Switch the Main band selector knob to choose wanted value.
5. Press the Main band selector knob or
key to store value
and [SQL] back to function menu. Press key or hold selector
knob for over 0.5 second to store setup and exit.
◊ RF Squelch level setup
When squelch level function is on, you can cancel squelch only
when the signal strength reach the level setup by users.
1. Press
key to enter function menu.
2. Turn the Main band selector knob
to choose No 32 menu. The LCD
displays “RF SQL”.
3. Press the Main band selector knob to enter function setup.
4. Switch the Main band selector knob to choose wanted value.
S-2: Able to hear the calling when the power meter reach 1 bar.
S-5: Able to hear the calling when the power meter reach 4 bar.
S-9: Able to hear the calling when the power meter reach 8 bar.
S-FULL: Able to hear the calling when the power meter reach
full bar.
5. Press the Main band selector knob
or key to store value and back
to function menu. Press [SQL] key
or hold selector knob for over 0.5 second to store setup and
exit.
◊ OFFSET Direction setup
1. Press key to enter function menu.
2. Turn the Main band selector knob
to choose No 33 menu. The LCD
displays “RPT MOD”.
3. Press the Main band selector knob
to enter function setup.
4. Switch the Main band selector knob to choose wanted Offset
direction.
-: Minus offset, means transmitting
frequency lower than receiving
frequency.
+: Plus offset, means transmitting frequency higher than
receiving frequency.
OFF: OFFSET is turn off. Transmitting frequency is same as
receiving frequency.
5. Press the Main band selector knob or key to store value
and back to function menu. Press [SQL] key or hold selector
knob for over 0.5 second to store setup and exit.
◊ Scan Dwell Time Setup
1. Press key to enter function menu.
2. Turn the Main band selector knob
to choose No 34 menu. The LCD
displays “SCAN”.
3. Press the Main band selector knob
to enter function setup.
4. Switch the Main band selector knob to choose wanted value.
TIME: it pauses 5s once scanning a
matching signal, then resume scan.
BUSY: it pauses once scanning a
matching signal, then resume scan
after the signal disappeared for 2 seconds.
SECEDE: It stops once scanning a matching signal, and exit
scan.
28
For Menu details, please refer to Page 30-31, Microphone Opera-
tion.