Mode 2
Mode 1
08
4.3 Charging/Staup and Shutdown
Staup
Drone: Press and hold the power button until all the power indicators turn on, then release to complete the
staup.
Remote controller: Press and hold the power button until all the power indicators turn on, then release to
complete the staup.
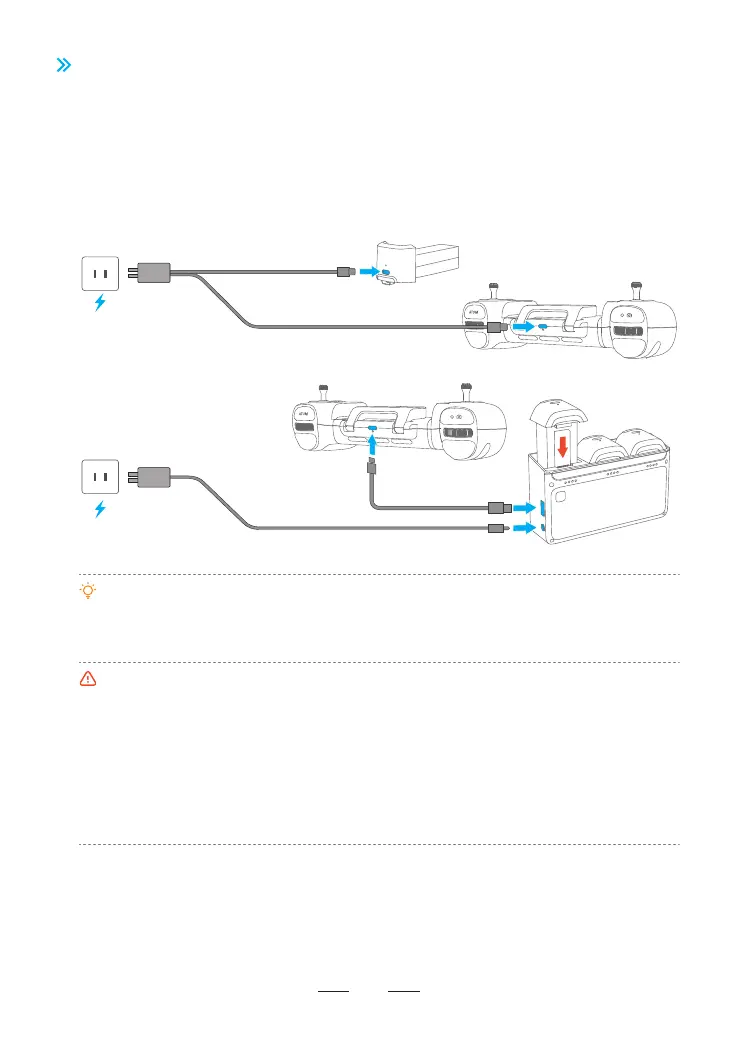
•The shoest charging period is approx. 1 h 25 min through the USB-C charging po. Make sure your
charger suppos 5 V/3 A output in order to achieve this charging speed.
•User is suggested to charge the batte through the Parallel Charging Hub, in order to charge 3
batteries quickly at the same time.
•It is suggested to remove the batte from the drone to charge for safety reasons; otherwise, the
drone won't power on if the batte is being charged in the drone.
•If the charging cable is connected while the drone is on, it will power o automatically and the
charging will continue.
•The batte may become too hot after use; do not charge it until it cools down; otherwise, charging
can be rejected by the sma batte.
•Charge the batte eve three months to sustain the cell's activity.
•Please connect the original cable or any cable that suppos over 3 A current to the USB-C po;
otherwise, it may cause charging failure or batte damage.
Before the rst ight, it is essential to wake up the batte; otherwise the drone wouldn't sta. Connect the
USB-C charging po of batte and a USB charger to the AC power supply to nish single charging (USB
charger is not included in the package. User can use a charger that conforms to FCC/CE specication to
charge the batte). The red indicator will stay on during charging, and turn o automatically after charging
is done. User can charge the batte with the Parallel Charging Hub if Fly More Combo is purchased. For
more details, please refer to the user manual of Parallel Charging Hub. The Parallel Charging Hub can also
charge the remote controller.