15
www.powerbox-systems.com
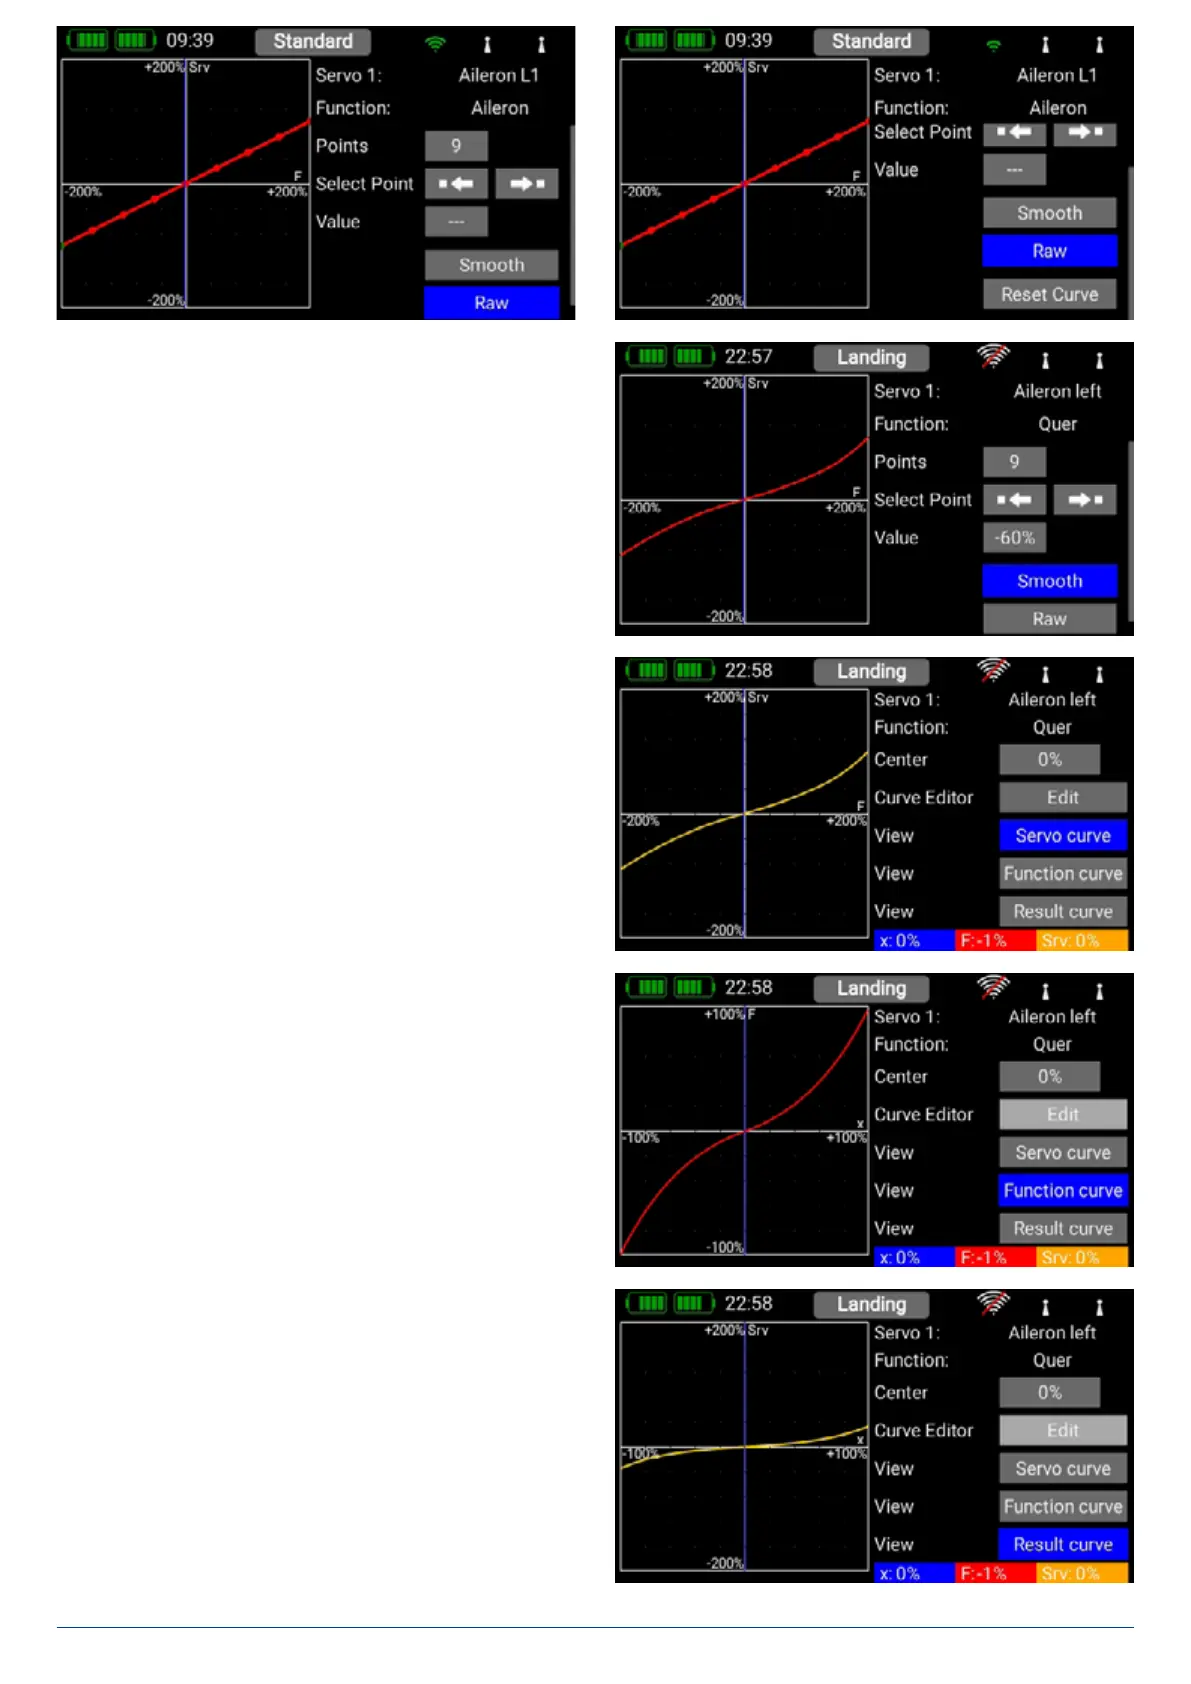
This is the procedure: use the arrow buttons to select the point
you wish to adjust. Briefly press the displayed setting at Value,
then adjust the servo for this position. The Smooth button
can be used to even out the course of the curve. Right at the
bottom you will find a Reset button which sets the curve back
to a straight line. Once you have set the desired curve, return
to the Servo Curve menu, where you will find three Preview
buttons:
- Servo curve
This displays the shape of the pure servo curve.
- Function curve
This displays the shape of the pure function curve. If
you have already set up Expo or Dual Rates, this will
be shown in this view.
- Result
This displays the net result of the function curve and
the servo curve.
3.3.6. Servo
Here you will find the assigned servos again. Up to eight servos
can be assigned to each function. As already mentioned in
the Assistant, the travel and end-points of each servo can be
adjusted separately here. Any adjustments you make to a servo
at this point have no influence on the settings of the same servo
if it is also assigned to another function. This provides a simple
means of mixing in aircraft with multi-flap wings, delta wings and
V-tails.
If you wish to adjust a servo’s travel or center position, the first
step is to touch the appropriate button; you can now adjust
the value. As soon as you move the associated stick, the Select button shifts to the corresponding position. This means that you
do not need to select Left, Right and Center when adjusting the control surface; instead you select each point very conveniently
using the transmitter stick, altering the position of the control surface using the arrow buttons at the bottom of the screen. At the
same time, you can observe the effect of any change directly on the servo.
• Servo number
Indicates the receiver output at which this servo signal is present.
• Servo name
The servo name can be changed individually. Hold your finger on it to open up the keypad.
• Limit
Works like a mechanical stop – the servo does not move beyond the set point.
• Way
Adjusts the servo travel.
• Center
Offsets the servo center position. Acts like a “mechanical” center offset – it also affects the end-points.
• Direction
Reverses the direction of rotation of the servo.
• Curve editor
The travel of each servo can be adjusted using a 9-point curve to match the mechanical installation even more accurately. The
most common use for this function is to match servos to each other where they are mechanically linked (servo matching). At
top right you will see the name of the servo whose curve you wish to adjust, and the function which the servo controls. If you
alter the servo curve in the selected function, the change will have no effect on the travel which you have set for the same servo
in other functions.
- Center
The Center button is used to set a center offset which affects the whole of the servo’s travel. You will see the effect of
the change immediately in the graph on the left-hand side.
- Curve Editor
Press Edit. when you wish to adjust servo travel using a maximum of 17 points.
 Loading...