41
www.powerbox-systems.com
4.1.10. Erase
The last button (cross symbol) in the Sensor Overview can be used to erase individual telemetry values from the widget.
Once you have entered all the settings, press OK at the bottom of the screen.
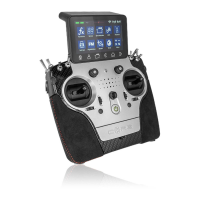
4.2 Timer
The CORE allows you to set up eight different, independent timers. When you select Timer as widget type, the screen shown
on the right appears, where you can set timers and the associated alarms. Press the + button to create a timer:
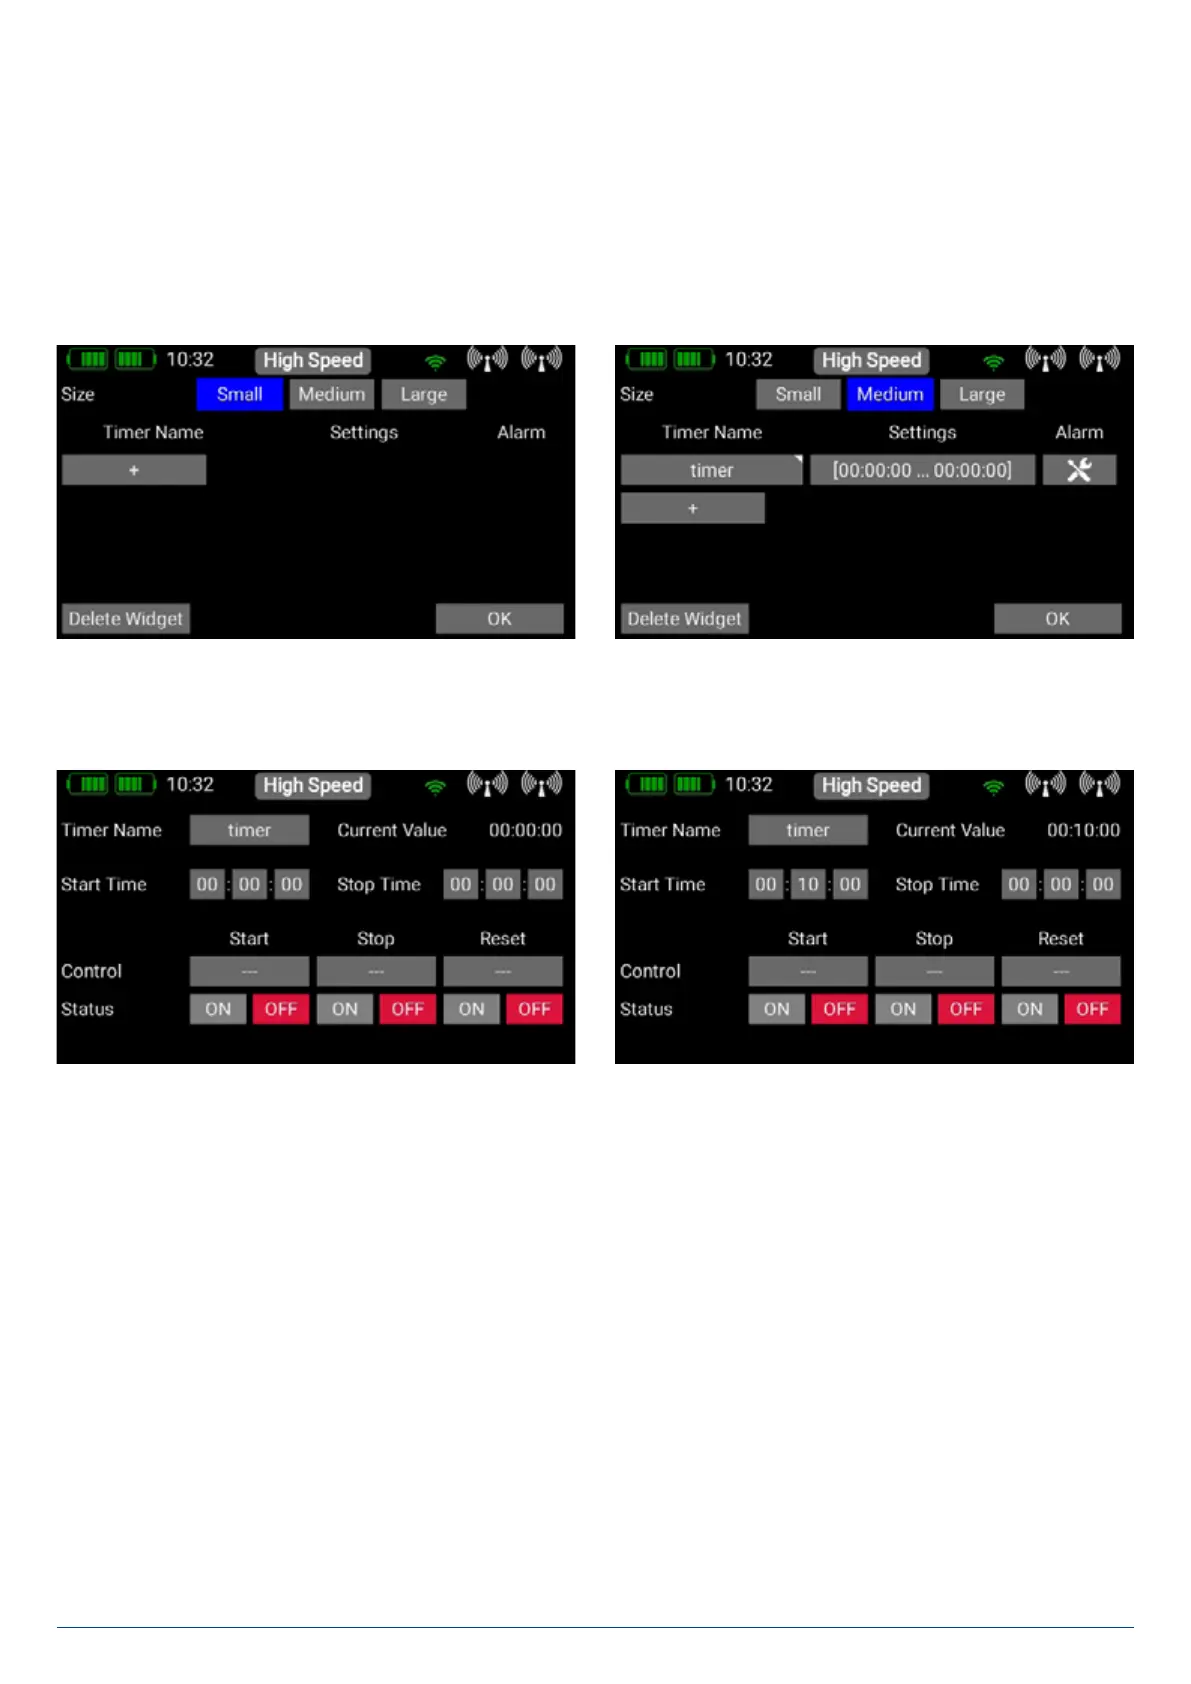
To configure the timer, press the field under Settings. The first step is to set the Start and Stop times: if the Start time is
greater than the Stop time, the timer counts down; if the Stop time is greater than the Start time, it counts up..
The next step must be to select a transmitter control which starts the timer: briefly press the empty field below Start. The
transmitter control can be a switch, a linear control or a virtual switch. In our example the throttle stick is used to start the timer.
Your chosen transmitter control now appears on the left, together with a bar display containing two switching points.
The two switching points can now be placed in any position you like by moving them with your finger. The red area indicates the
“Off state”, the green area the “On state”. The orange area indicates “hysteresis”, i.e., the area in which no switching takes place.
You can very easily reverse the “Off state” and the “On state” by moving one of the two switching point sliders in front of or behind
the other.
This adaptability provides maximum flexibility and simplicity, and you can immediately check the effect of your settings by moving
the switch or linear control. The transmitter control symbol on the left changes colour to indicate the switched state.
Press OK when you have completed the settings. The procedure for the Stop and Reset control is identical.