35
www.powerbox-systems.com
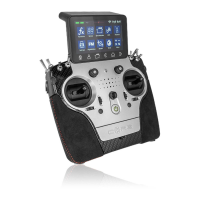
The next step is to assign a pair of transmitter controls by pressing the + symbol at Core transmitter control. Here you can as-
sign one of the Student’s transmitter controls to a transmitter control at the Teacher transmitter. If you operate the switch assigned
in this way, the control signals from the Student transmitter replace the transmitter control from the Teacher transmitter.
The two transmitter controls are detected automatically simply by moving the sticks or switches. At Core transmitter controls
press the empty field in order to select a transmitter control in the usual way.
Repeat the procedure with the transmitter control from the
Student transmitter: press the empty field under External
channel and move the appropriate stick or switch at the
Student transmitter. The Core automatically detects which
channel has been moved, and assigns this channel to the
transmitter control at the Core.
In the field under In use you can remove assigned channels whose control you don’t want to transfer. This allows you to assign
the complete model to the Student transmitter, but include only specific functions when control is transferred to the Student pilot -
according to the Student’s skill level.
At top right there is a further button - Active or Inactive. This can be used to disable the Teacher / Student system completely,
even if a Student receiver is still connected.
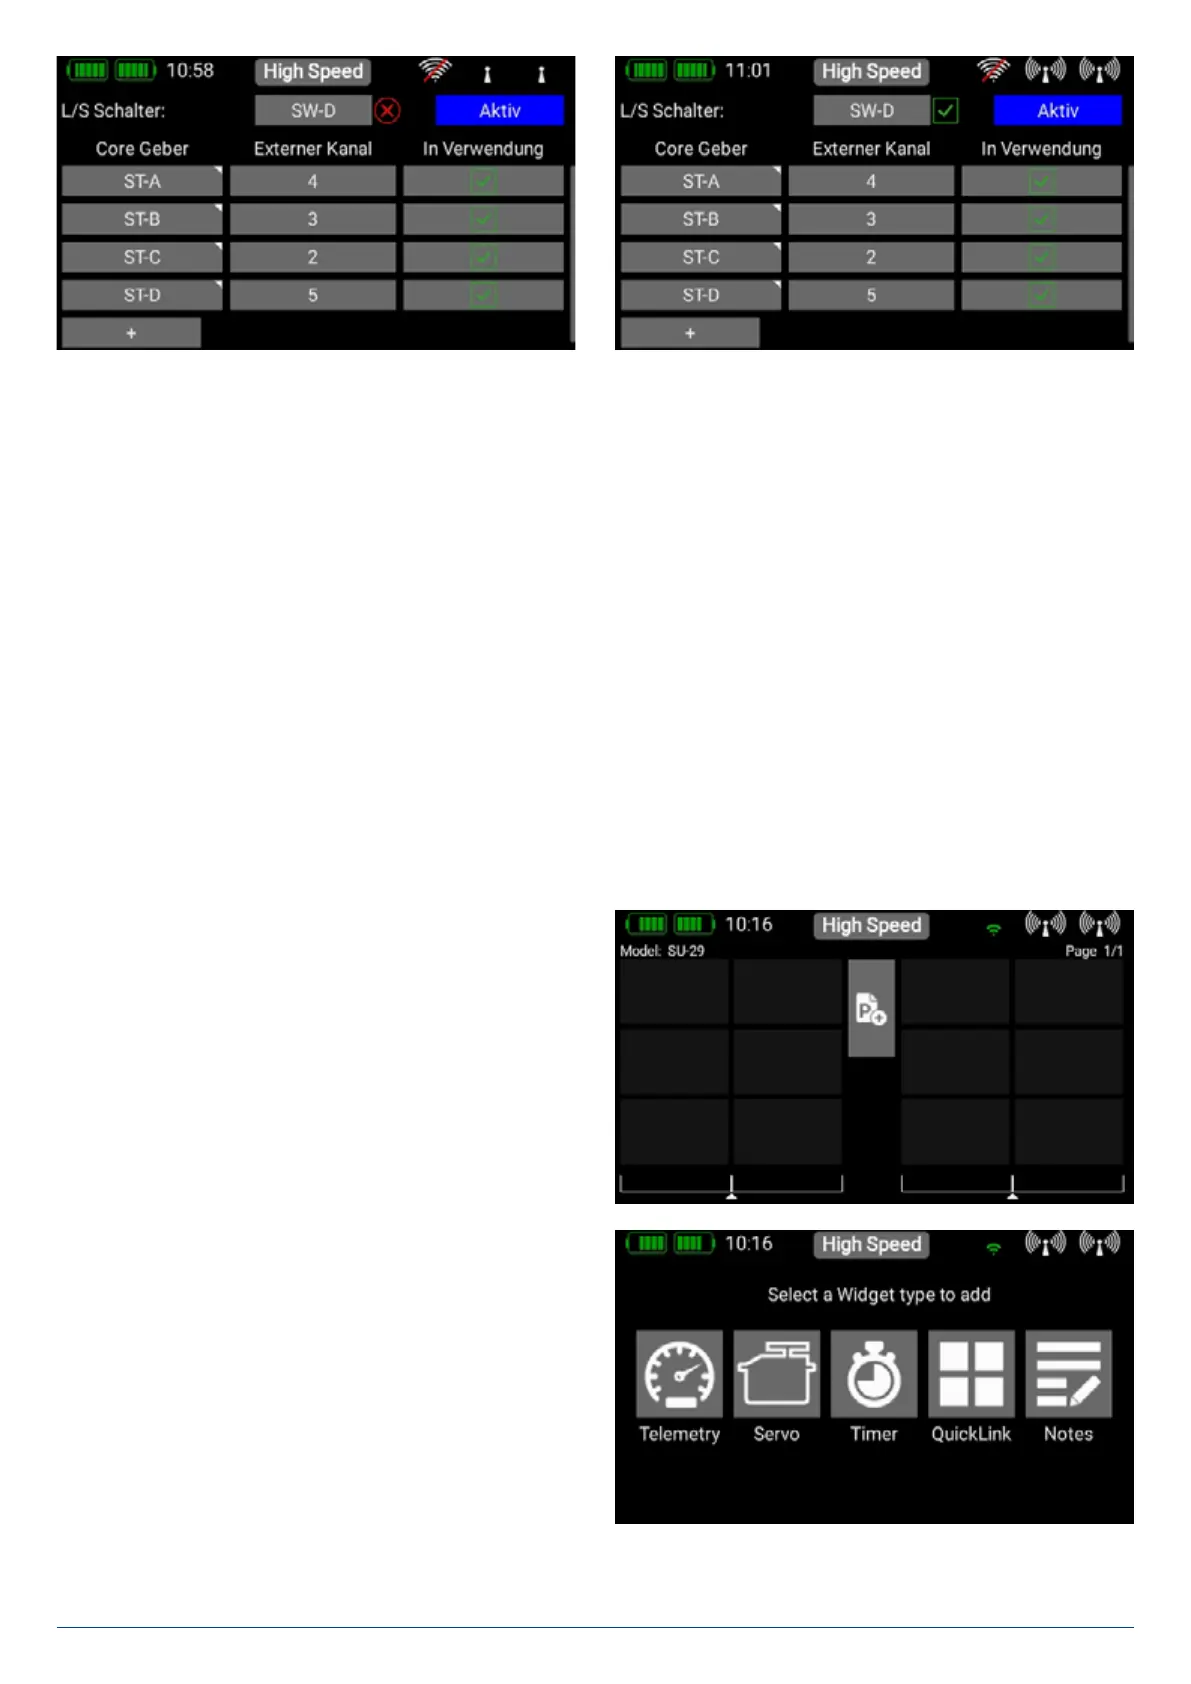
4.Telemetry, Timers, Servo display, Notes and Quick-Select-Buttons
Once you have created a new model and bound one or more receivers, you can display important information on the main screen
using the telemetry widgets. You can select any of five different types of widget.
• Telemetry
• Servo display
• Timers
• Quick-Select-Buttons
• Notes
Creating a widget
To create a widget, touch an empty area of the main screen,
and you will see the following display:
You will now see twelve grey fields, together with a P+ button
and a P- button. The P+ button can be used to create additio-
nal pages, so that more telemetry widgets can be displayed.
You can move to and from between the pages by swiping with
your finger. The P- button is used to erase empty pages. Touch
one of the grey fields, and this screen display appears:
Now select the type of widget you wish to create: