iPocket232 User Guide 2 Setting Up the iPocket232
23-CML000293 iPocket232 Inc. 10
4 Ensure the LINK lamp is lit to indicate a valid Ethernet connection, and the
STATUS lamp is flashing to indicate the unit is ready to transmit/receive data.
5 If you know the IP address of the iPocket232, ping the unit to ensure you have a
valid network connection. (See Check IP Address (Ping) on page B-3.)
2.2 Mounting the iPocket232
The iPocket232 comes with a mounting bracket that you can use to conveniently
mount the unit. Once the mounting bracket is in place, the iPocket232 can be easily
clipped on or removed as needed.
To mount the iPocket232 to a wall or other surface:
1 Affix the mounting bracket to the wall using two #6 pan head screws.
2 Clip the iPocket232 to the mounting bracket.
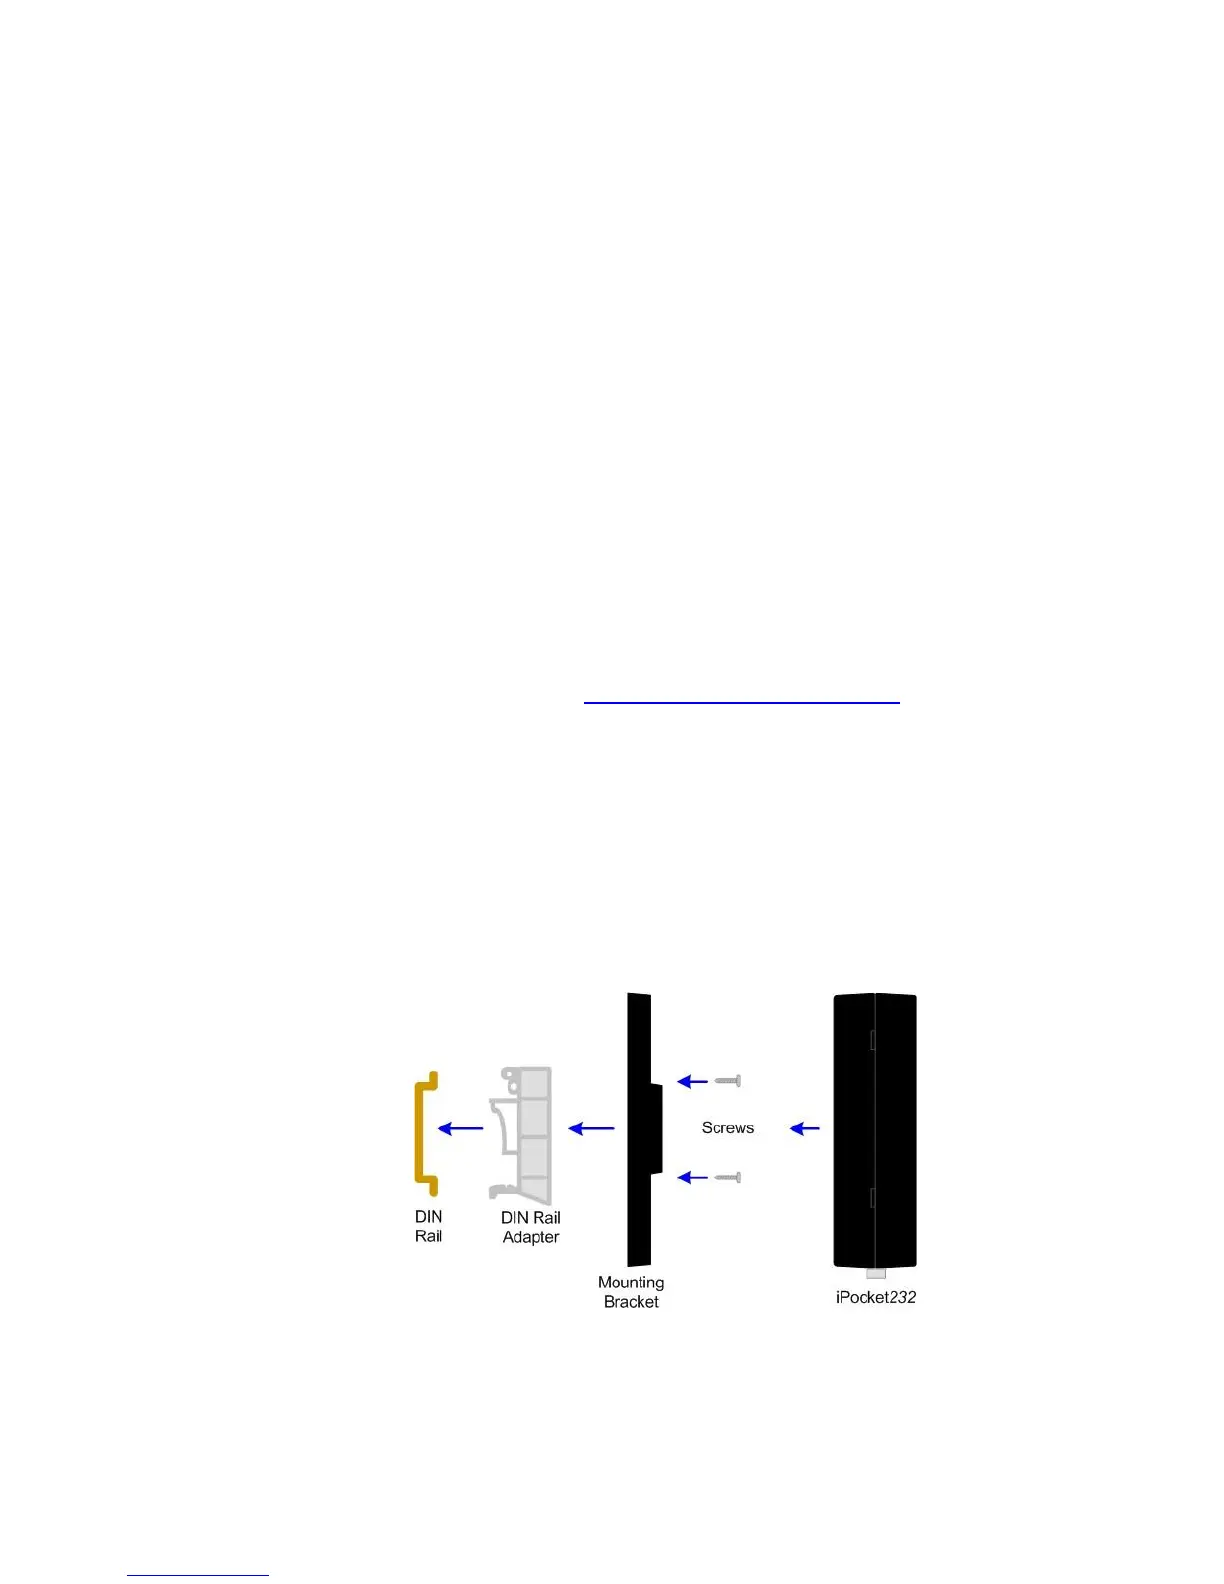
You can also attach a rail adapter (http://www.phoenixcontact.com/, part # USA 10)
to the mounting bracket to secure the iPocket232 to a DIN rail.
To mount the iPocket232 to a DIN rail:
1 Affix the recommended DIN adapter to the mounting bracket using two #6 or M3
thread forming screws, 3/8” (10 mm) long.
2 Clip the mounting bracket onto the DIN rail.
3 Clip the iPocket232 to the mounting bracket.
Mounting the iPocket232 to a DIN Rail
iPocket232 User Guide 2 Setting up the iPocket232