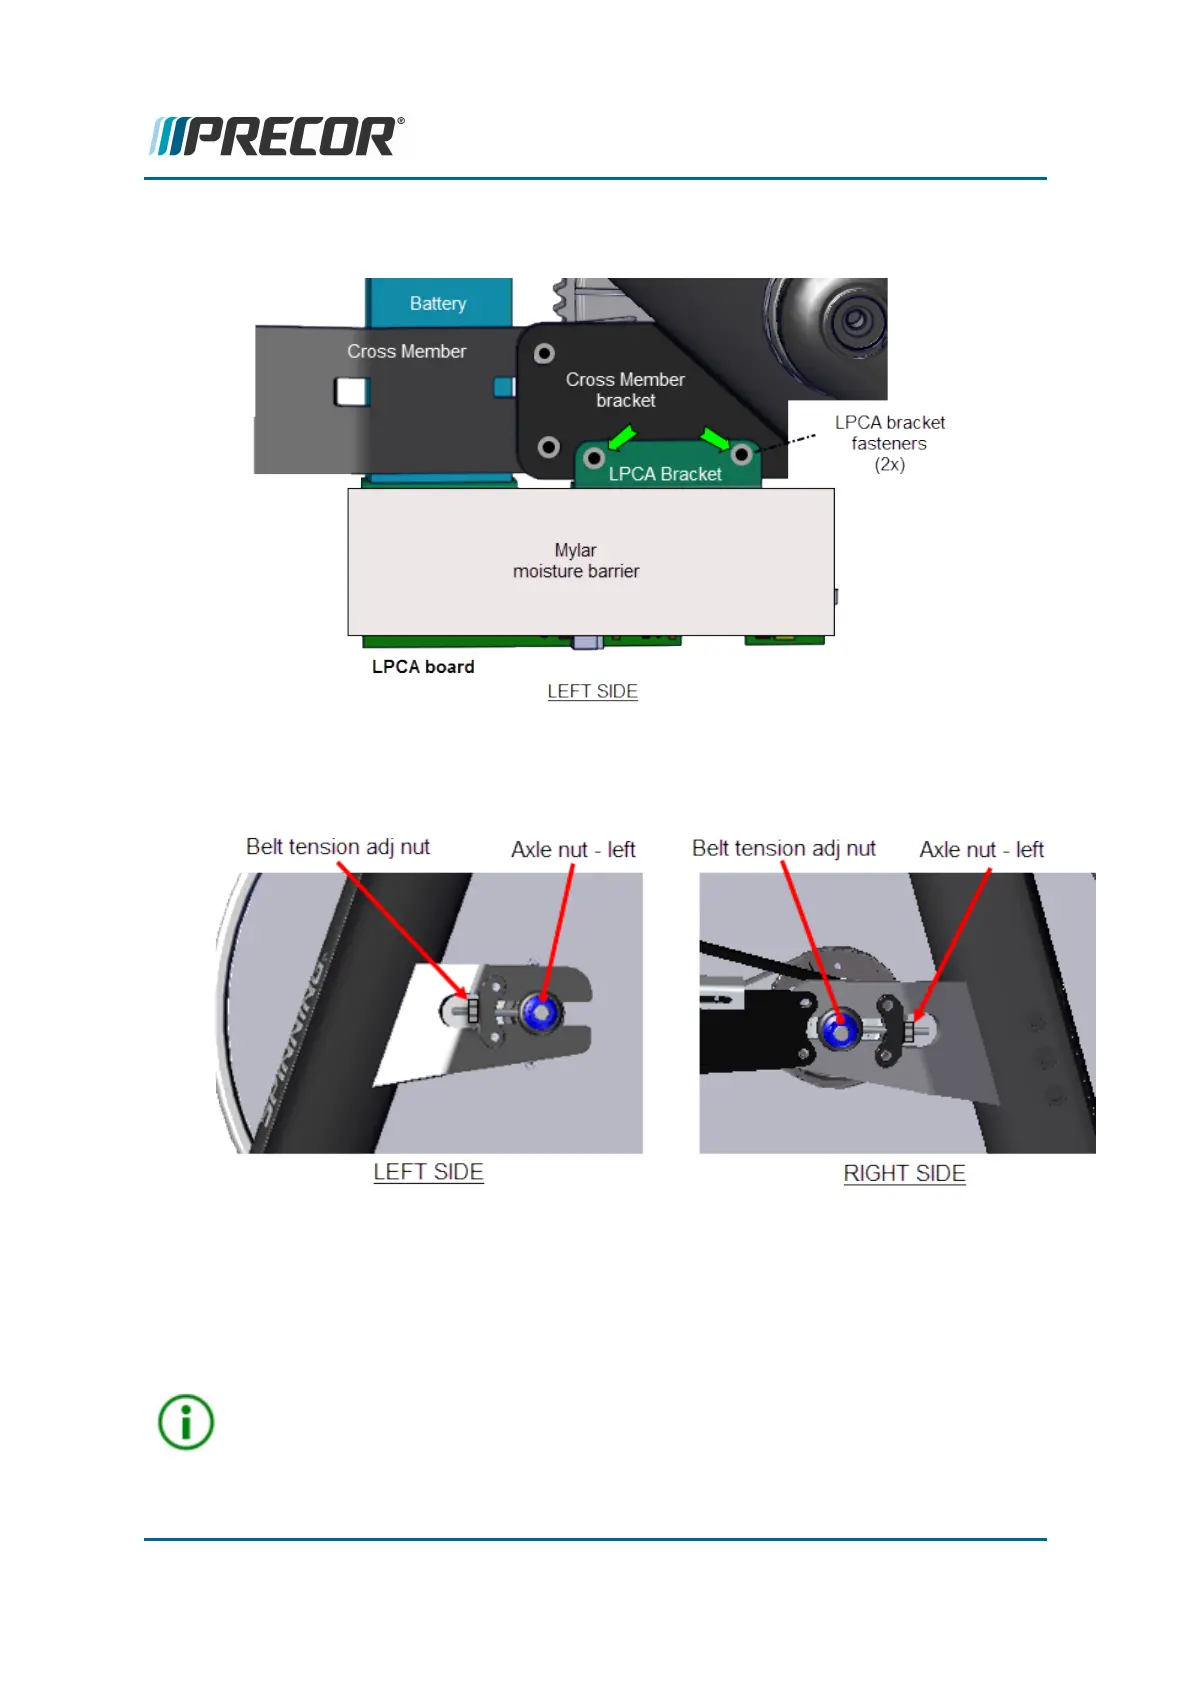
7. Remove the two 4 mm hex key LPCA bracket mounting bolts (2x) and washers (2x)
and remove the LPCA bracket. Retain part(s) and/or fastener(s) for installation.
8. Loosen, but do not remove, the left and right 17 mm axle nuts enough to allow fly-
wheel axle movement.
9. Remove drive belt tension by alternately loosening the left and right tension adjust-
ment nuts using a 10 mm wrench. Then fully remove the nuts and retain for install-
ation.
10. Cut the back three cable-ties that secure the generator, data COMM, strain gauge
(Spinner® Chrono™ Power models only), and battery cables to the cross member.
TIP: It is not absolutely necessary to remove the back three cable ties from the
cross member during flywheel removal and installation. However, care must be
Contact Precor Customer Support at support@precor.com or 800.786.8404 with
any questions.
Page 88
5 Replacement Procedures
Drive Belt, Generator Belt, and Flywheel Replacement
 Loading...