4.2 Setting Up Studio One
Studio One Artist was designed to work with PreSonus interfaces and provides
unique interoperability and simplified setup. When Studio One Artist is
launched, by default you will be taken to the Start page. On this page, you
will find document-management and device-configuration controls, as well
as a customizable artist profile, a news feed, and links to demos and tutorials
from PreSonus. If your computer is connected to the Internet, these links will
be updated as new tutorials become available on the PreSonus Web site.
Complete information on all aspects of Studio One Artist is available in
the Reference Manual PDF located within Studio One. The information
in this tutorial covers only the basic aspects of Studio One Artist and is
intended to get you set up and recording as quickly as possible.
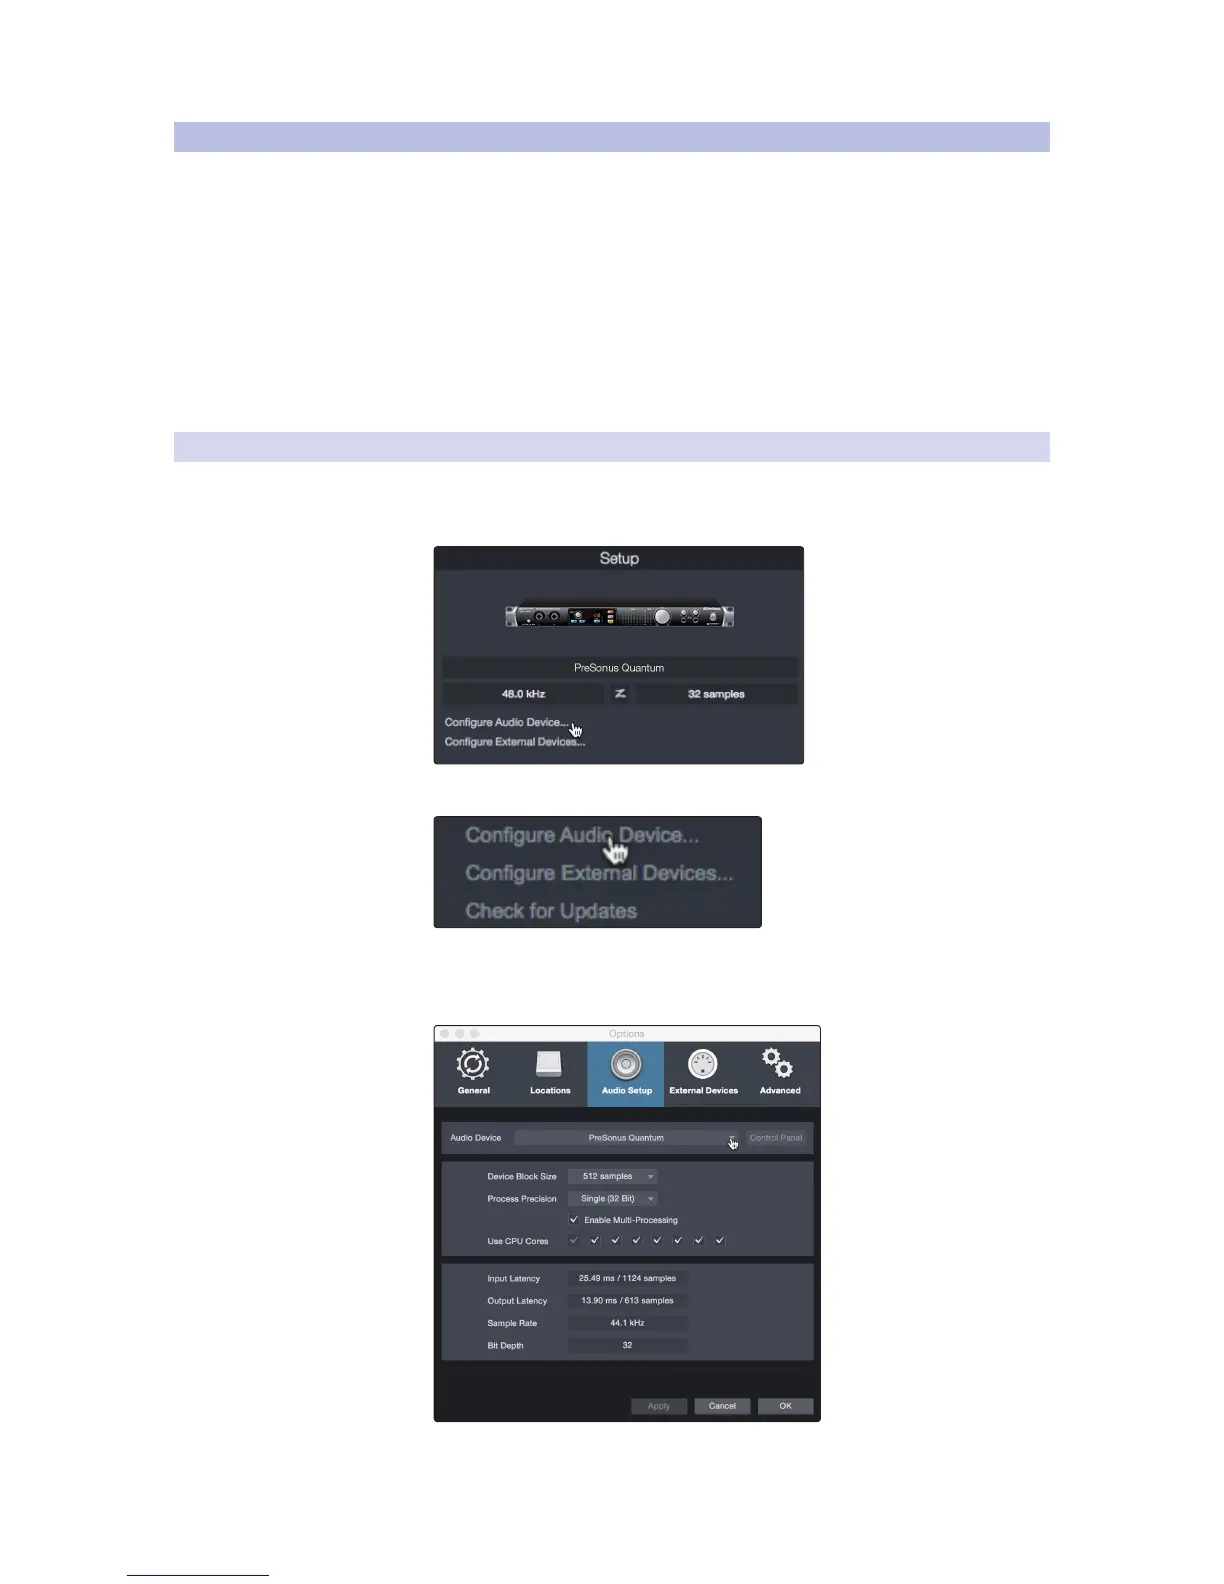
4.2.1 Configuring Audio Devices
In the middle of the Start page, you will see the Setup area. Studio One
Artist automatically scans your system for all available drivers and selects
a driver. By default, it will choose a PreSonus driver if one is available.
1. Click on the Configure Audio Interface link to select your audio interface driver.
2. Select your audio interface from the Audio Device pull-
down menu. From this page, you can also adjust your device
buffer block size. Click OK when you are finished.