2 Controls
2.1 Top Panel Overview
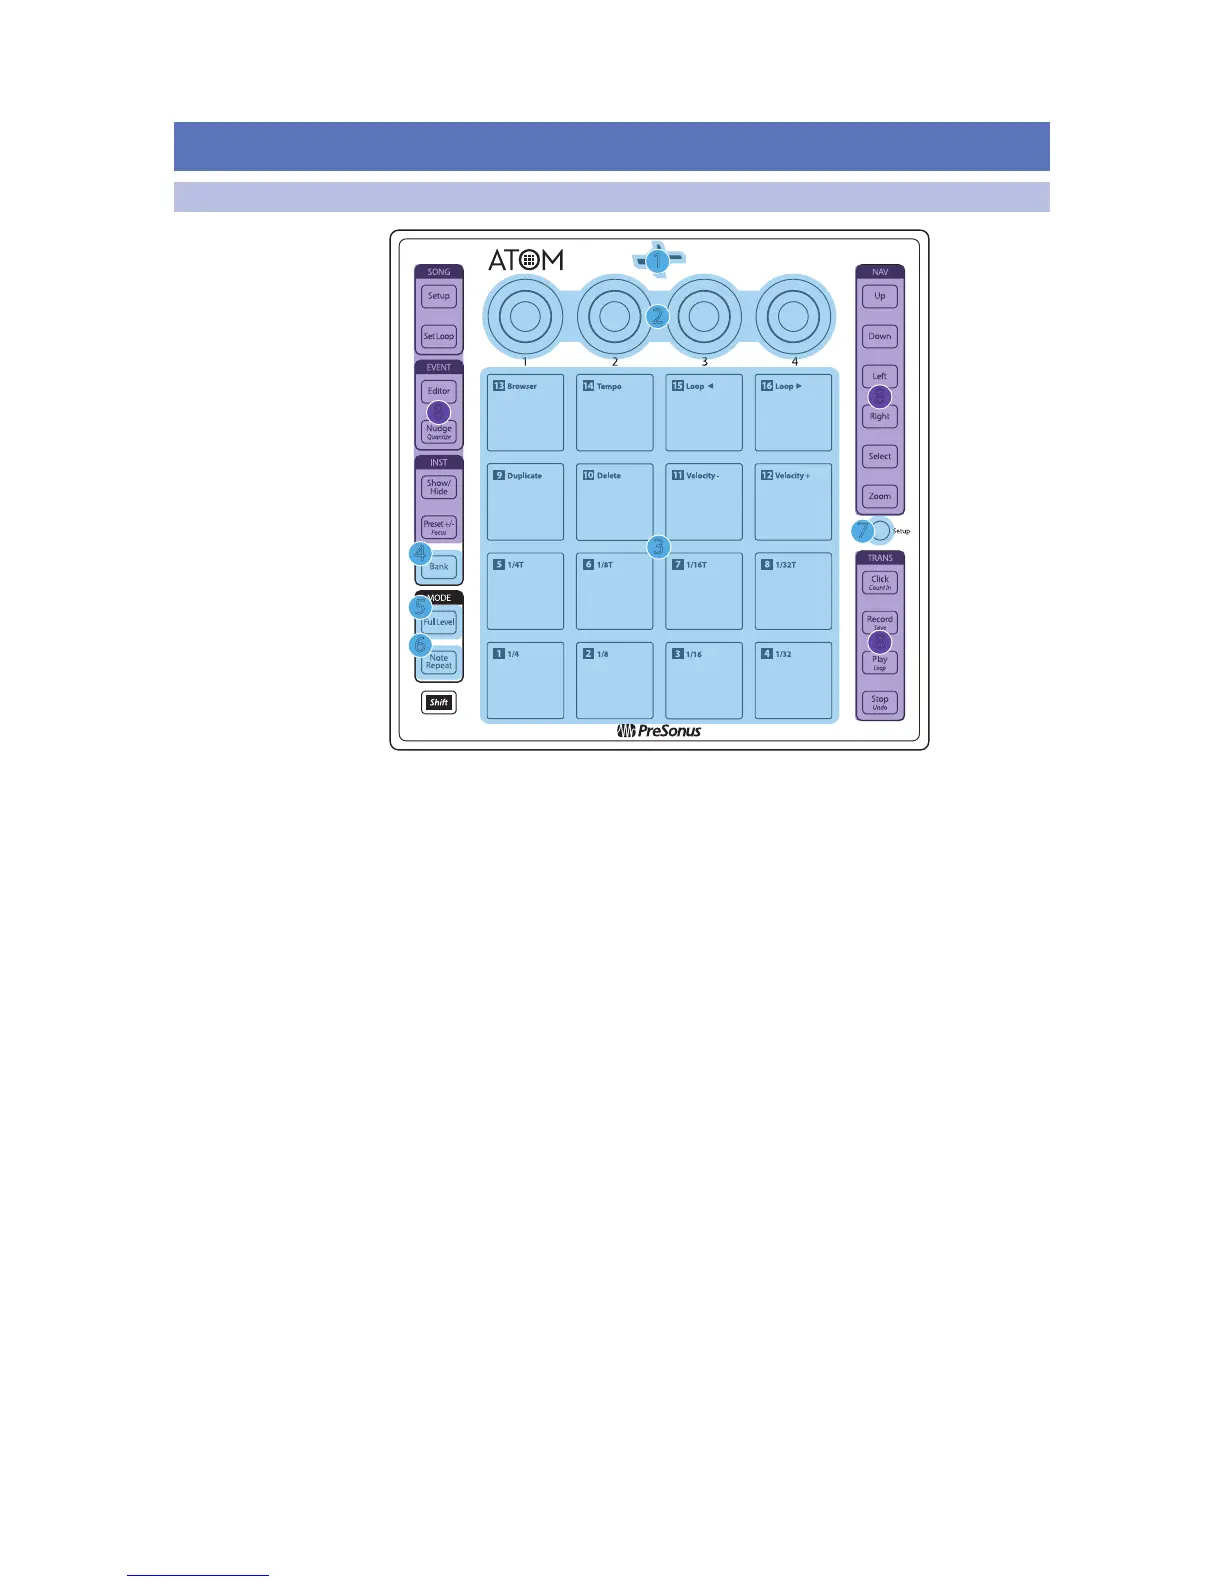
1. Status Indicator. This LED will change color to indicate whether Studio
One Native control is active or not. When Studio One is connected, the
LED will illuminate blue. For other applications, it will illuminate green.
2. Knobs 1-4. These knobs transmit MIDI CC14-17 respectively. See Section 5.2.
3. Pressure- and Velocity-sensitive controller pads. These 16 pads can be used
to trigger samples and sounds within your software. Two different control
modes, as well as several advanced customization options, are available. Please
review Section 2.2 for details. MIDI Mapping can be found in Section 5.1.
4. Bank. Use this button to switch between pad banks 1-8. Each bank can
control a unique group of 16 individual sounds for a total of 128.
5. Full Level. When engaged, every pad will trigger its assigned sound
at full strike velocity (127) no matter how soft or hard you hit.
6. Note Repeat. Also known as “roll,” note repeat allows you to trigger a sound
at a specified rate as long as the pad is held. See Section 2.1 for details.
7. Setup. This button provides access to advanced
configuration features. See Section 2.2 for details.
8. Assignable Controls. The remaining buttons have specialized functions
in Studio One (see Section 3 for details). These buttons send unique MIDI
CC messages and can be used for many purposes in other applications.
For a table of assigned MIDI CC messages, please see Section 5.3.