68
To install a MTRX MADI module:
1 Remove the two fasteners that secure the faceplate over the Optical I/O slot and remove the faceplate.
Set the screws aside (you will use them later to secure the card to the unit).
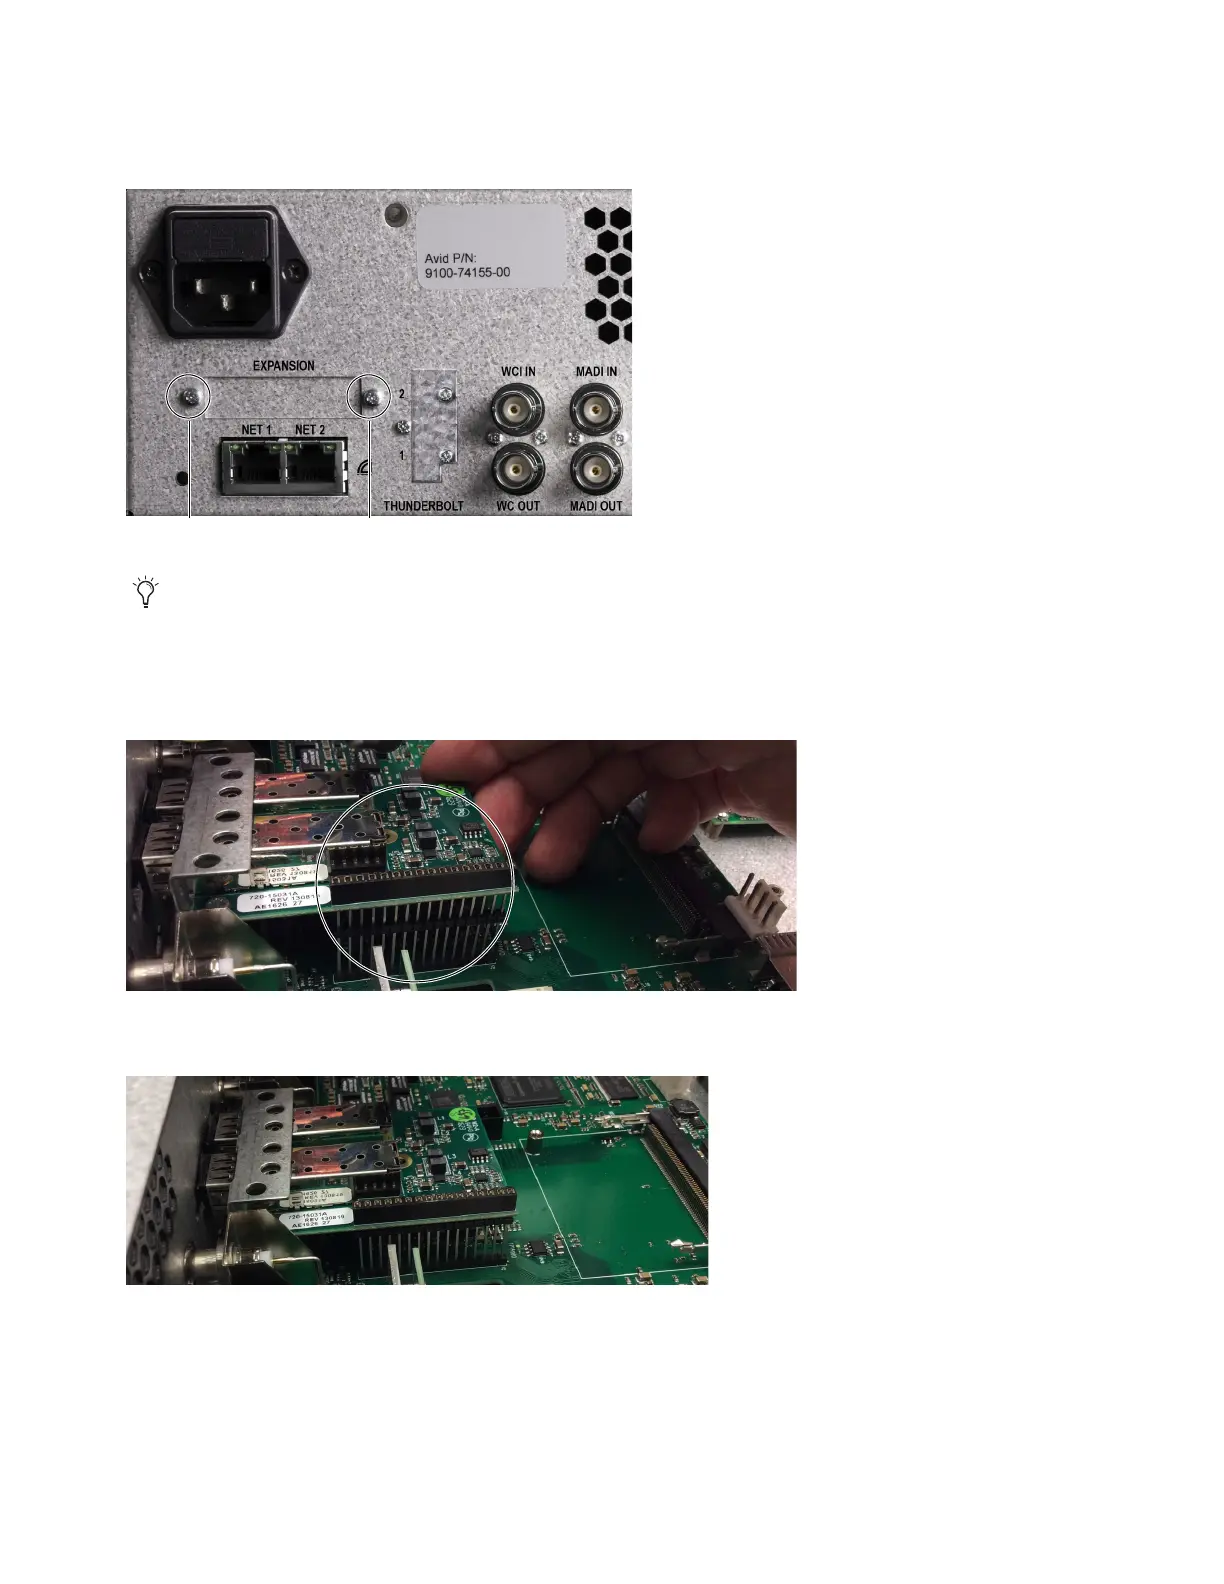
2 Carefully position the MADI module in the unit so that the receiving holes on the underside of the MADI module align with the
MADI connector pins on the motherboard.
3 With the card aligned, gently push the MADI module down so that it is fully seated on its connector.
Fasteners securing the Optical I/O faceplate
The MTRX MADI module has been modified since its original production to make it easier to install. If you have a newer module, you
do not need to remove the motherboard and you can skip steps 2 through 4, and steps 7 and 8. For more information, refer to this
online video at: https://www.digitalaudiosupport.com/madi-module-installation/
Side view of MADI module aligned with the connector on the motherboard
Side view of MADI module fully seated on its connector
 Loading...