74
On Windows
• DAD Thunderbolt 3 ASIO Driver, v.1.0.8 or later
• DADman for Windows, v.5.6.7.1 or later
Install the Thunderbolt 3 Core Audio Driver on macOS
The Thunderbolt 3 module Core Audio driver is required to use MTRX II over Thunderbolt 3 with your Apple computer.
To install the Thunderbolt 3 module Core Audio driver on macOS:
1 Download the Thunderbolt 3 module driver.pkg file to your computer from your Avid Master account.
2 Double-click the driver installer package.
3 Follow the on-screen instructions.
4 When prompted, enter your Administrator password and click Install.
5 When prompted, click Open Security Preferences.
6 In the Security and Privacy System Preferences, click Allow.
7 When prompted, restart your computer.
8 After restart, open the Thunderbolt 3 driver application and connect the DAD Thunder|Core interface to the Thunderbolt 3 port on
the Computer. Make sure that you are using a high-speed (20Gbps) Thunderbolt 3 cable.
Core Audio Driver Configuration
Once the driver is installed and a DAD Thunder|Core interface is connected to the Thunderbolt 3 port on the computer, the driver can
be set-up with the relevant configuration by opening up the DADDriverSetup application.
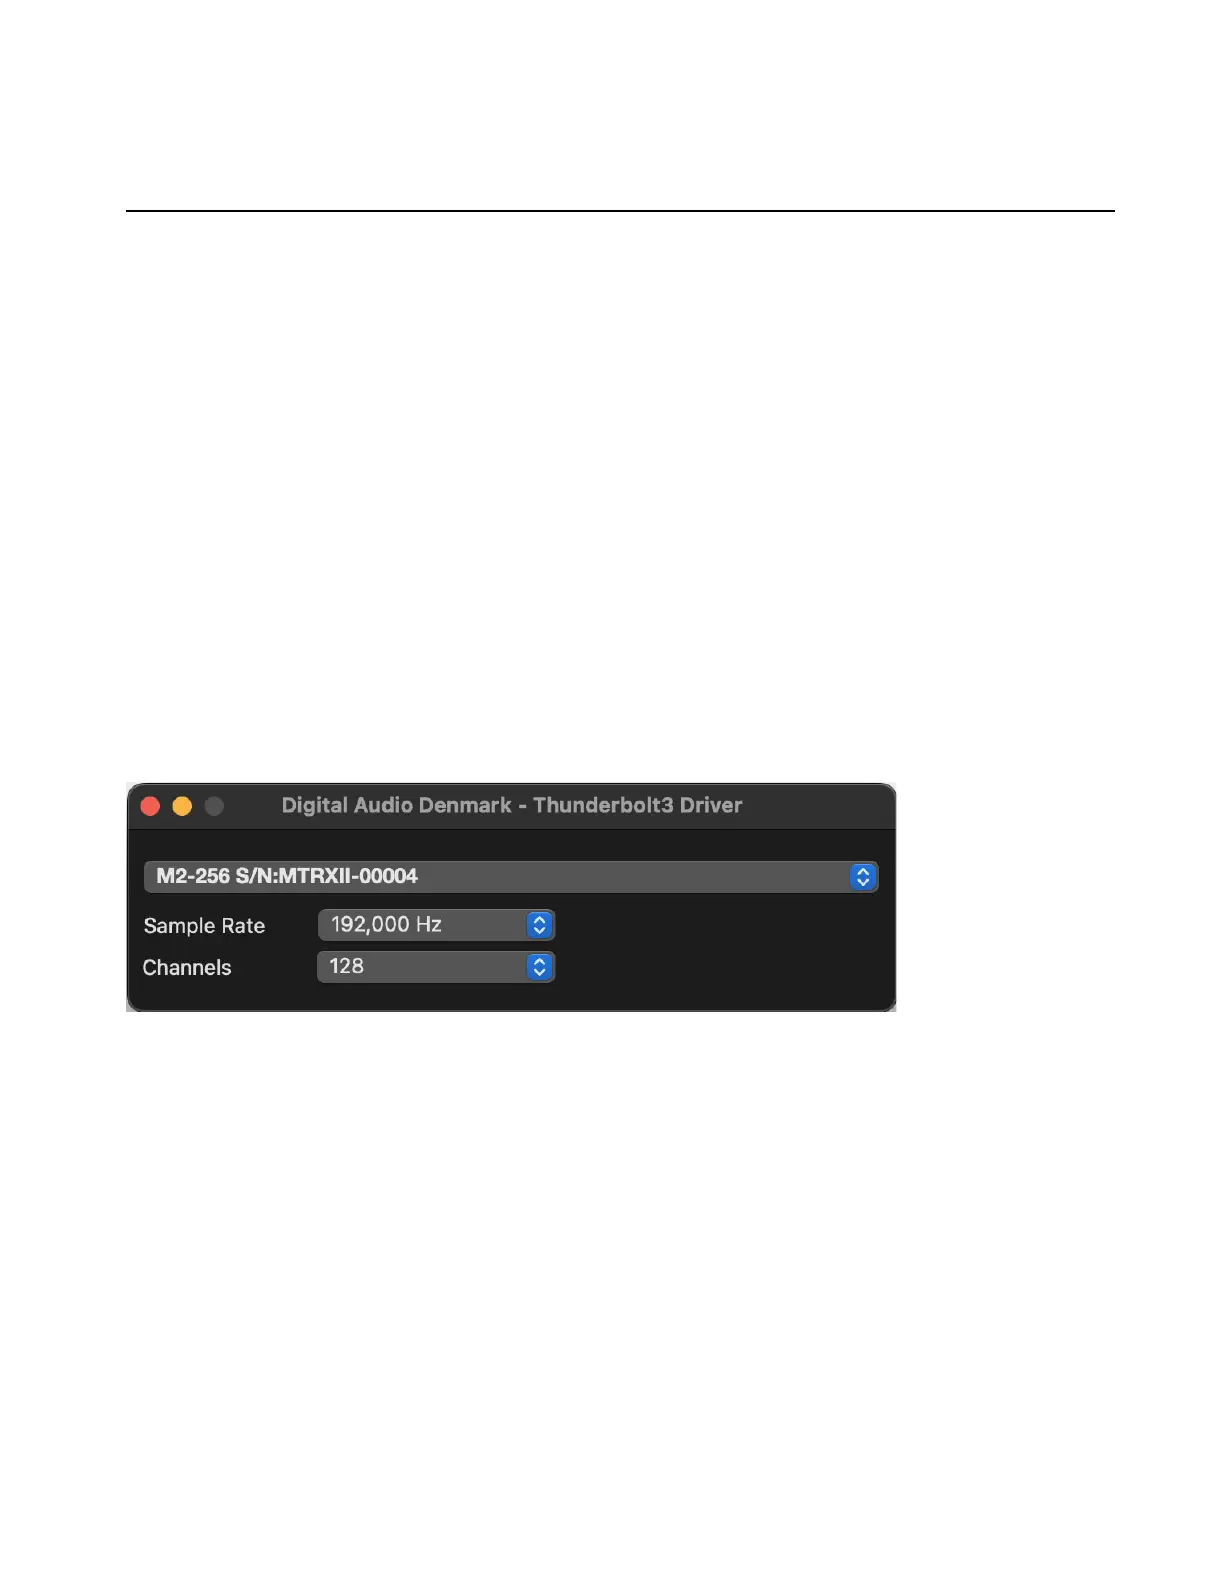
Device Selection
Lets you select any of the interfaces connected by Thunderbolt.
Sample Rate
Select the desired sample rate for the connected audio interface: 44.1, 48, 88.2, 96, 176.4, 196, 352.8 or 384 kHz
Channels
Select the desired number of channels you want to make available for Core Audio applications on your computer: 64, 128,
or 256 channels.
All connected and configured interfaces support up to 256 bi-directional channels in the audio hardware.
Core Audio Driver Control Panel
 Loading...