Chapter 7: Monitor Profiles
47
3 Right-click New output set and choose Rename (or double-click the name in the Groups column), and type a descriptive name.
4 Right-click the output set and select the desired channel width from Set group format. Choose from the available preset formats
(such as
Stereo or 5.1). You can also create custom formats (see Group Formats) to choose from.
5 Select the output set. The right pane lists all channels in the output set.
6 In the right pane, right-click each channel of the selected output and select the desired output assignment from the available outputs
(such as
DA > DA, ch. 1).
7 If desired, click in the Label column of each row and type a descriptive label.
8 To adjust the trim on any channel, click in the Trim column for any channel and type a negative value to attenuate or a positive value
(in dB) to boost the output signal for that channel.
Once you have made all assignments for the output set, you can repeat these steps to add additional output sets to the monitor group for
external metering.
To remove an output set from Metering:
Right-click the output set under Metering and choose Remove set.
Remove Unused Groups button
Click the Remove Unused Groups button to remove any defined (existing), but unassigned input or output sets in the monitor profile.
This can be helpful if the Monitor Profile is not functioning as expected.
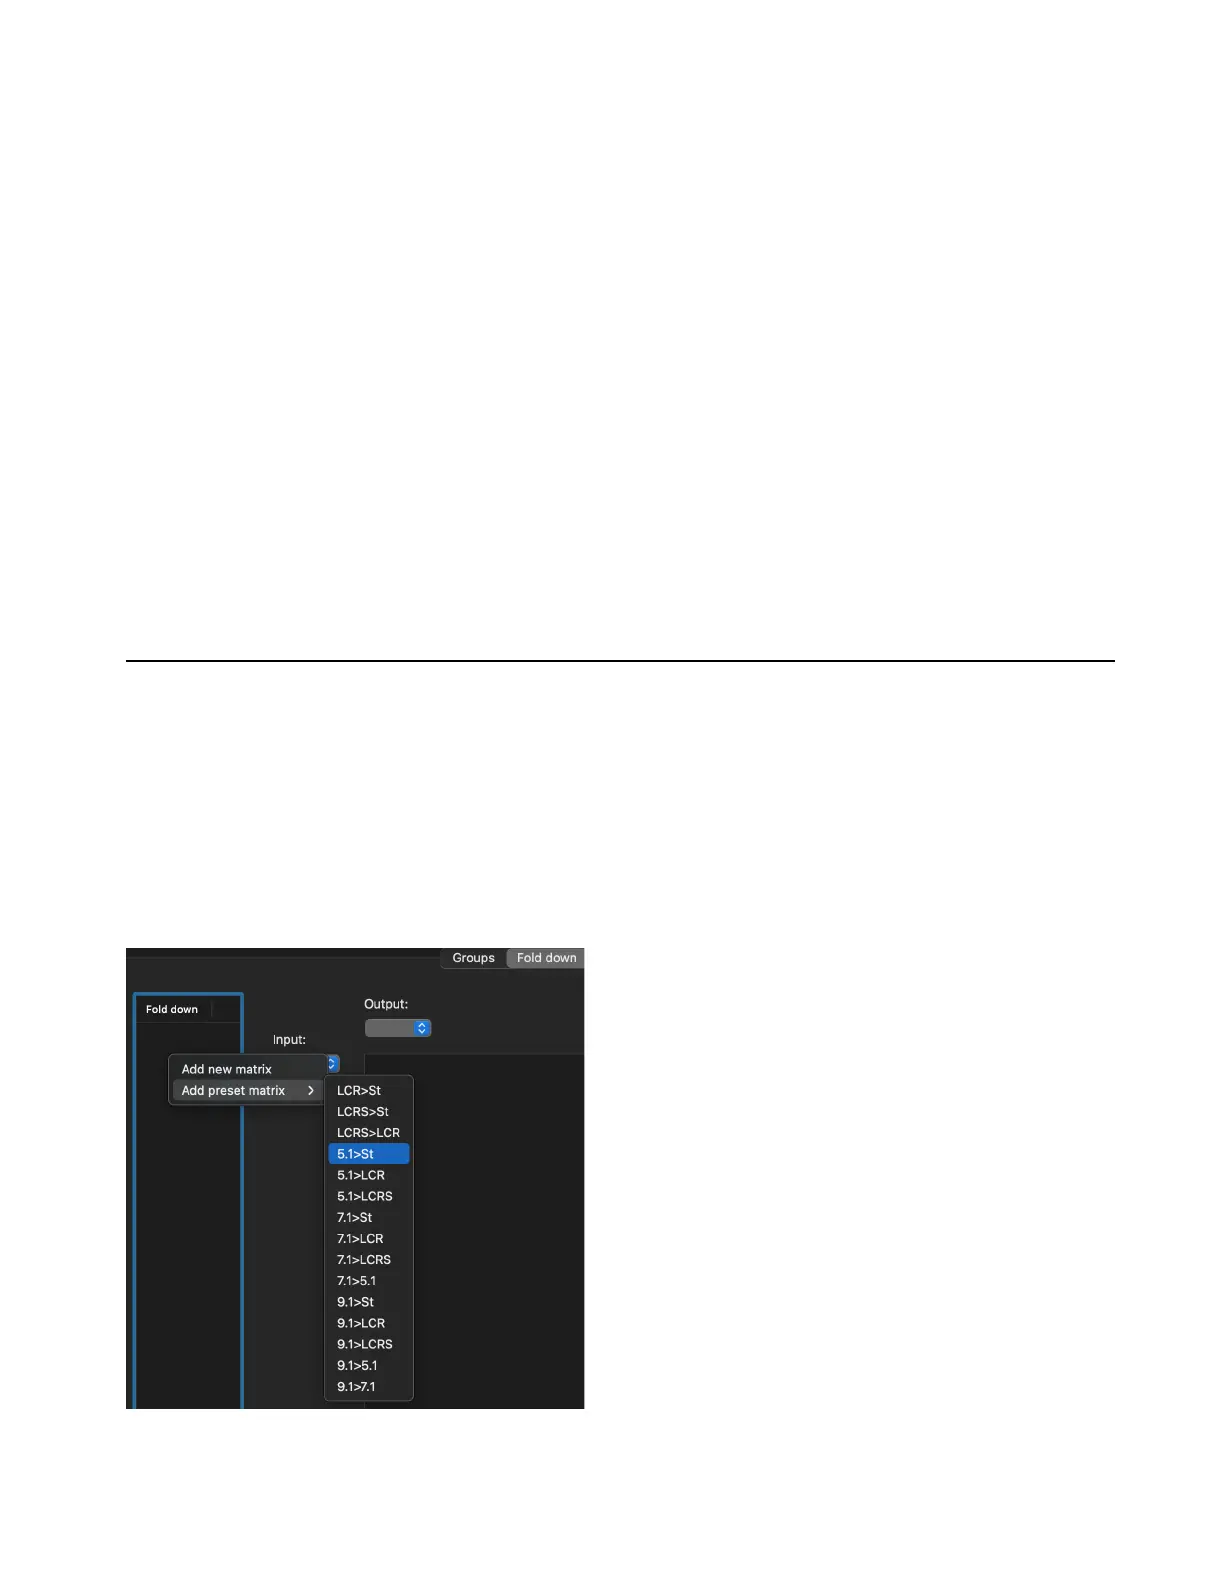
Fold Down Page
The Fold down page lets you select preset Fold down matrices to add to monitor groups (see Fold Downs). You can also create custom
fold down matrices. For any selected fold down matrix, you can attenuate or boost inputs to ensure the optimal dynamic balance in the
fold down output.
To add a preset fold down matrix:
1 In the Monitor Profile Configuration window, click the Fold down tab.
2 In the Fold down column on the left side of the Fold down page, right-click and select the desired fold down matrix from Add preset
matrix
.
Adding 5.1 to stereo fold down
 Loading...