Installation and Initialization MP.11-R Installation and Management
Hardware Installation
26
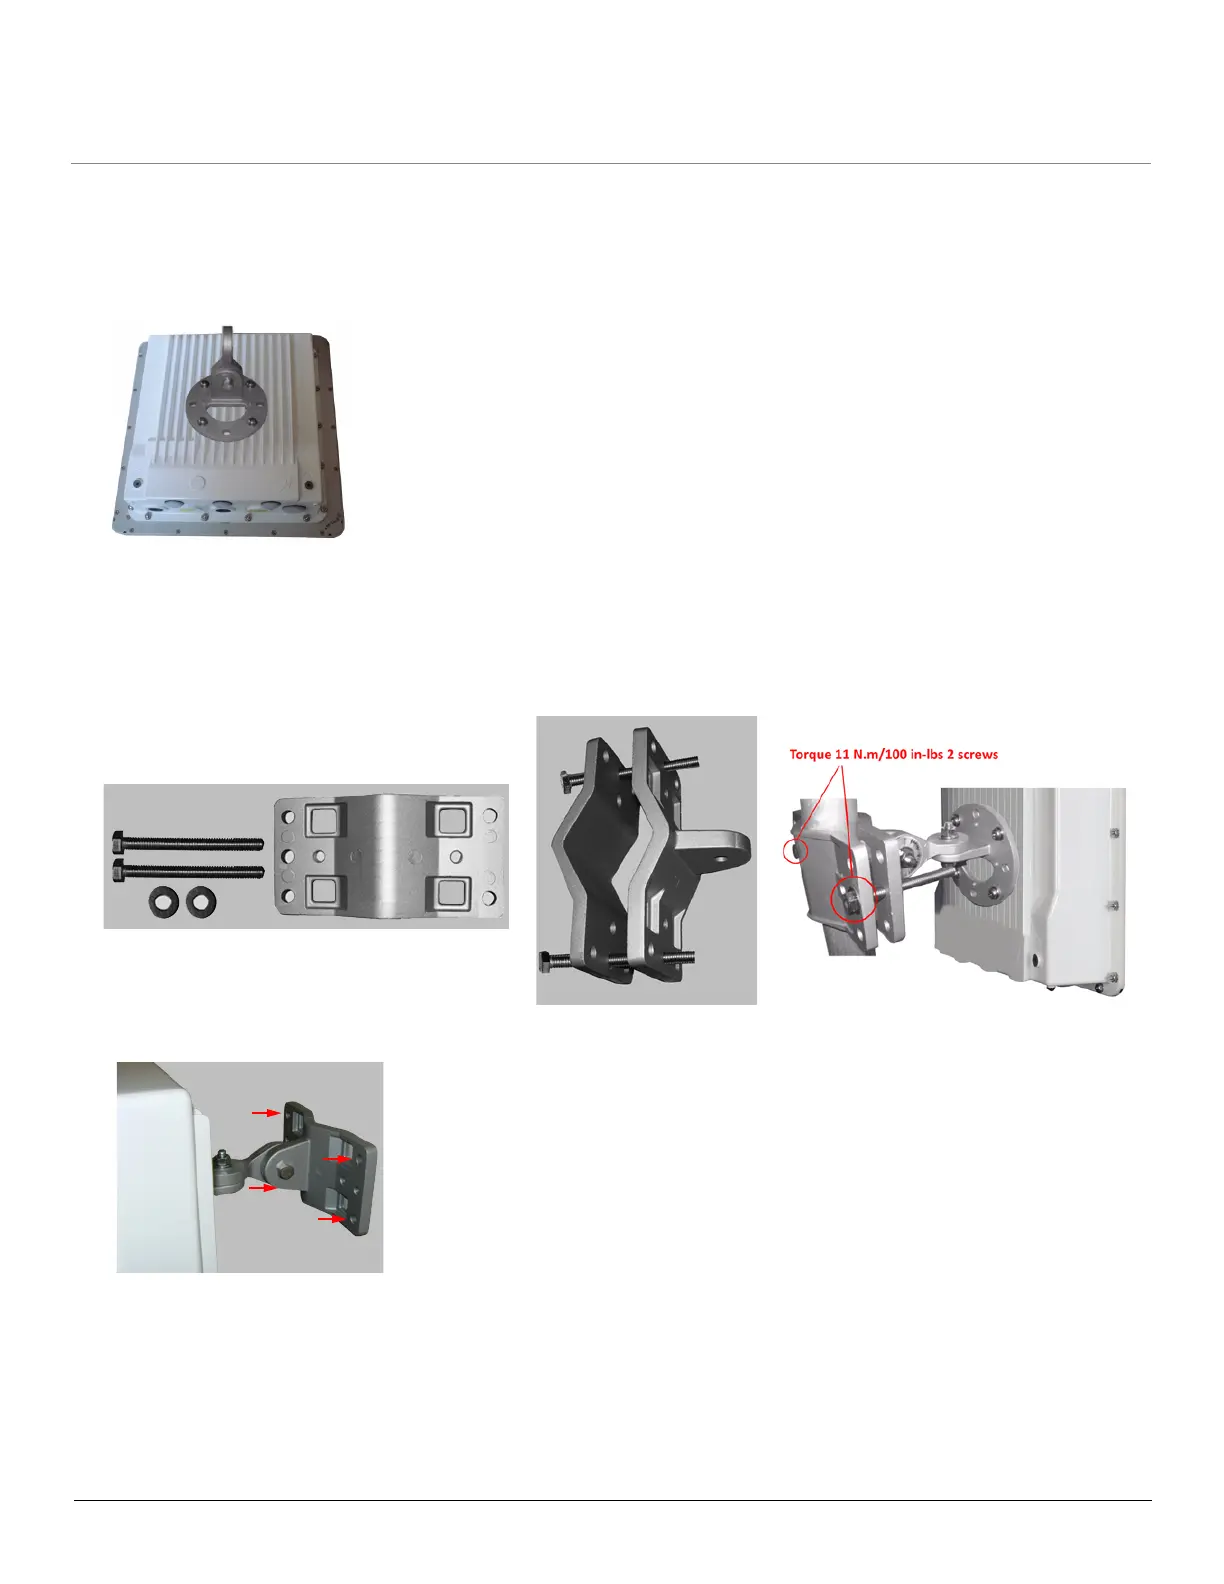
The following figure shows the full assembly attached to the unit.
Note that this figure is for illustration only. The unit depicted is equipped with external antenna connectors, which
allows rectangular mounting. Units with integrated antennas must always be mounted in diagonal position to achieve
vertical or horizontal polarization as indicated by the arrow on the back of the unit. Also, on units with direct-connected
omni antennas, the enclosure must be mounted with the lower side in the horizontal position.
Step 6: Mount the Unit
1. To pole-mount, insert screws through bracket F and fasten around the pole to bracket E and secure (Torque 11 N
.
m/
100 in-lbs). Longer bolts (not supplied) are required for mounting the units to a pole with a diameter larger than 3
inches.
2. To wall-mount the unit, mount bracket E to a wall using 4 screws (not provided), as shown:
 Loading...