dosemeter User Manual
Page 67
2. Place the metal label and three screws to one side.
These screws are extremely small and easily lost. Please place them in small
container or similar.
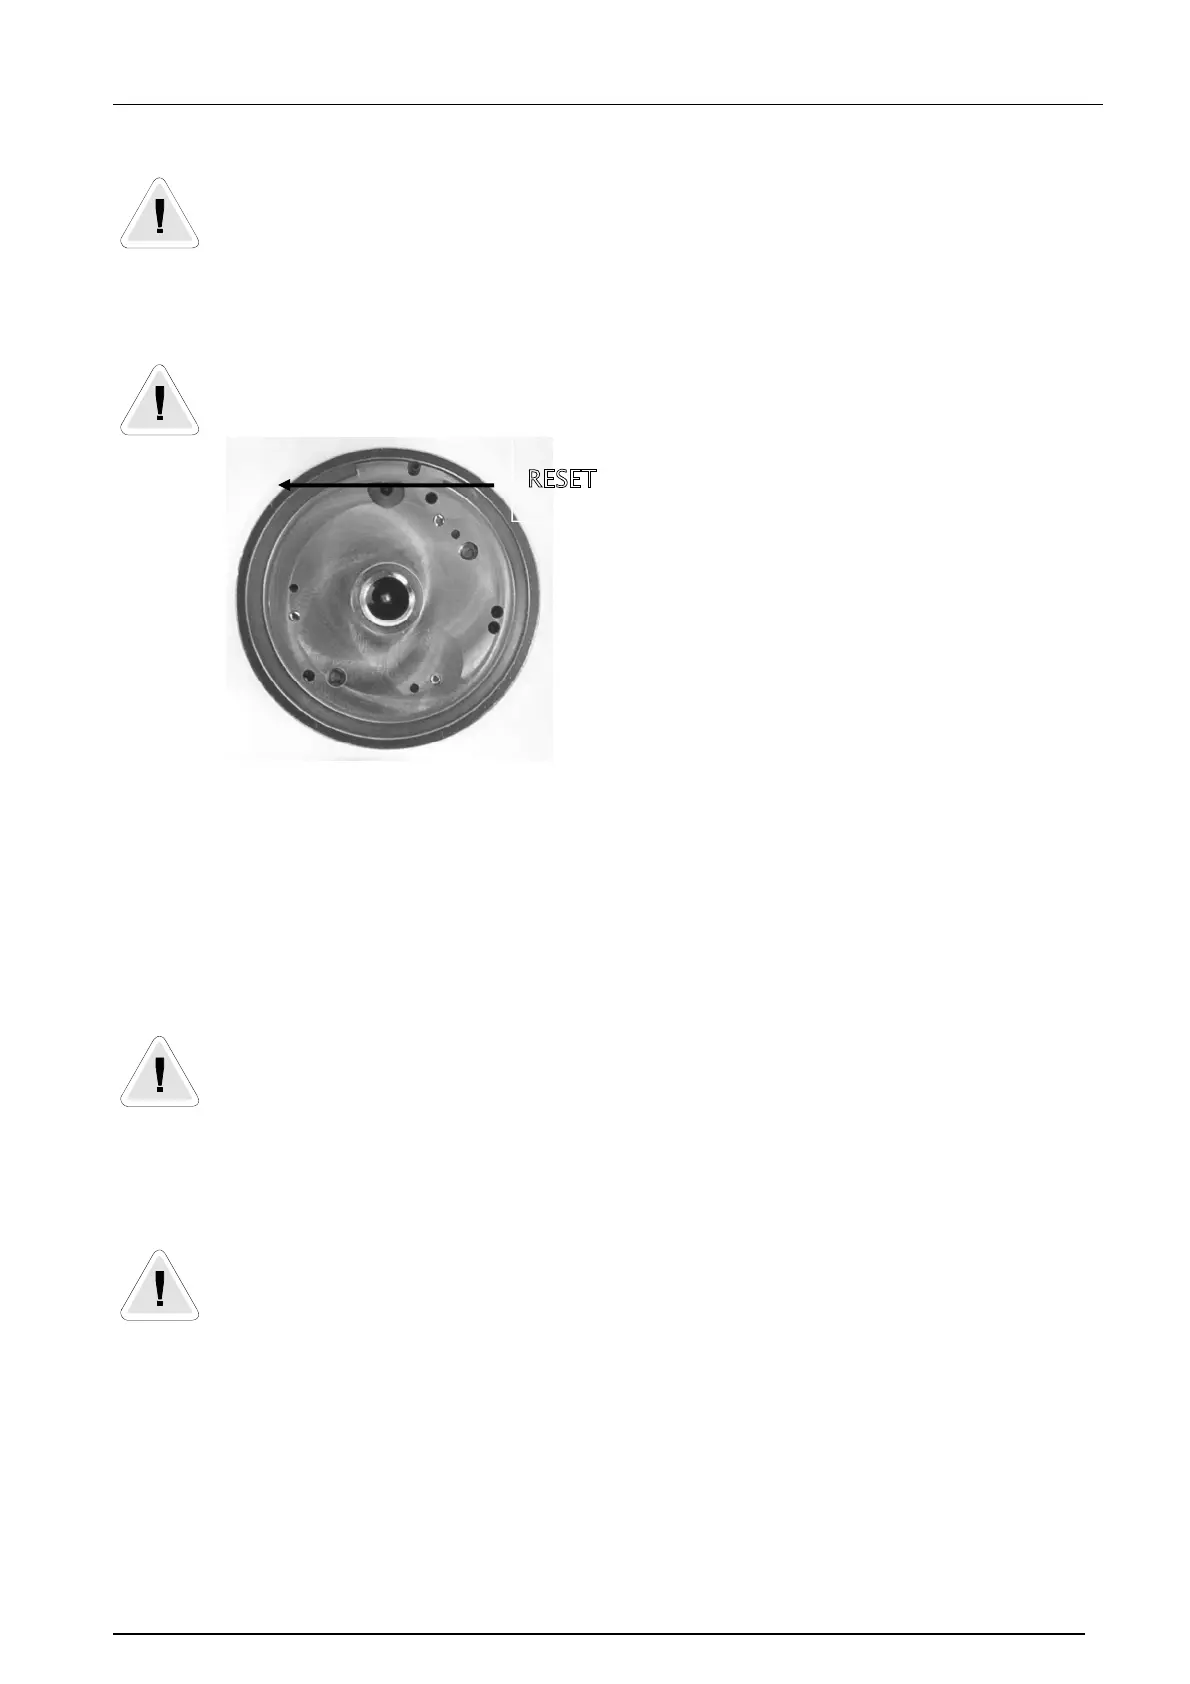
3. Take a thin small metal object (a pin or bent open paperclip is ideal) and insert it
into the hole highlighted blue in the picture below.
Care must be taken to insure that it is the correct hole. Use the locating pin
in the case and the notch in the baseplate as a reference.
4. Move the metal object in the hole until you see the Blue LED flash through the
optical window on the dosemeter. What you are trying to do with the metal object is
connect the pin directly below the hole with the silver metal baseplate.
5. Insert the dosemeter into the calibrator cavity on the top of your dosemeter
reader. Test the dosemeter is now communicating.
6. Place the metal label back onto the bottom of the dosemeter. Rotate the label
until all three holes are lined up.
Care must be taken lining up the three holes. If all three holes are not lined
up, rotate the metal label further. Inserting a screw into the incorrect hole
could seriously damage your dosemeter!
7. Carefully place the three small screws through the holes in the metal label and
screw them into the baseplate.
DO NOT over tighten the three small screws as damage to their heads will
occur.
8. Place the dosemeter onto a CHR22 charger, and allow the dosemeter to go
through a full charge cycle before using.
RESET