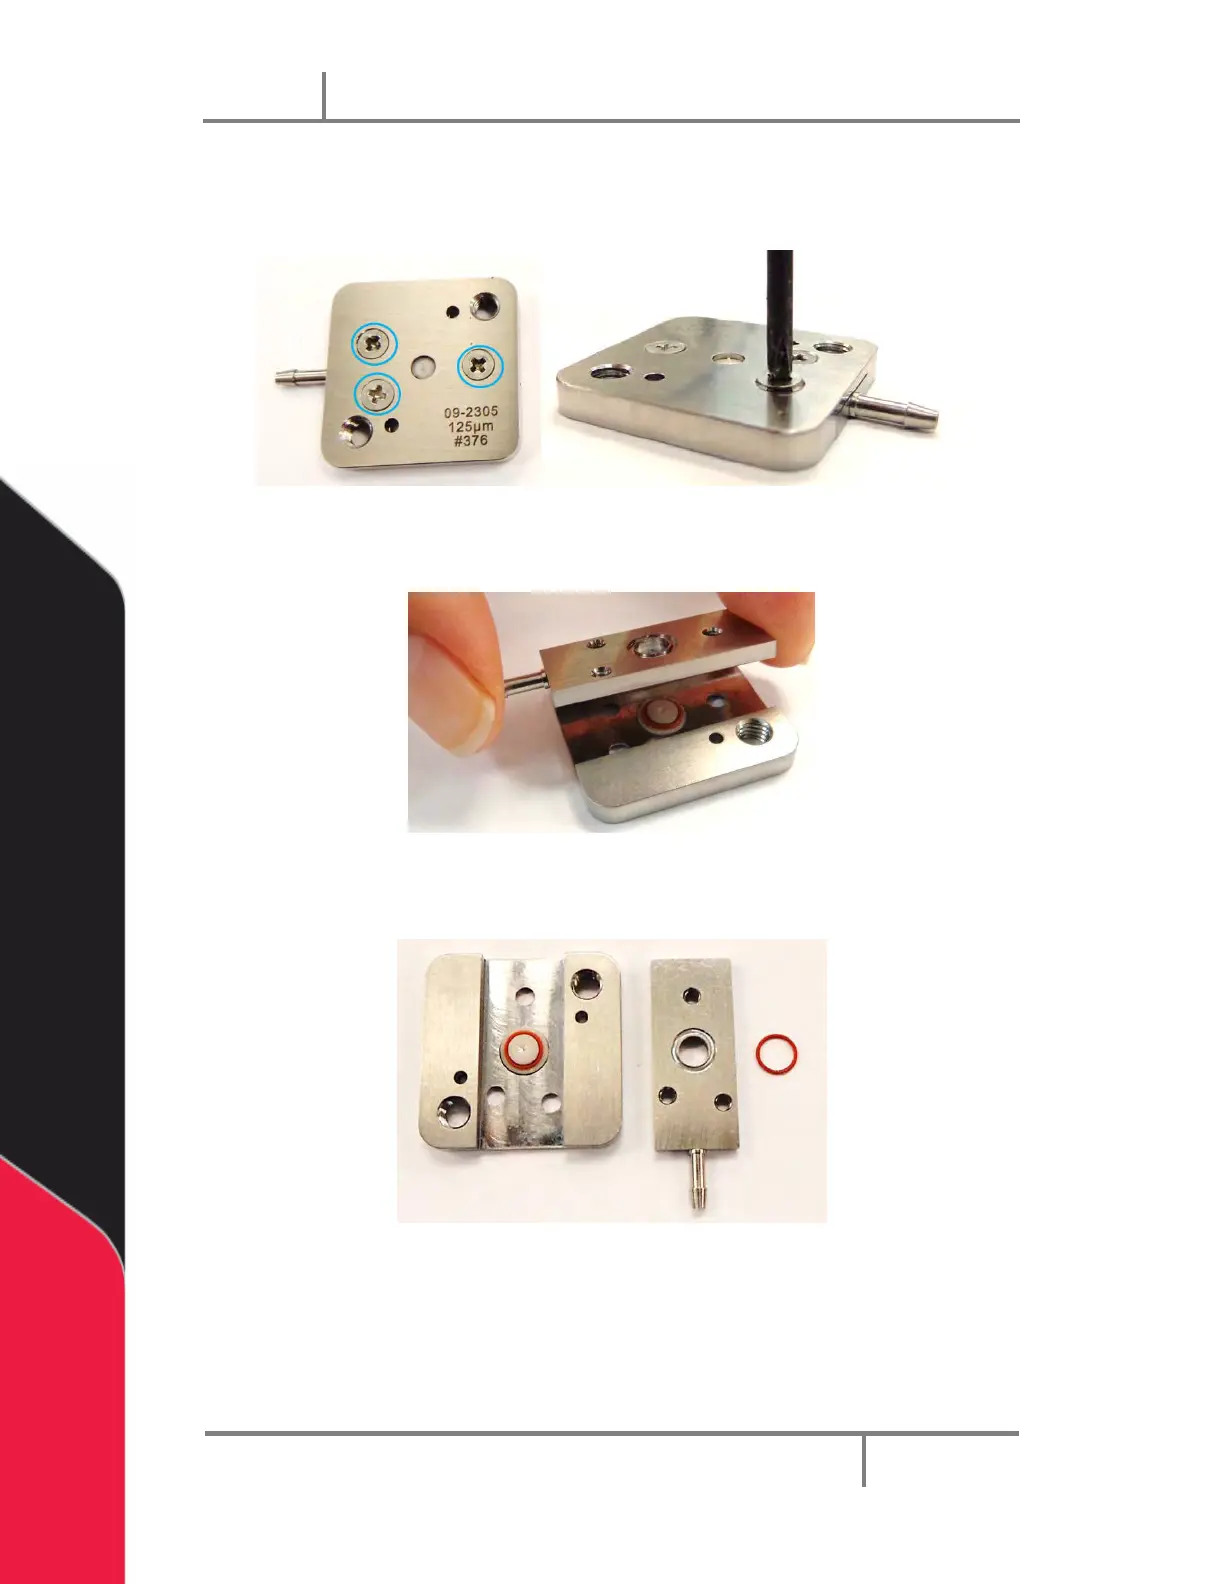
Replace the Orifice 3.9
1. Loosen the three screws in the nozzle plate.
Figure 15: Remove the Nozzle Plate Screws
2. Remove the barb plate.
Figure 16: Remove the Barb Plate
3. Remove the O-ring from the barb plate. Clean and replace as necessary.
Figure 17: Remove the O-ring
NOTE: There is an O-ring on the barb plate and one on the orifice. Make sure
you keep them separate; the O-ring on the barb plate is slightly larger than the
orifice O-ring and they are not interchangeable.