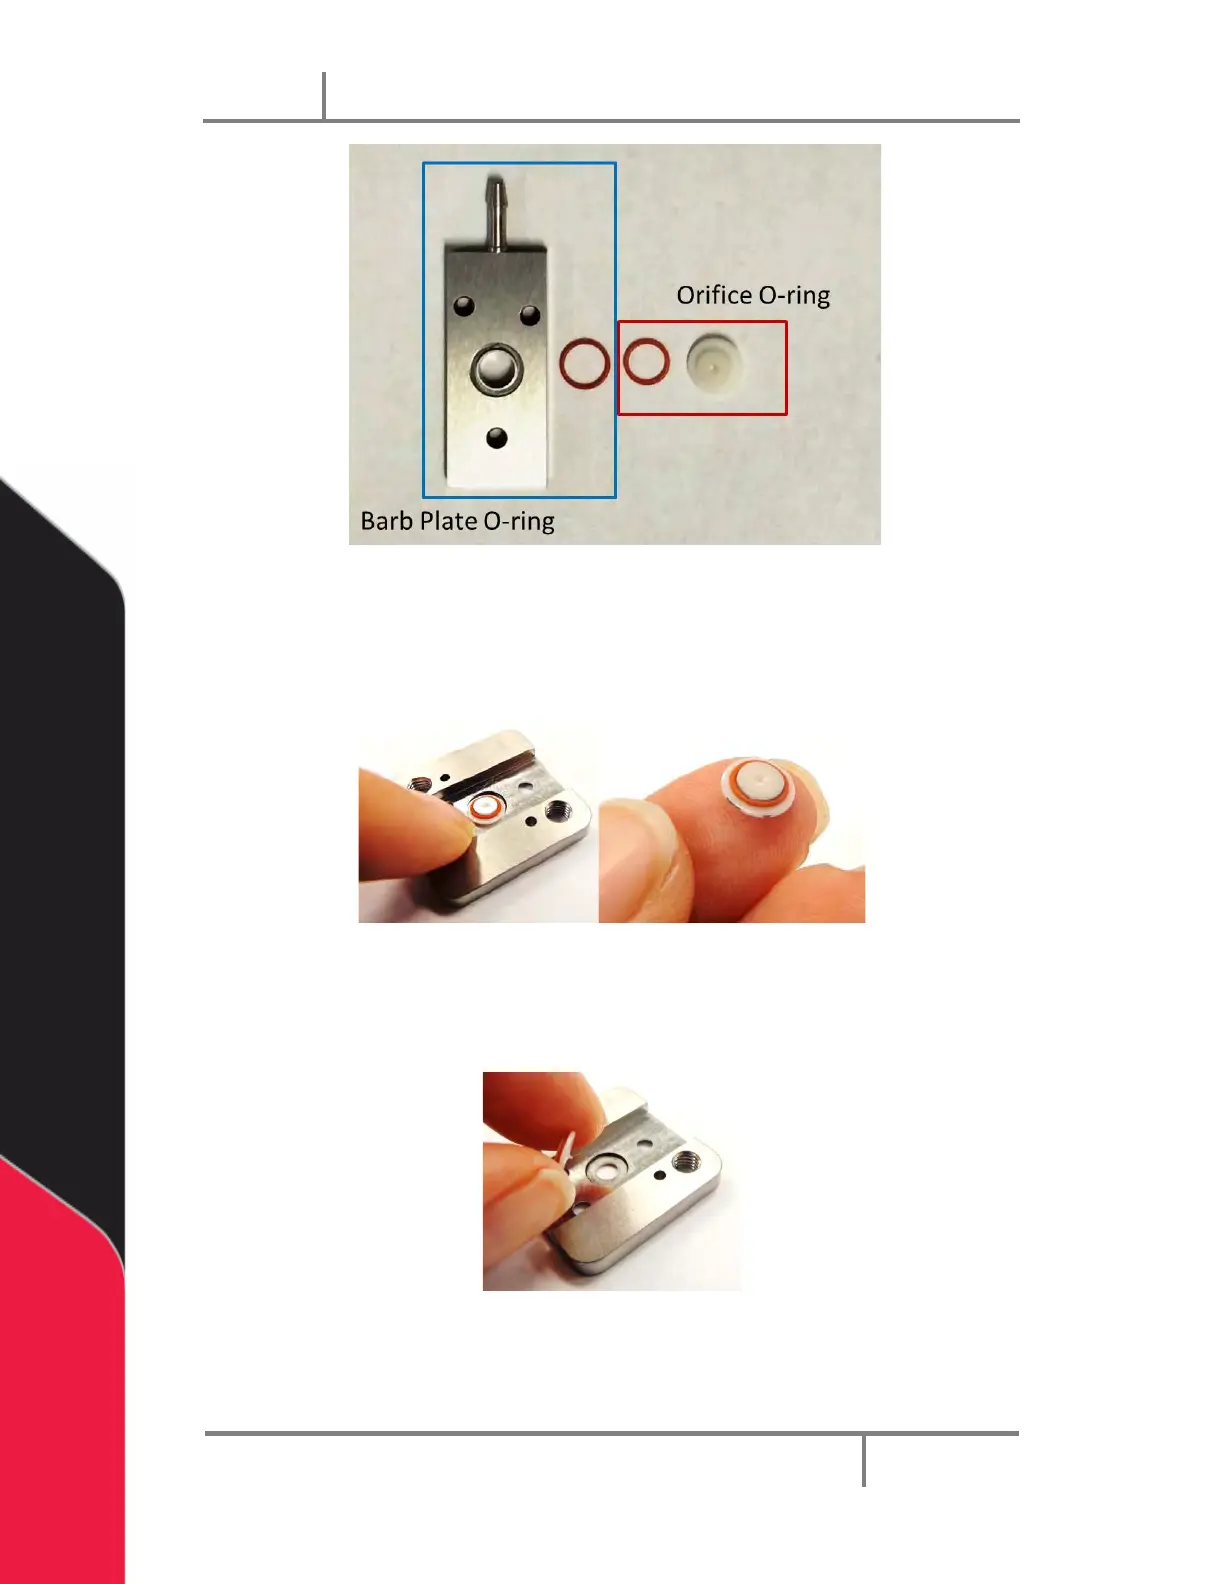
Figure 18: Barb Plate and Orifice O-rings
4. Remove the orifice (the orifice shown is ceramic; you may have a different
orifice). You may have to turn the nozzle plate over and push on the orifice tip
to remove the orifice.
Figure 19: Remove the Orifice
5. Clean the nozzle plate, barb plate, and O-ring if necessary.
6. Install a new orifice. Make sure the orifice has an O-ring installed.
Figure 20: Install the Orifice
7. Install the barb plate. Make sure the nozzle plate screw holes are aligned.