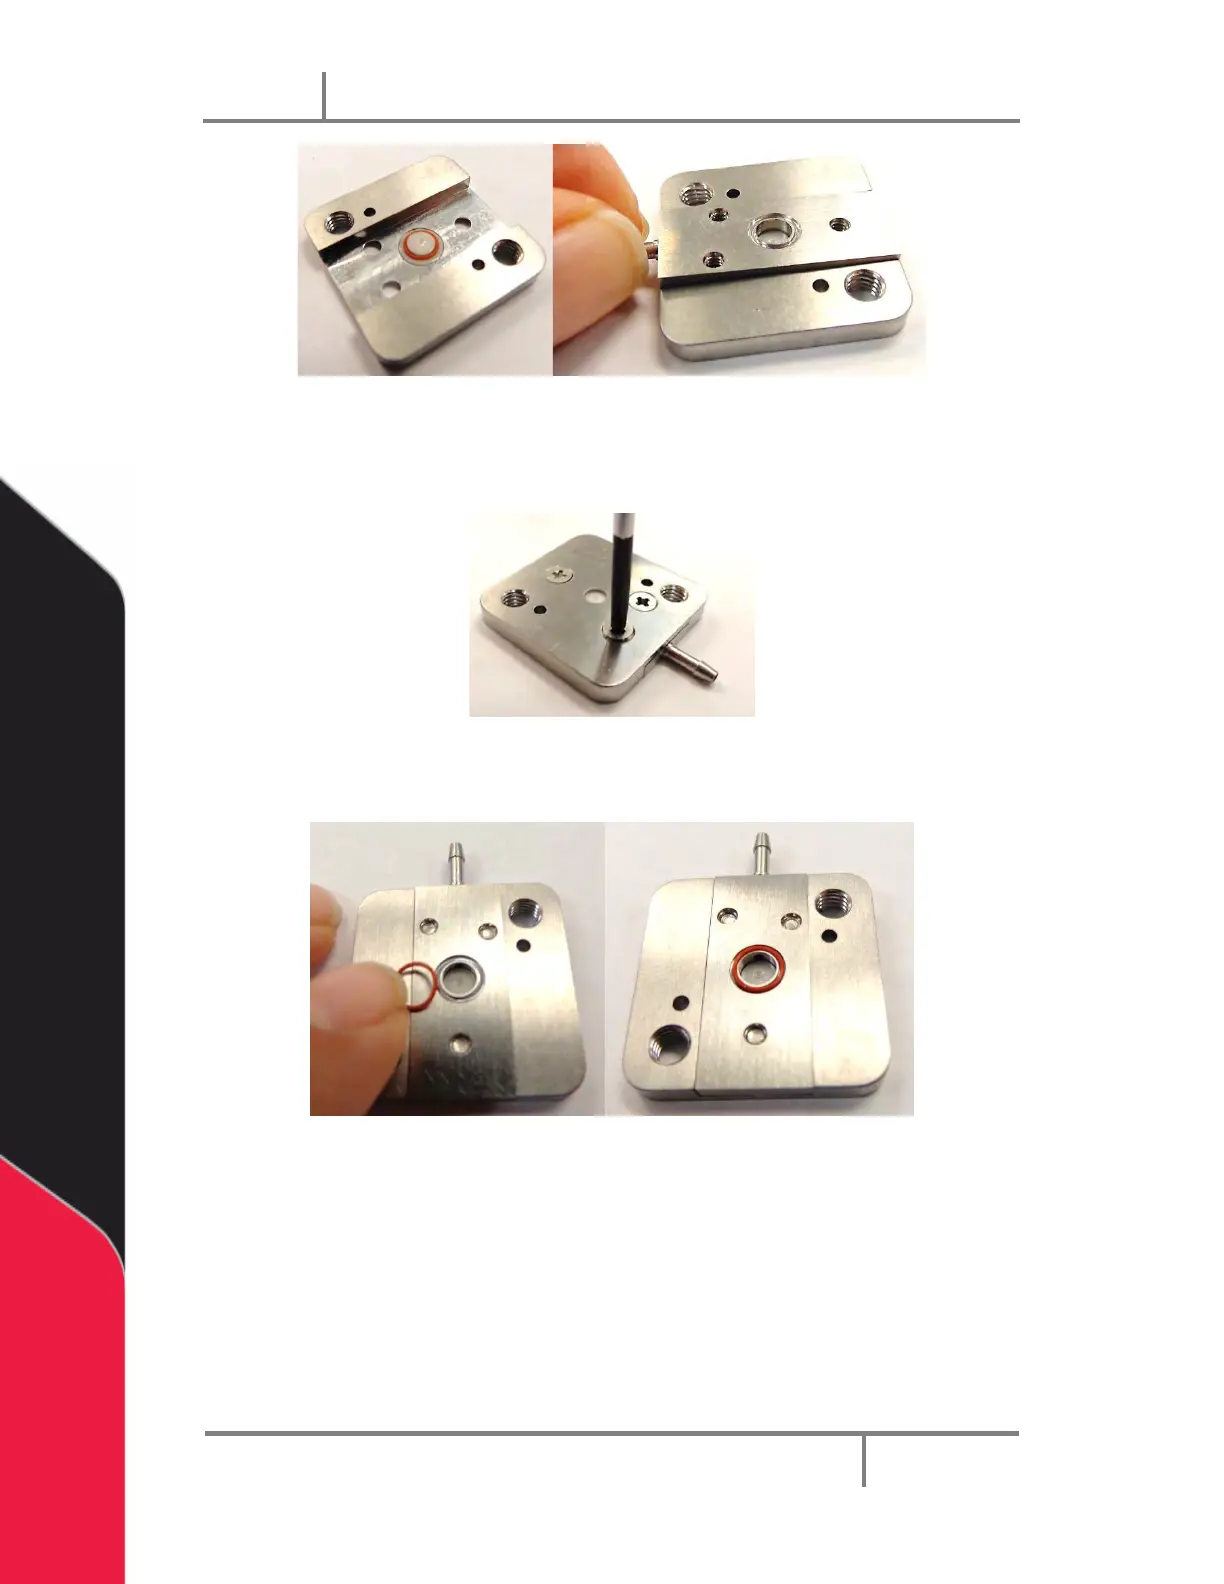
Figure 21: Install the Barb Plate
8. Turn the nozzle plate over and install the three screws. Make sure the screws
are correctly tightened. Do not damage the screws when you tighten them
Figure 22: Install the Nozzle Plate Screws
9. Install the barb plate O-ring.
Figure 23: Install the O-ring
The above example is a ceramic orifice; you may have an extended nozzle or a carbide
orifice, as shown below.